
First steps with OpenProject - a quick start guide for team collaboration
Getting started with a new project management software can be a challenge for the whole team. This blog post will give you an overview of the first steps with OpenProject. We will continue focussing on different modules in depth in future articles.
Leave us a comment which features you are especially interested in.
1. Create your OpenProject instance
The easiest way to start project collaboration with OpenProject is to set up an installation from our trial page.. Just type in your organization name with small letters and hit the green button. You will then be asked to create your account for OpenProject. Type in your details - or, much easier, just login with an existing Google account. Your organization will be set up immediately. You will also be notified via email when your organization is set up and ready to get productive.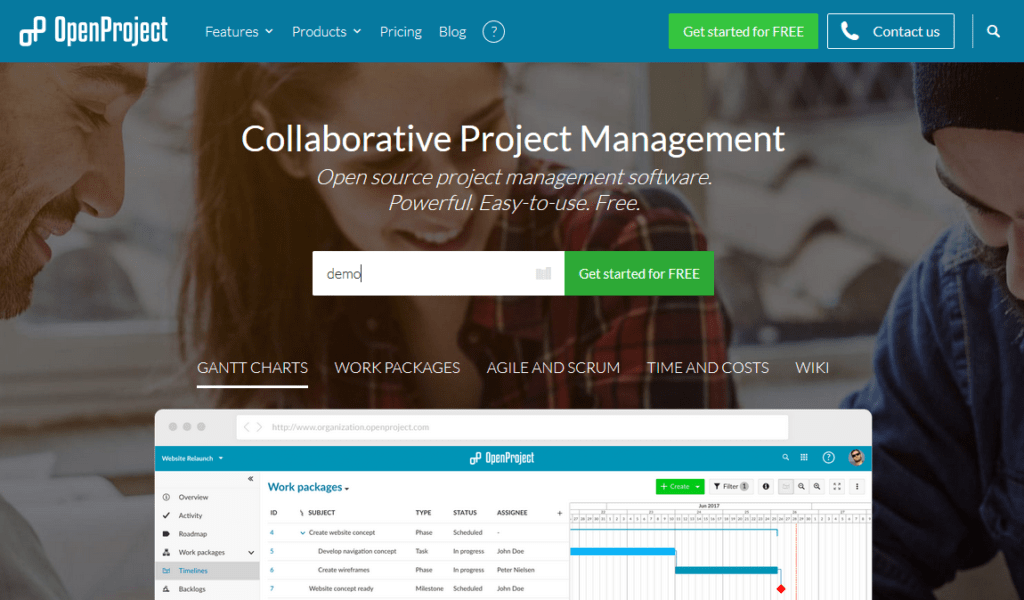
Please note, the OpenProject hosting (Enterprise cloud) can be tested 14 days for free without entering any payment information. Afterwards, you can either upgrade to one of our paid plans. Of course, you can always choose to download and install the Community edition. This is completely free. Forever. We promise!
However, one of the advantages, besides that you do not need to bother about maintenance or security updates, is that you get professional support as well as Enterprise add-ons with the hosted version.
2. Create a project structure
OpenProject is best for managing multiple complex projects at the same time. First step is to create a project structure with main projects and subprojects. Login to your OpenProject and create a new project directly from the home page. Just click the green +Project button.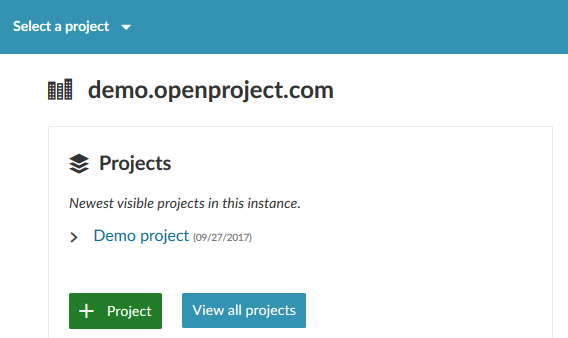
You will be asked to enter a project name. If you will set up subprojects, just open the Advanced Settings underneath and choose the parent project.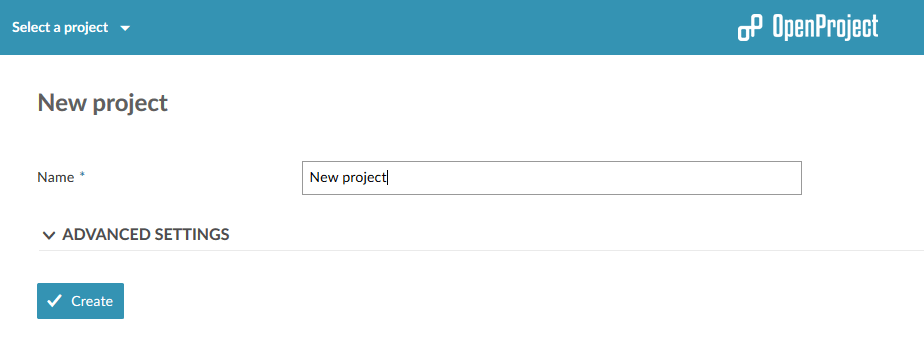
3. Add project members to a project
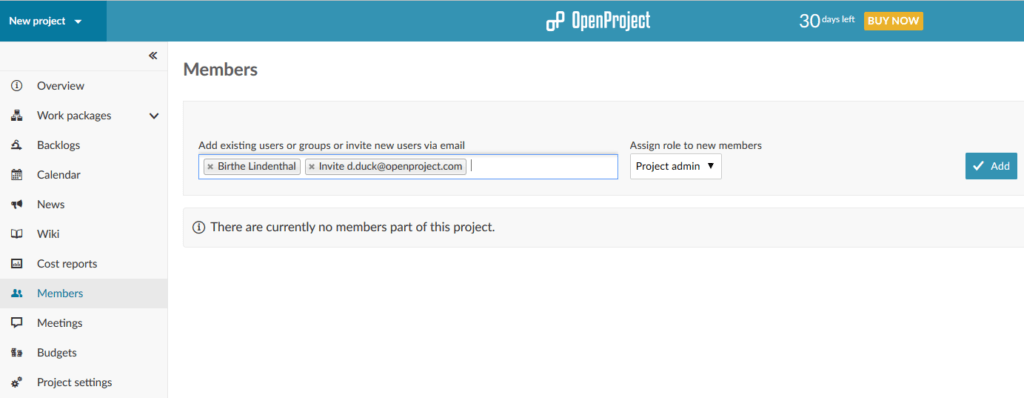
Next, you will need to add members to your projects. Please note, in order to see and work in a project you need to be a member. Navigate to the Members tab in the left navigation within a project. You can add existing members or invite new members via email by typing in their email address. There is a basic set up of roles from which you can choose. Of course, those can be customized within the Administration.
4. Create your work (tasks, bugs, features, ideas, …)
Navigate to the work packages module in the left navigation of your project. Create your work by clicking in the line of the blue +. You can edit directly inline: Insert the subject, assign it to a project member, change the status.
Please note, in the work packages module you create and manage the work within your project. This can be basically anything you need. The TYPE differentiates the work. Therefore, you have different work package types e.g. tasks, bugs, ideas, risks, deliverables, features, … or anything else you would like to manage within your project. Types and belonging workflows can be customized within the Administration.
From the green +Create button you can choose which new type of work package you would like to create within a project.

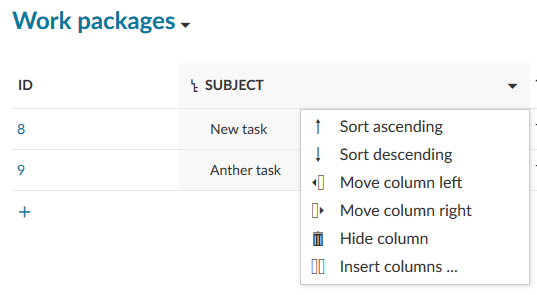
What you see is not enough? You can adapt the header of the list view by clicking on the arrow next to a title in the header of the table and select insert columns… . Just choose the ones you need and arrange the order with drag and drop.
5. Manage your work
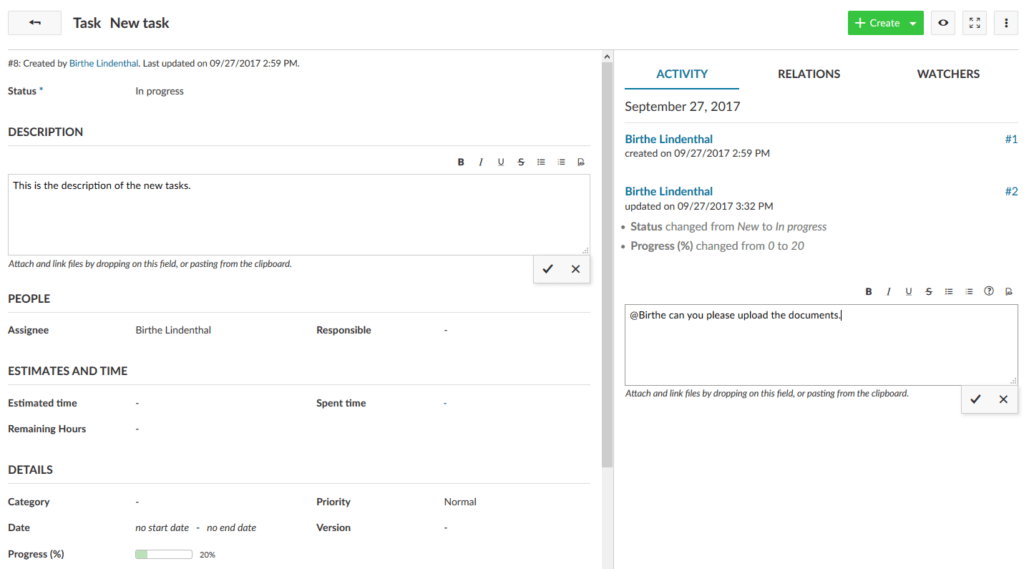
Specify your work, prioritize, assign it to someone, set due dates, comment on topics, upload attachments, setting dependencies, progress, and much more. Just double click on a line will open a detailed view for each work package.
You can also add custom fields and configure the forms for each type to your specific needs within the Administration.
The arrow next to the title brings you back to the list view.
6. Create and manage a project plan (Gantt chart)
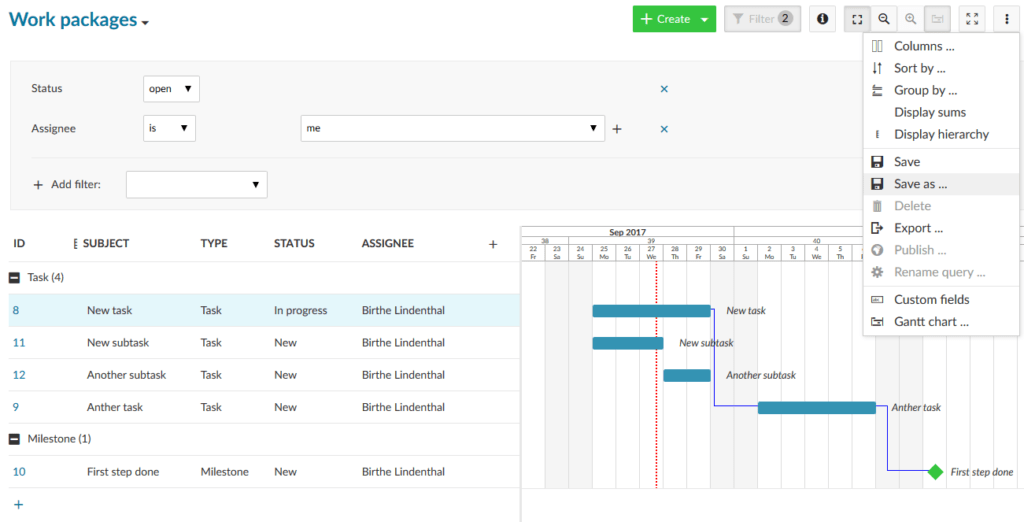
You can create and manage an interactive project plan (Gantt charts) with your team members. Within the work packages module, you can activate the Gantt chart diagram, by clicking on the little Gantt icon in the upper right corner over the work package table.
You can create a project plan by simply clicking in the chart and drag the phases. Right click in the phases allows to set relations or create children.

Please note, soon the Gantt chart will also be accessible from the left project menu.
7. Filter, group, and save reports
You can filter and group the work package table view to your specific needs. The button Filter next to the green Create button on the top of the list allows you to filter for all fields, including custom fields and multi-select values. To group the list, click on the arrow next to the title of the element you want to group by, e.g. TYPE and select Group by.
Save the view by clicking on the three dots in the upper right corner and select Save as… Choose a name for this report and whether it should be seen by all project members. You can also add the report directly to the project menu to have it at your fingertips.
Finally, these are the first things you need to know about project collaboration with OpenProject. Just get started and try it yourself!
Drop us a note to info@openproject.org if you need advice.


