
How to integrate OpenProject and GitHub
OpenProject makes it possible to integrate GitHub, so the planning and specifications of a development project are better integrated with the development side of things. With this integration, you can link pull requests in GitHub to OpenProject work packages, where you’ll be able to view the status of each pull request and the corresponding Actions from GitHub.
The integration of GitHub to OpenProject isn’t terribly challenging, but there are a few moving parts to take care of. Let’s make that happen now.
What you’ll need
To make this work, you’ll need a running instance of OpenProject and a valid GitHub account. That’s it. Let’s get to work.
Create a new OpenProject role
The first thing we need to do is create a new role in OpenProject. We’ll call this new role GitHub Member. To do that, log into OpenProject as an admin user, click the profile icon in the upper right corner, and select Administration from the drop-down. In the Overview, click Users and Permissions and then click Roles and Permissions in the left navigation. Click +Role in the top right corner and, in the resulting window (Figure 1), name the new role and make sure only View work packages and Add Notes are checked.
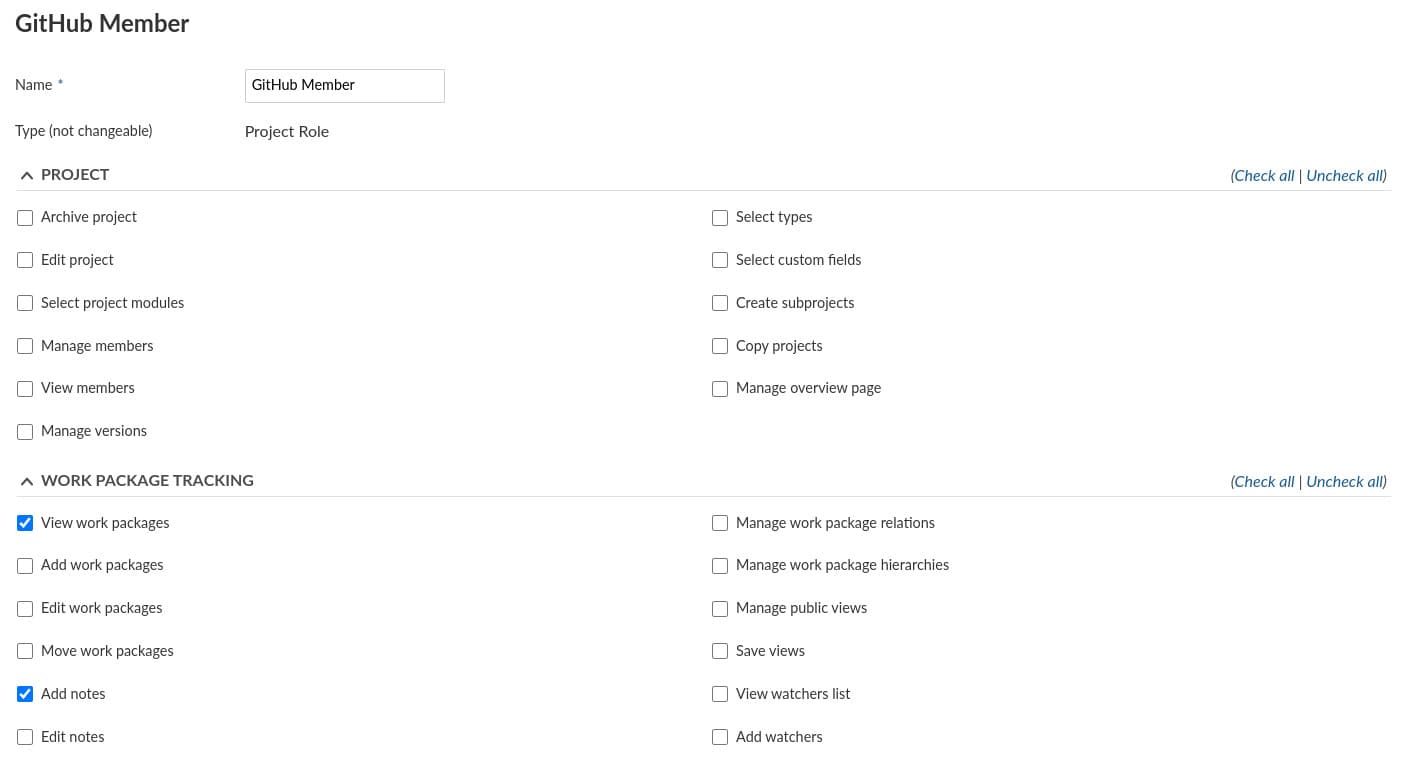
Once you’ve configured the role, scroll down and click Save.
Create a new user
Next, you must create a new user and assign the new role to it. Click Users in the left navigation and then click +User in the upper right corner. Give the new user a name and email address, and click Create. Fill out the necessary information for the new user in the GENERAL tab and then click the PROJECTS tab, select the project(s) where you want to add the integration and assign the GitHub Member role (Figure 2).
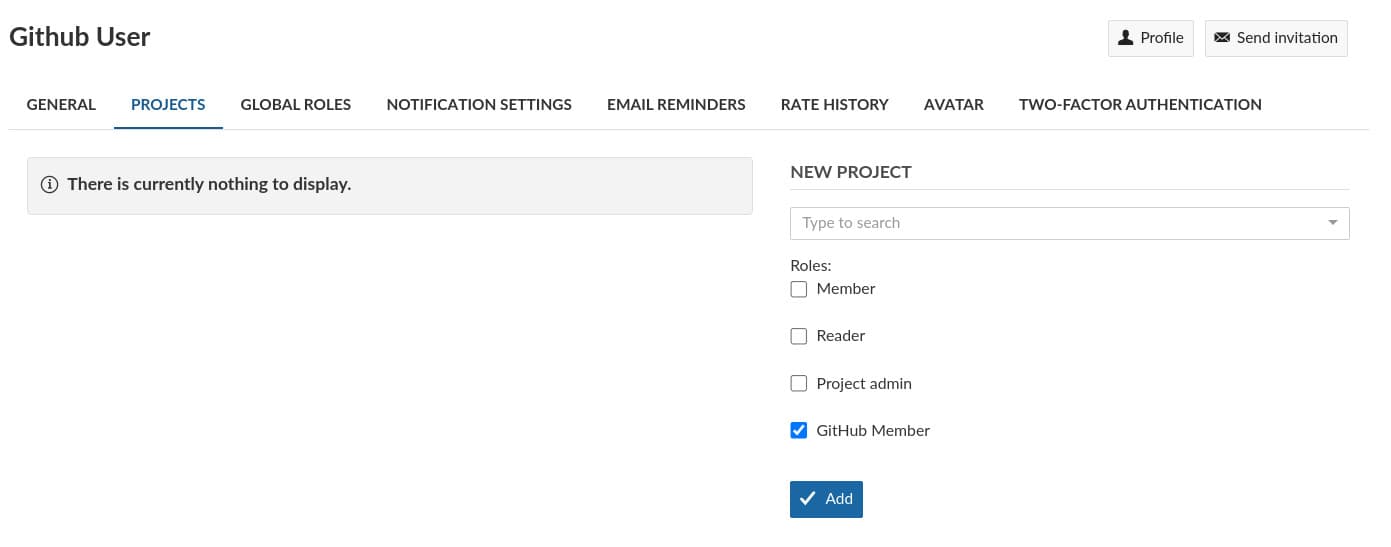
Click the checkbox for GitHub Member and click Add.
Create an API token
Log into OpenProject with the new user. Click the profile icon in the upper right corner and click My Account. In the resulting window, click Access Tokens in the left navigation and then click Generate associated with API (Figure 3).

When the new access token is generated, make sure to copy it.
Configure the GitHub webhook
Now, log into your GitHub account. You must set up a webhook for each repository that you want to integrate with OpenProject. To do this, navigate to one of your GitHub repositories and click the Settings tab. From the left navigation, click Webhooks and then click Add Webhook (Figure 4).

For the webhook configuration:
- The content type must be applications/json.
- The Payload URL must point to your OpenProject URL and end with /webhooks/github. For example, if your OpenProject domain is example.com, the Payload URL would be
https://www.example.com/webhooks/github. - At the end of the Payload URL, add ?=key and then past the API code you generated in OpenProject, so it might look like
https://www.example.com/webhooks/github?=7931d991f4860513bc55cef89cd0d2d5601016f1d4ca8721c44c5620c2cb0b5i(Figure 5).
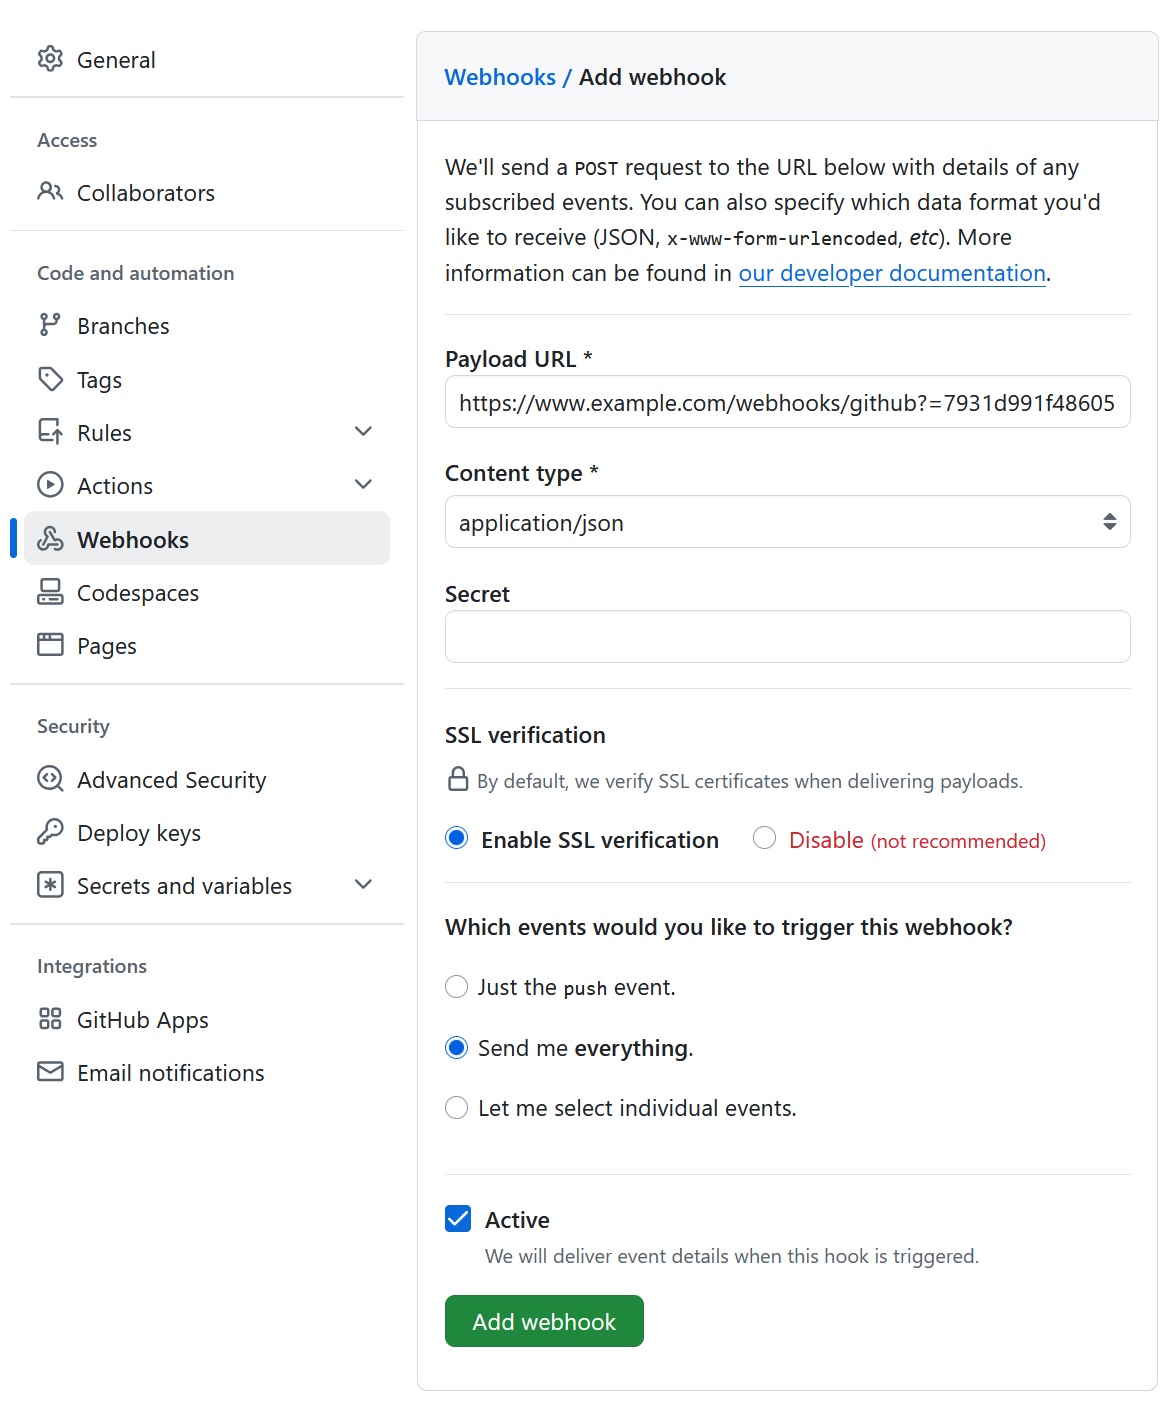
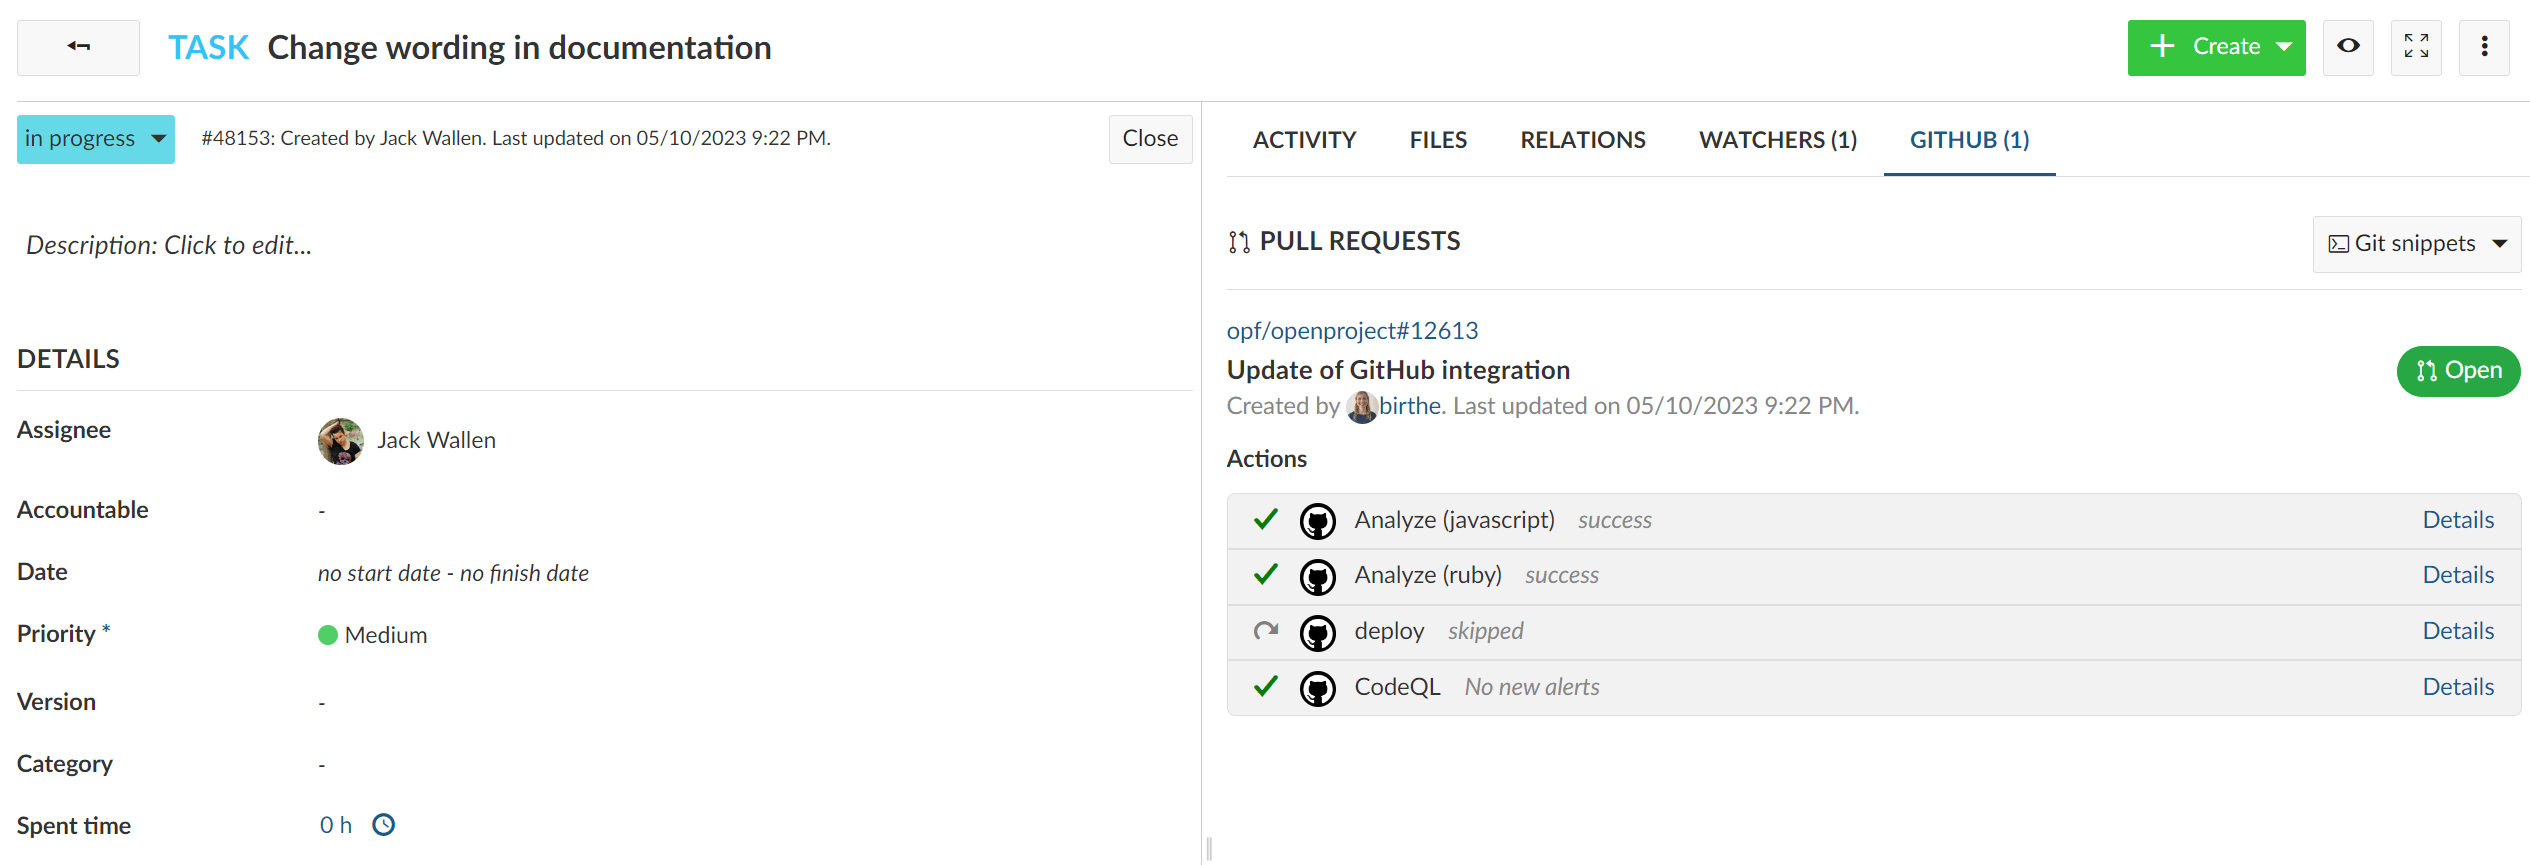
After you’ve taken care of that, click Add Webhook and the integration is ready to use in OpenProject. If you open a work package, you’ll see the GitHub tab (Figure 6) and any linked pull requests as well as GitHub Actions.
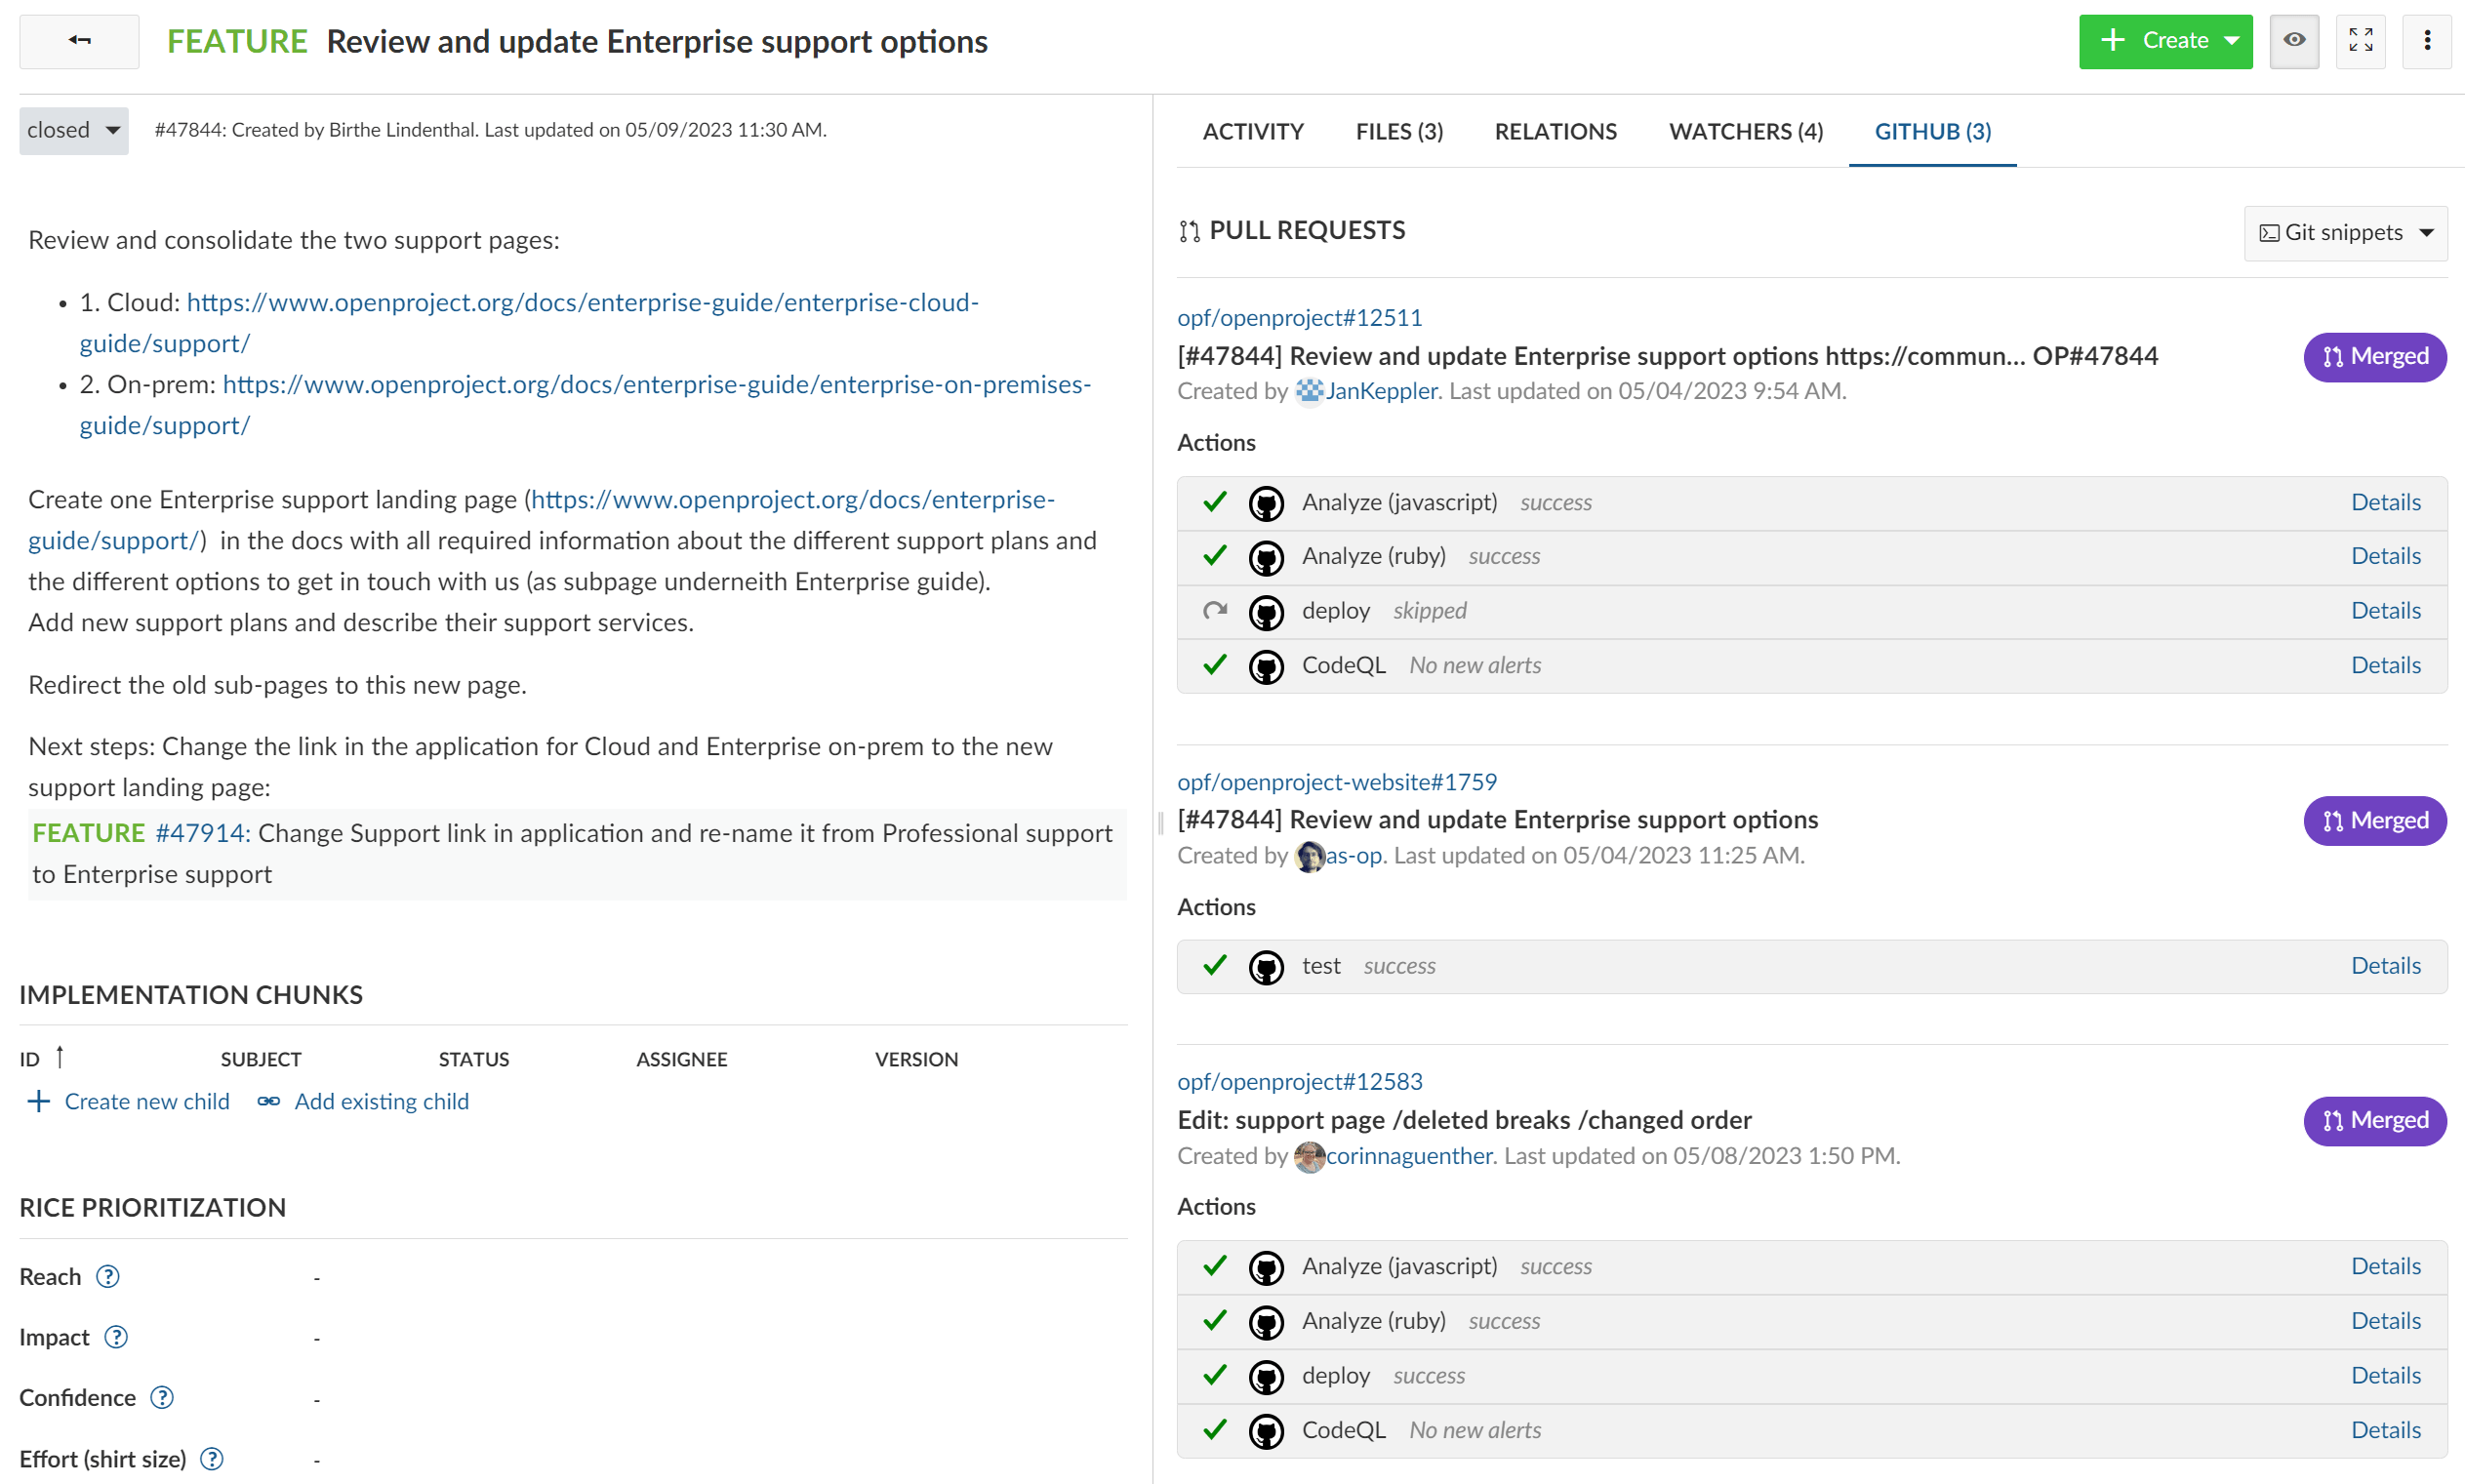
Congratulations, the OpenProject and GitHub are now integrated. But how do you use it? Let’s find out.
Using the GitHub integration
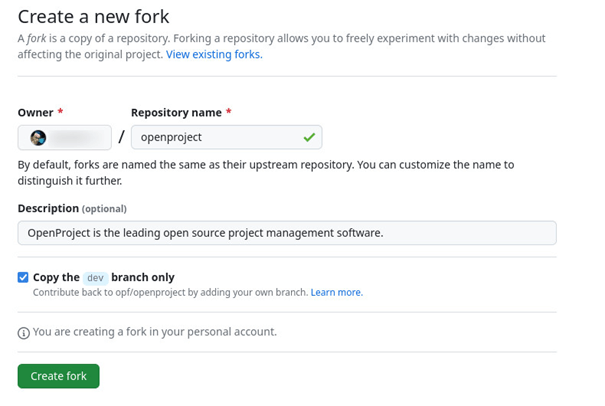
Let’s walk through the process of using the GitHub integration with an example to modify the documentation in OpenProject. Log into the GitHub account that’s integrated with OpenProject and navigate to the project in OpenProject. Create a work package for the task you want to do. First, you need to fork the OpenProject Repository on GitHub. To do this, open your GitHub repository and then, in the upper right corner, click Fork. In the resulting window (Figure 7), give the project a name and click Create Fork.
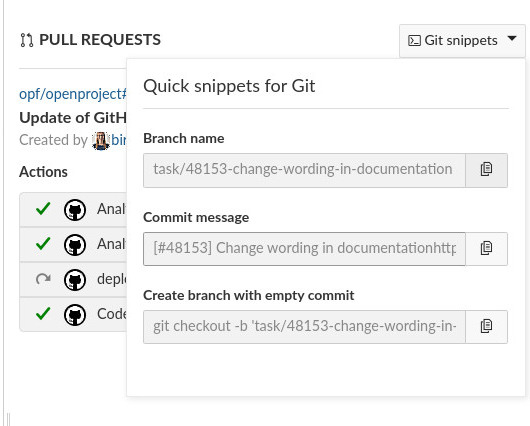
Next, create a new branch from the forked project. For this new branch name, you’ll want to pick the name from the GitHub tab on the OpenProject work package (in the Git Snippets dropdown - Figure 8).
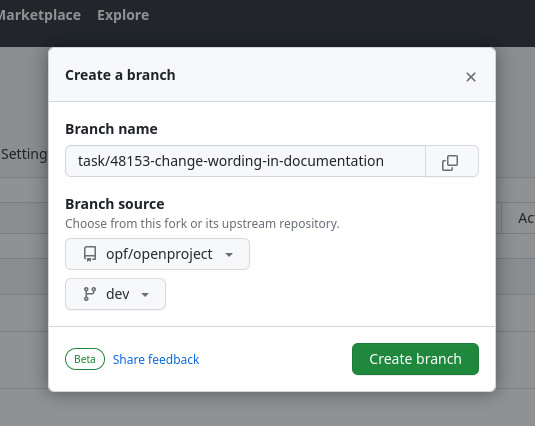
Back in GitHub, paste the branch name from the GitHub Snippets dropdown and then click Create Branch (Figure 9).
You can now work on your changes. Follow the contribution guidelines in order to find out more about how to create a pull request. To link the pull request to the respective work package in OpenProject, in the pull request description field, enter the Commit message of the work package found in OpenProject Git Snippets dropdown from your work package. This will create the connection and link the pull request directly to your work package in OpenProject.
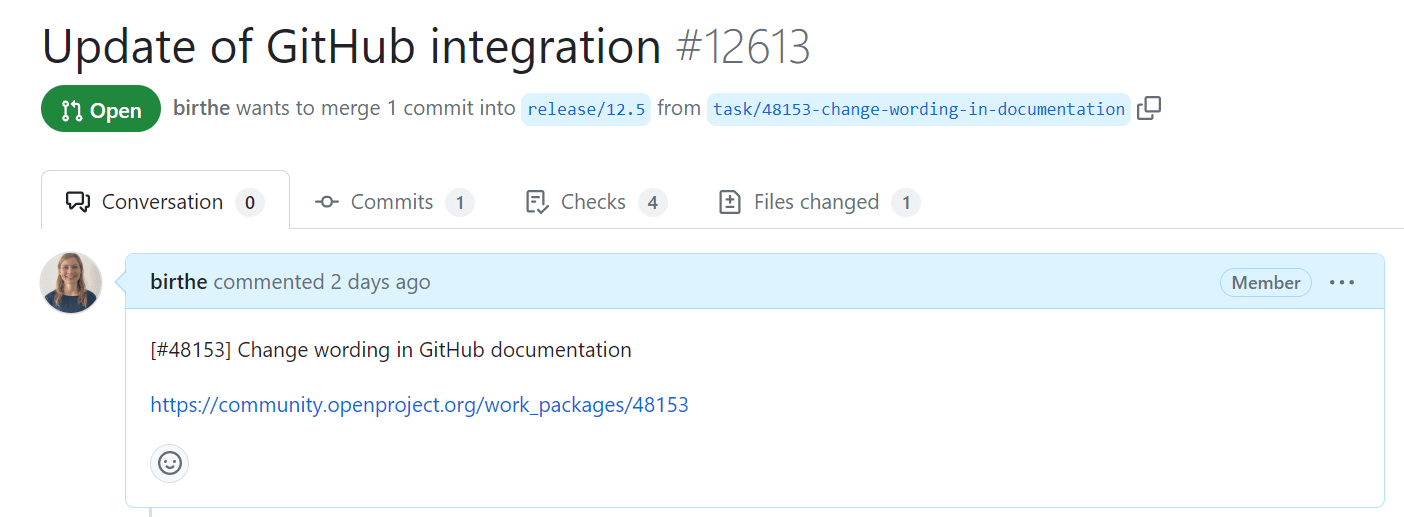
The pull request and its status (e.g. draft, open, merged) as well as GitHub Actions, will be displayed and linked in the GitHub tab of the respective work package (Figure 11). Additionally, the Activity tab in the OpenProject work package will add a pull request that is first referenced (usually when opened),merged, and closed.
And that’s how you use the GitHub/OpenProject integration. You can find further information in the OpenProject documentation.


