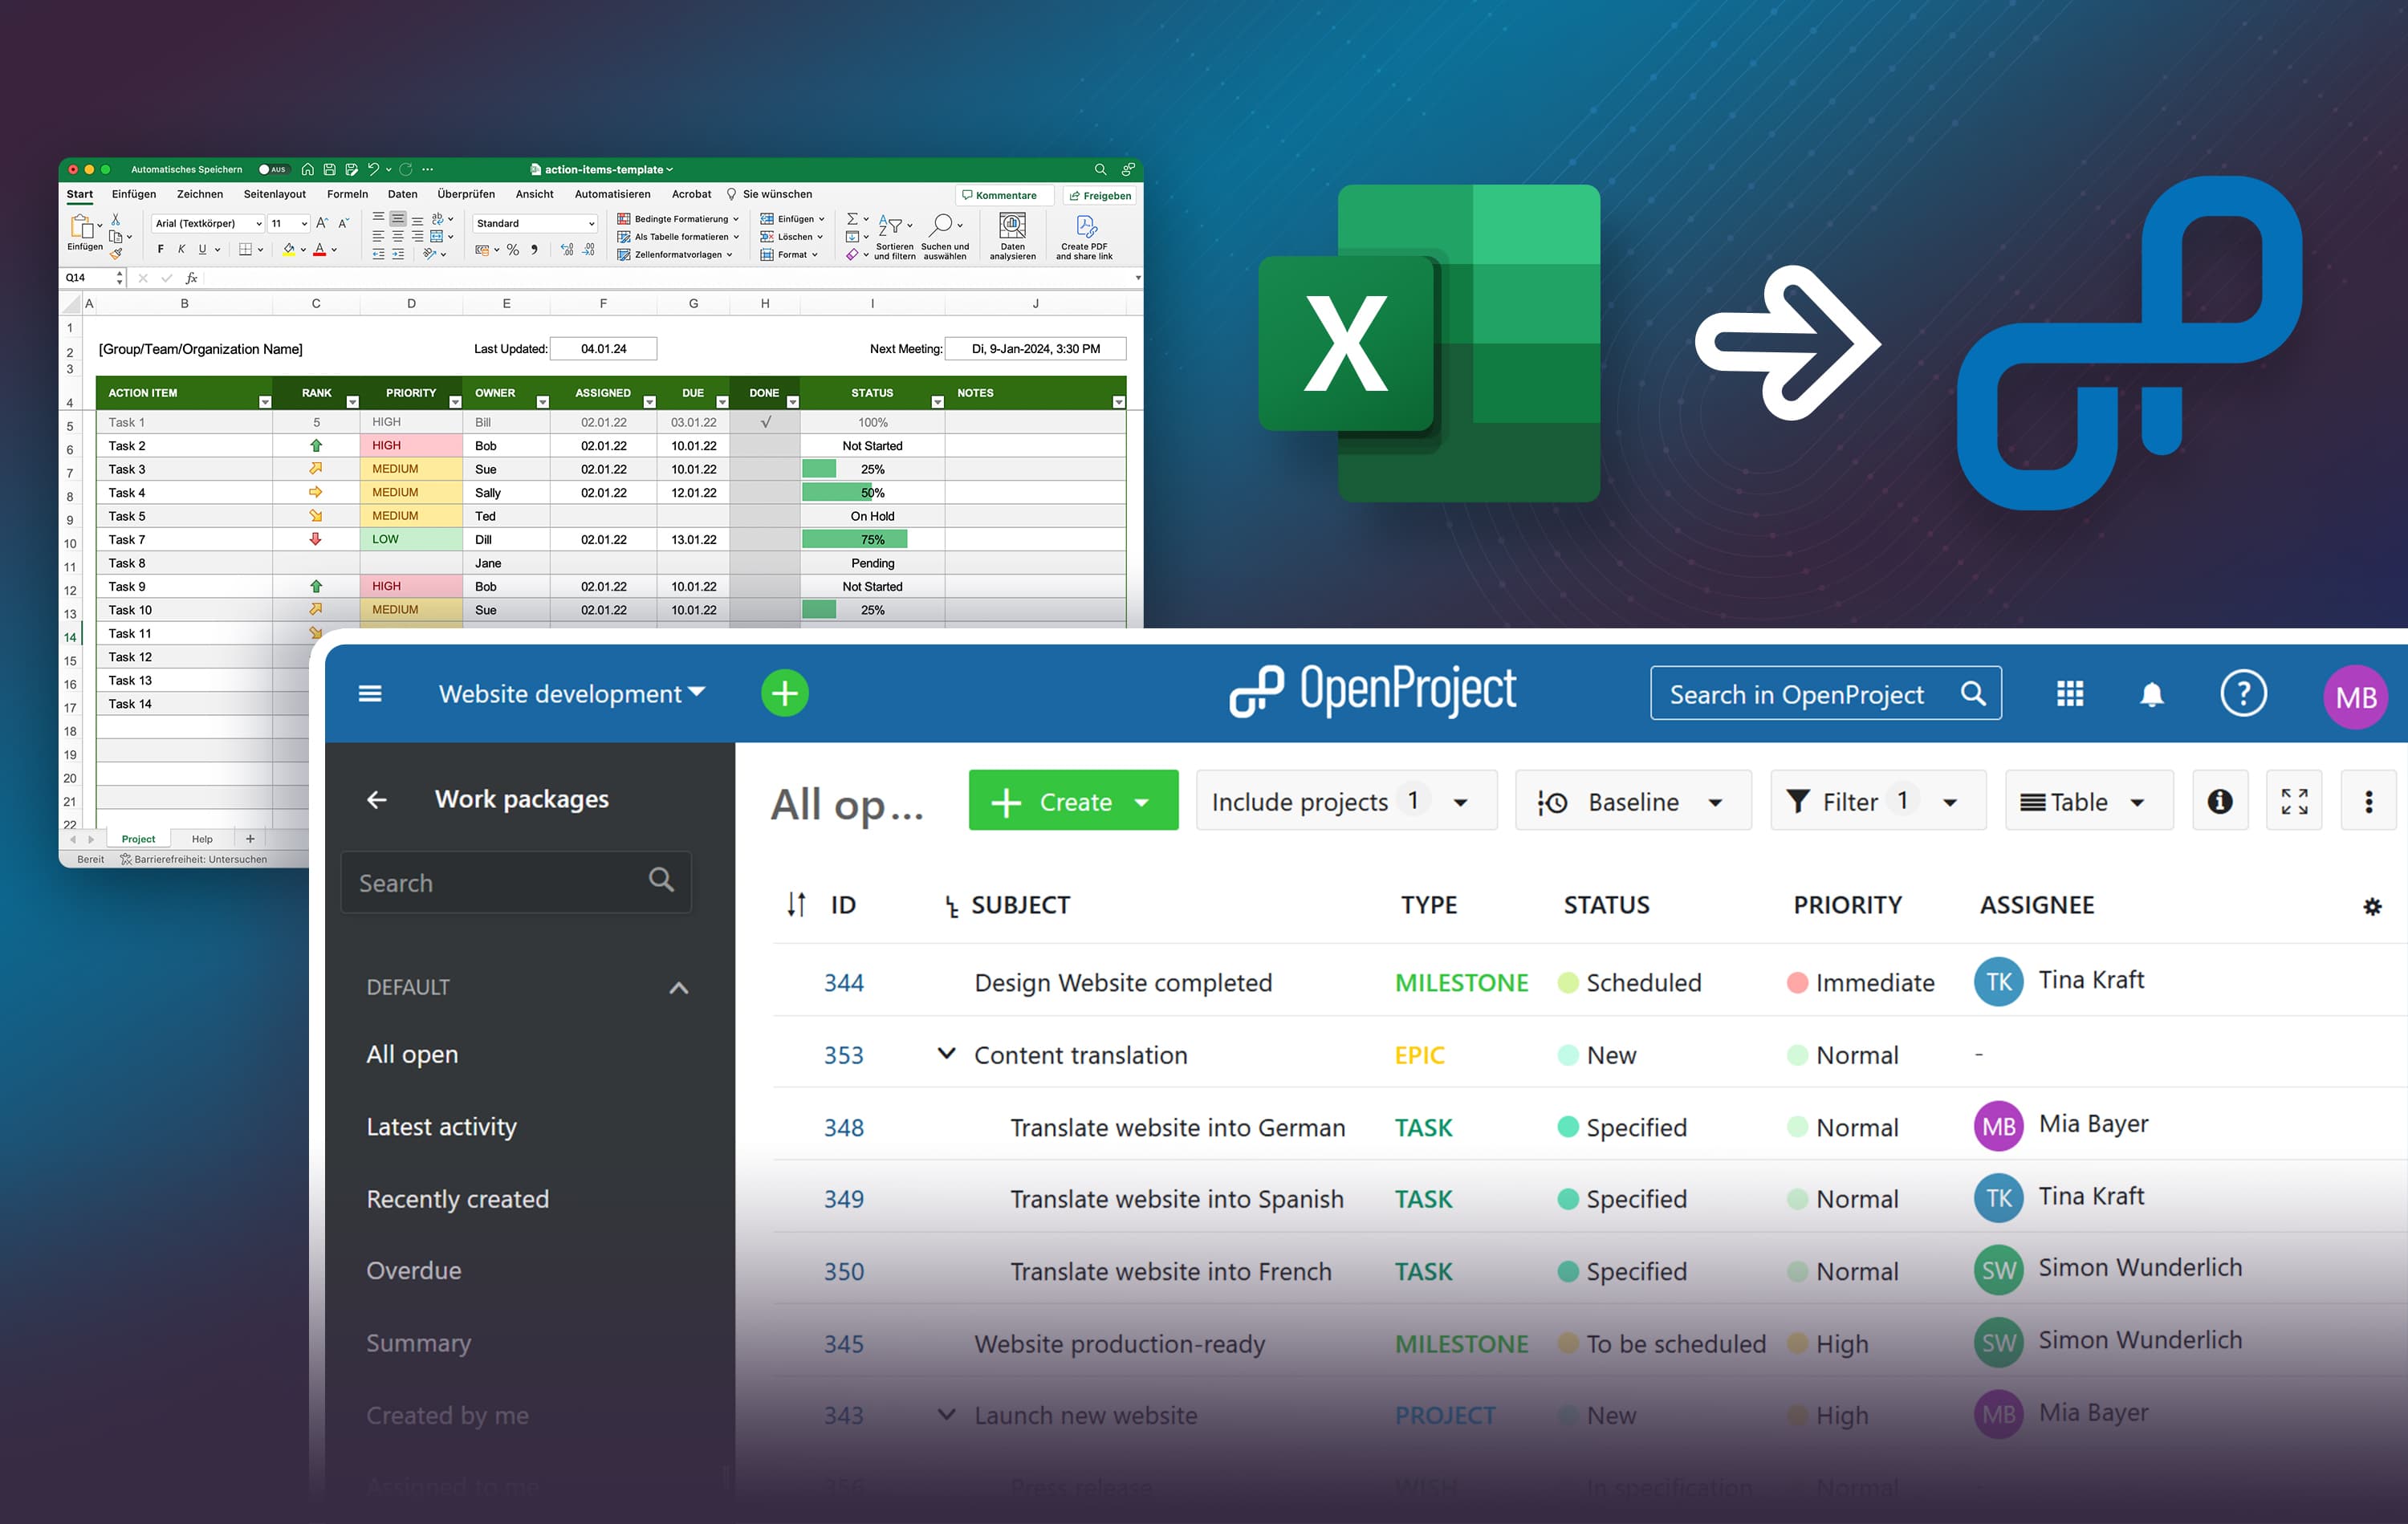
OpenProject: The collaborative Excel alternative for project management
Excel for project management
Excel is a widely used standard application. The application is often already installed and users are already familiar with it. When companies introduce project management, it is only logical that many start out with Excel.
Limitations of using Excel
However, while widely used, Excel has several limitations when it comes to effective project management:
- Excel provides only limited collaboration. While it is now possible for more than one user to work on a spreadsheet at the same time, it becomes increasingly challenging with the rising complexity of a project.
- Due to the lack of automation, no effective assignment to project members is possible. Users are not notified about projects, milestones or work packages they are assigned to.
- Excel also offers limited options when it comes to Gantt chart creation: Easy visualization is therefore not possible. While there are templates to address this, Gantt charts with complex dependencies often cannot be displayed in a good way.
While initial top-down project planning may be possible in Excel, effective project execution is not due to the lack of collaboration, user management and workflows.
When taking the next step from a rough project plan to actual project collaboration and implementation, OpenProject is the optimal solution. OpenProject closes the gap by allowing users to create custom table views very similar to Excel while providing full collaboration and professional project management features.
Let us take a look at an example of a project plan in Excel and see how it can be replicated and improved in OpenProject.

Transfer your Excel spreadsheet to OpenProject - and start to collaborate
OpenProject can display custom columns in the work package table - allowing you to use the same column names in OpenProject and replicate your Excel spreadsheet, which makes OpenProject a powerful Excel alternative. This allows you to display the project names, phases and milestones you tracked in Excel before directly within OpenProject.
Additionally, you can assign users to the different projects, milestones and work packages. These project members are notified by email in the event of changes to the deliverables they are being assigned to. To keep track of the progress, you can use OpenProject’s workflows and update the status. To directly display milestones associated with a project in your plan, use the Enterprise cloud or Enterprise on-premises edition and add relations (such as “includes”) as columns to the table view. This allows you to see the number and names of included milestones right away.
You can save different views to quickly access different aspects of your projects (e.g. to show the entire project plan or to only display the milestones).

Customize OpenProject to display project information
Moving from Excel to OpenProject is straightforward. You can create your own custom columns directly within OpenProject.
Create your own types
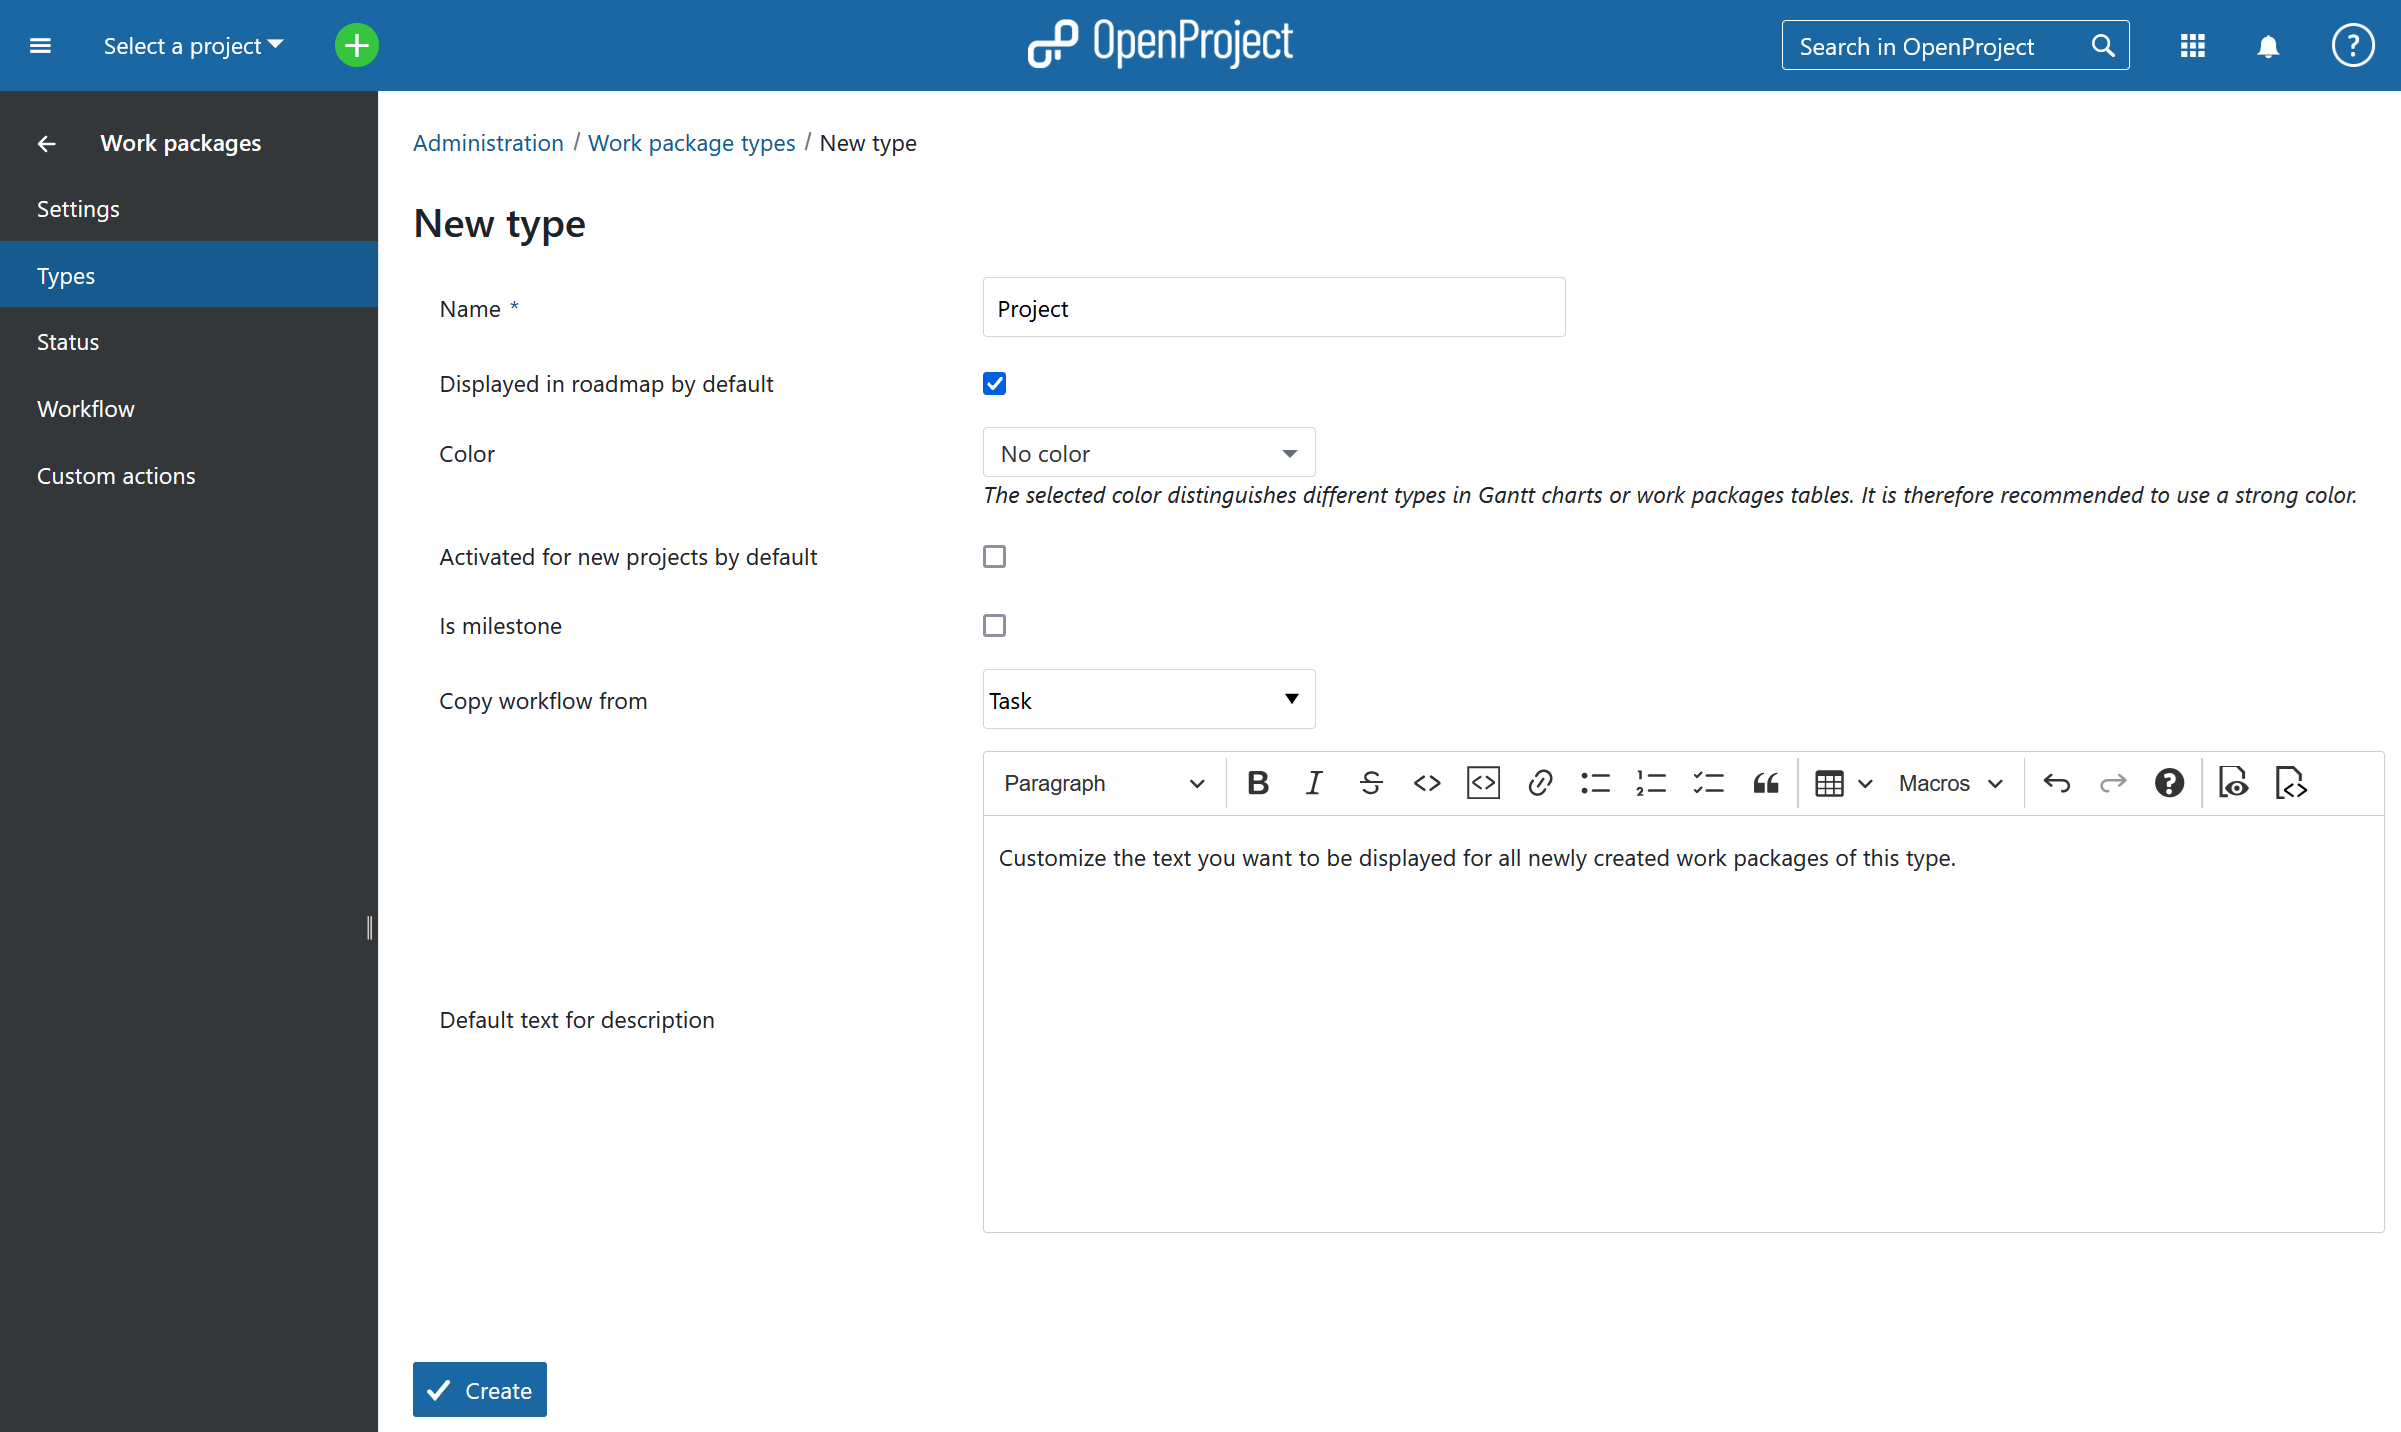
By default, you can create Phases, Milestones and Tasks in OpenProject. If you would like to use additional types (e.g. to display Projects in the list view), go to the Administration, select Work packages and then select Types. Click on the green + Type button, enter a name (e.g. Project), copy a workflow (e.g. from Task).
To use this type in all newly created projects, activate Type activated for new projects by default. Finally, click on Create.
Customize the displayed columns
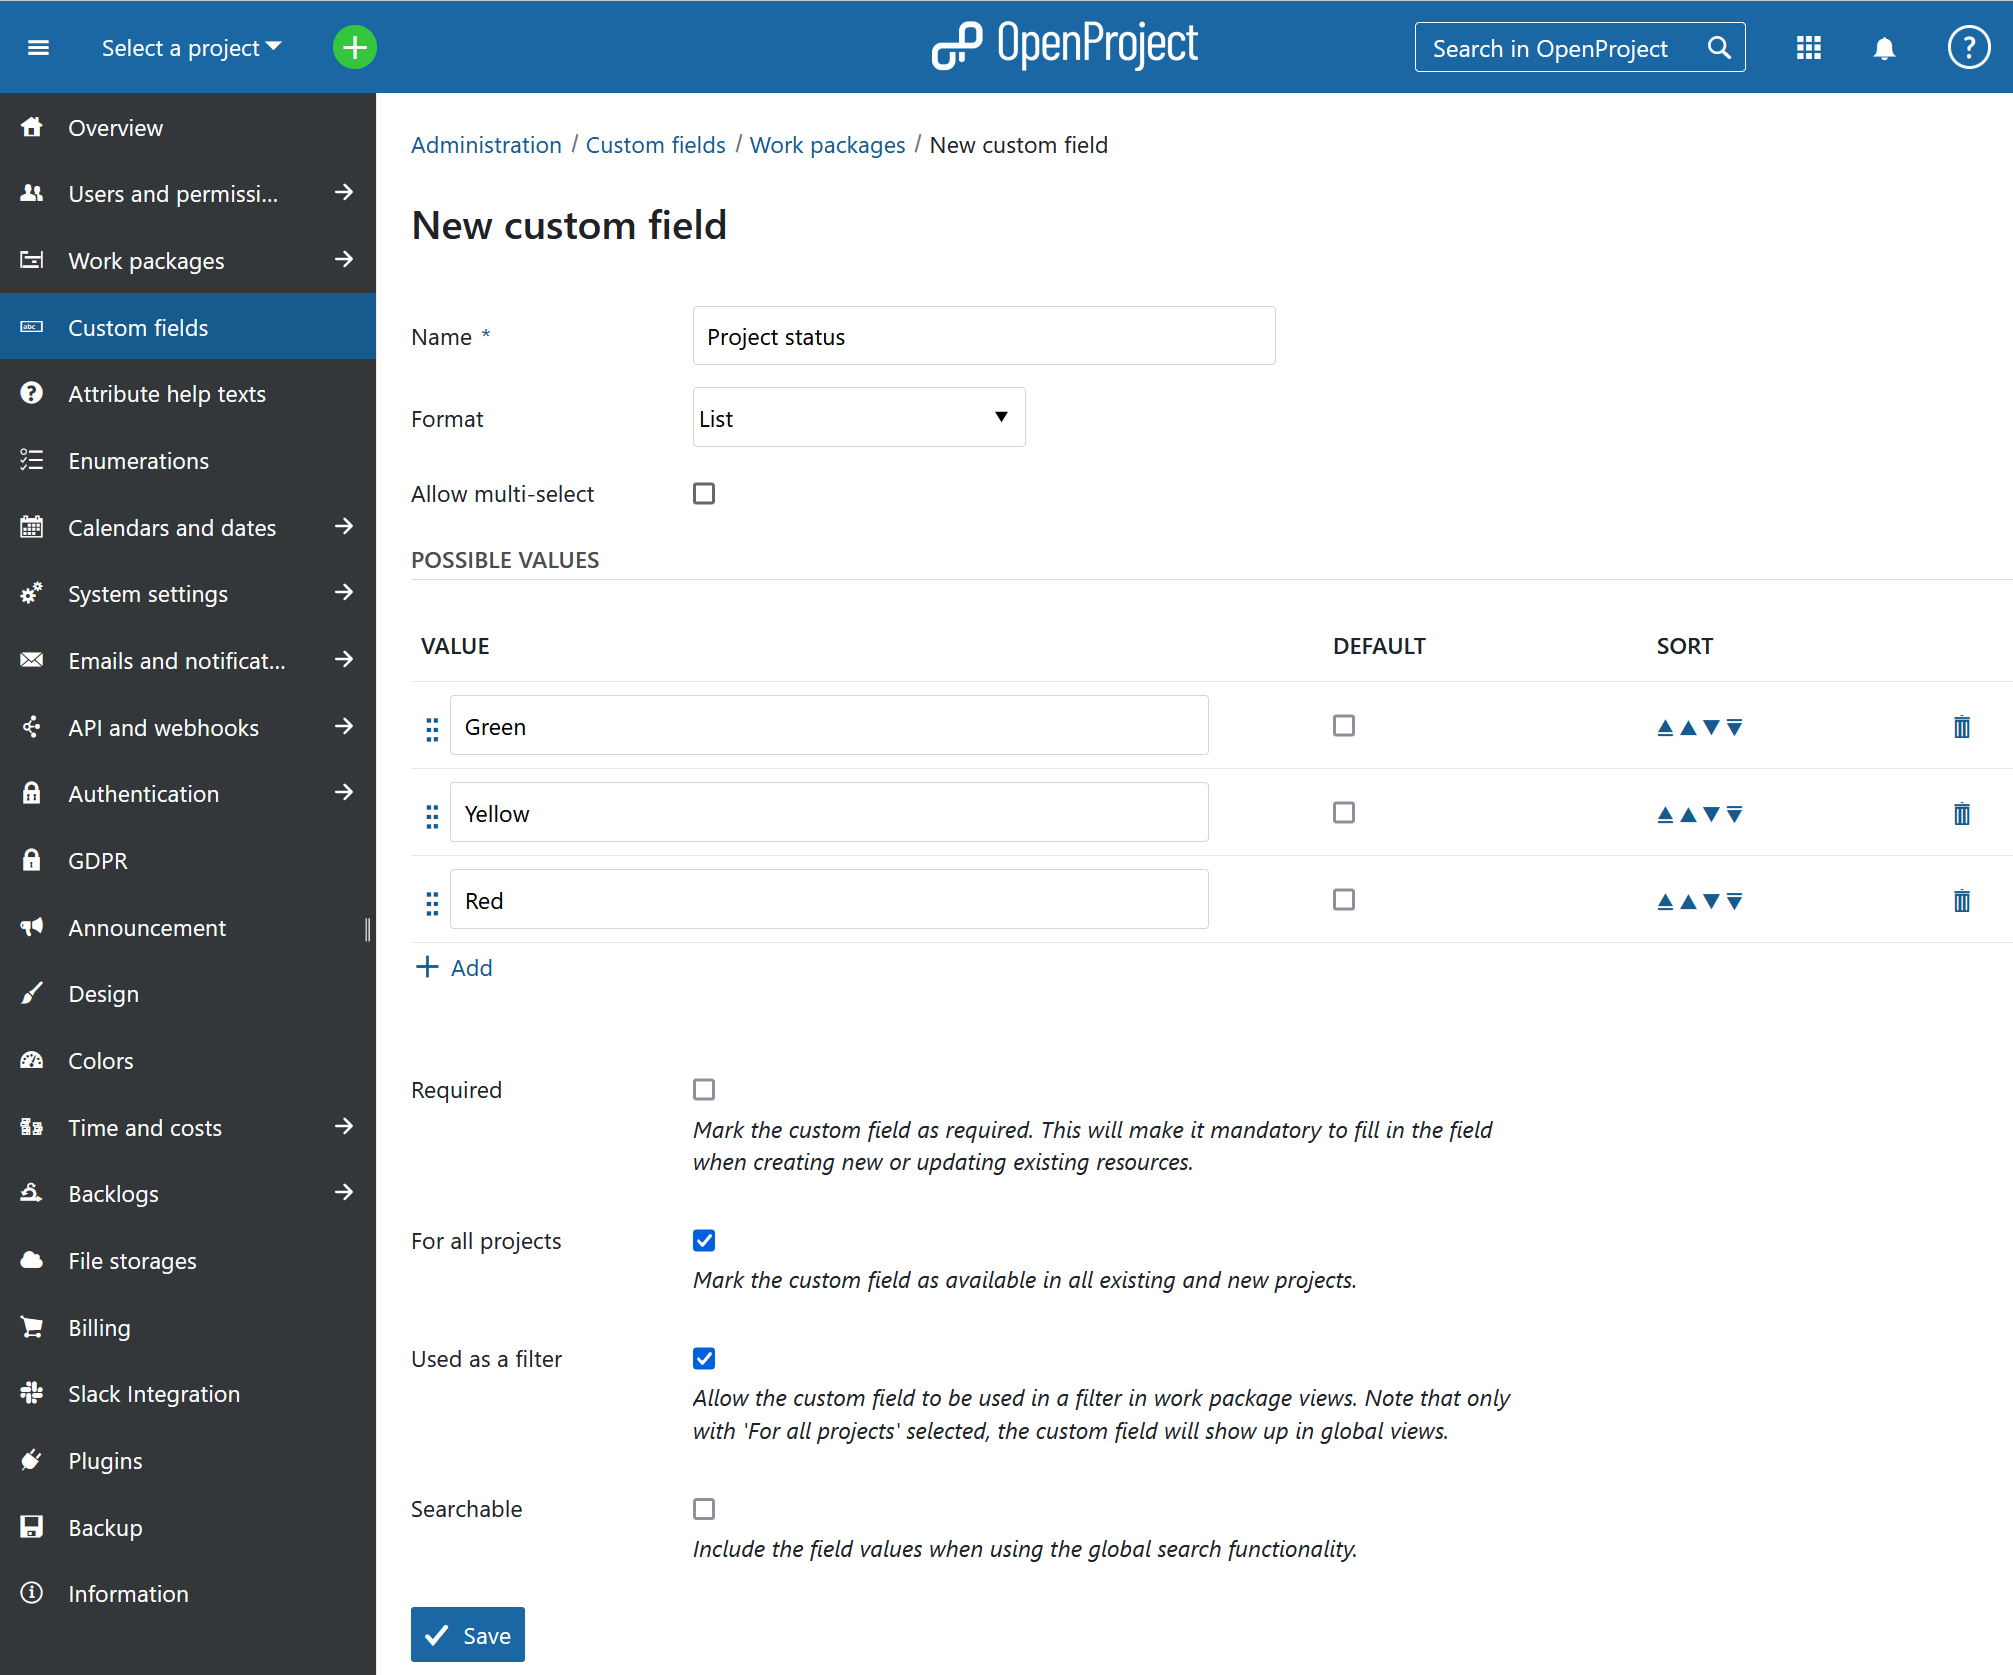
OpenProject allows you to create your own columns - similar to Excel. As an example we are going to create a column Project status. This can be done through custom fields in OpenProject.
To do this, go to Administration and select Custom fields from the side menu. Make sure the Work packages tab is selected and click on the displayed link or button to create a new custom field. Enter the name (e.g. Project status) and change the Format to List. Next, enter the values which users should be able to select (e.g. Green, Yellow, Red), select For all projects to activate this custom field in all projects.
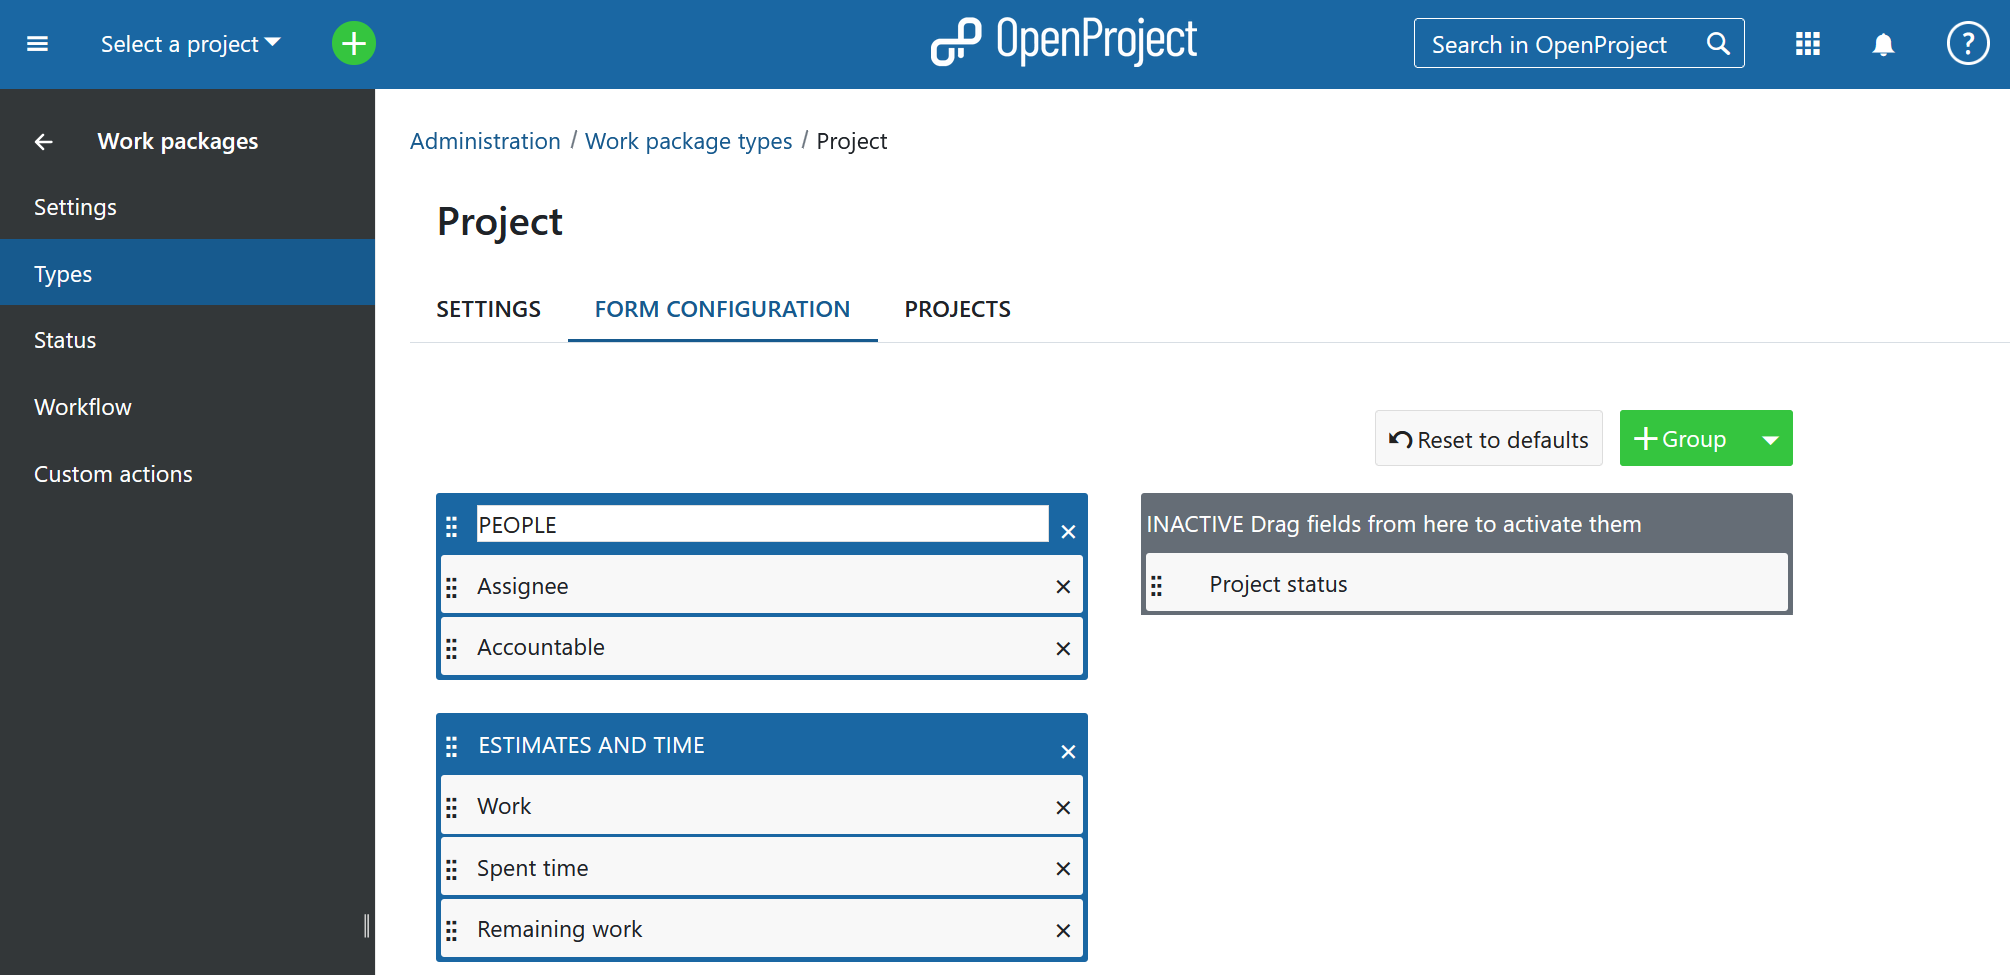
As a next step, select Work packages and then Types from the side menu on the left side and select a type for which the value can be set. In the case, we select type Project. In the tab Form configuration drag and drop the create field (i.e. Project status) to one of the attribute groups on the left side (e.g. to Details). Click on Save at the bottom of the page.
Repeat these steps to add additional custom columns.
With these steps completed, we can create the project plan.
Create the project plan
Navigate to an existing project or create a new project (choose Select a project from the top left side and select + Project from the dropdown menu) and select Work packages from the left side.
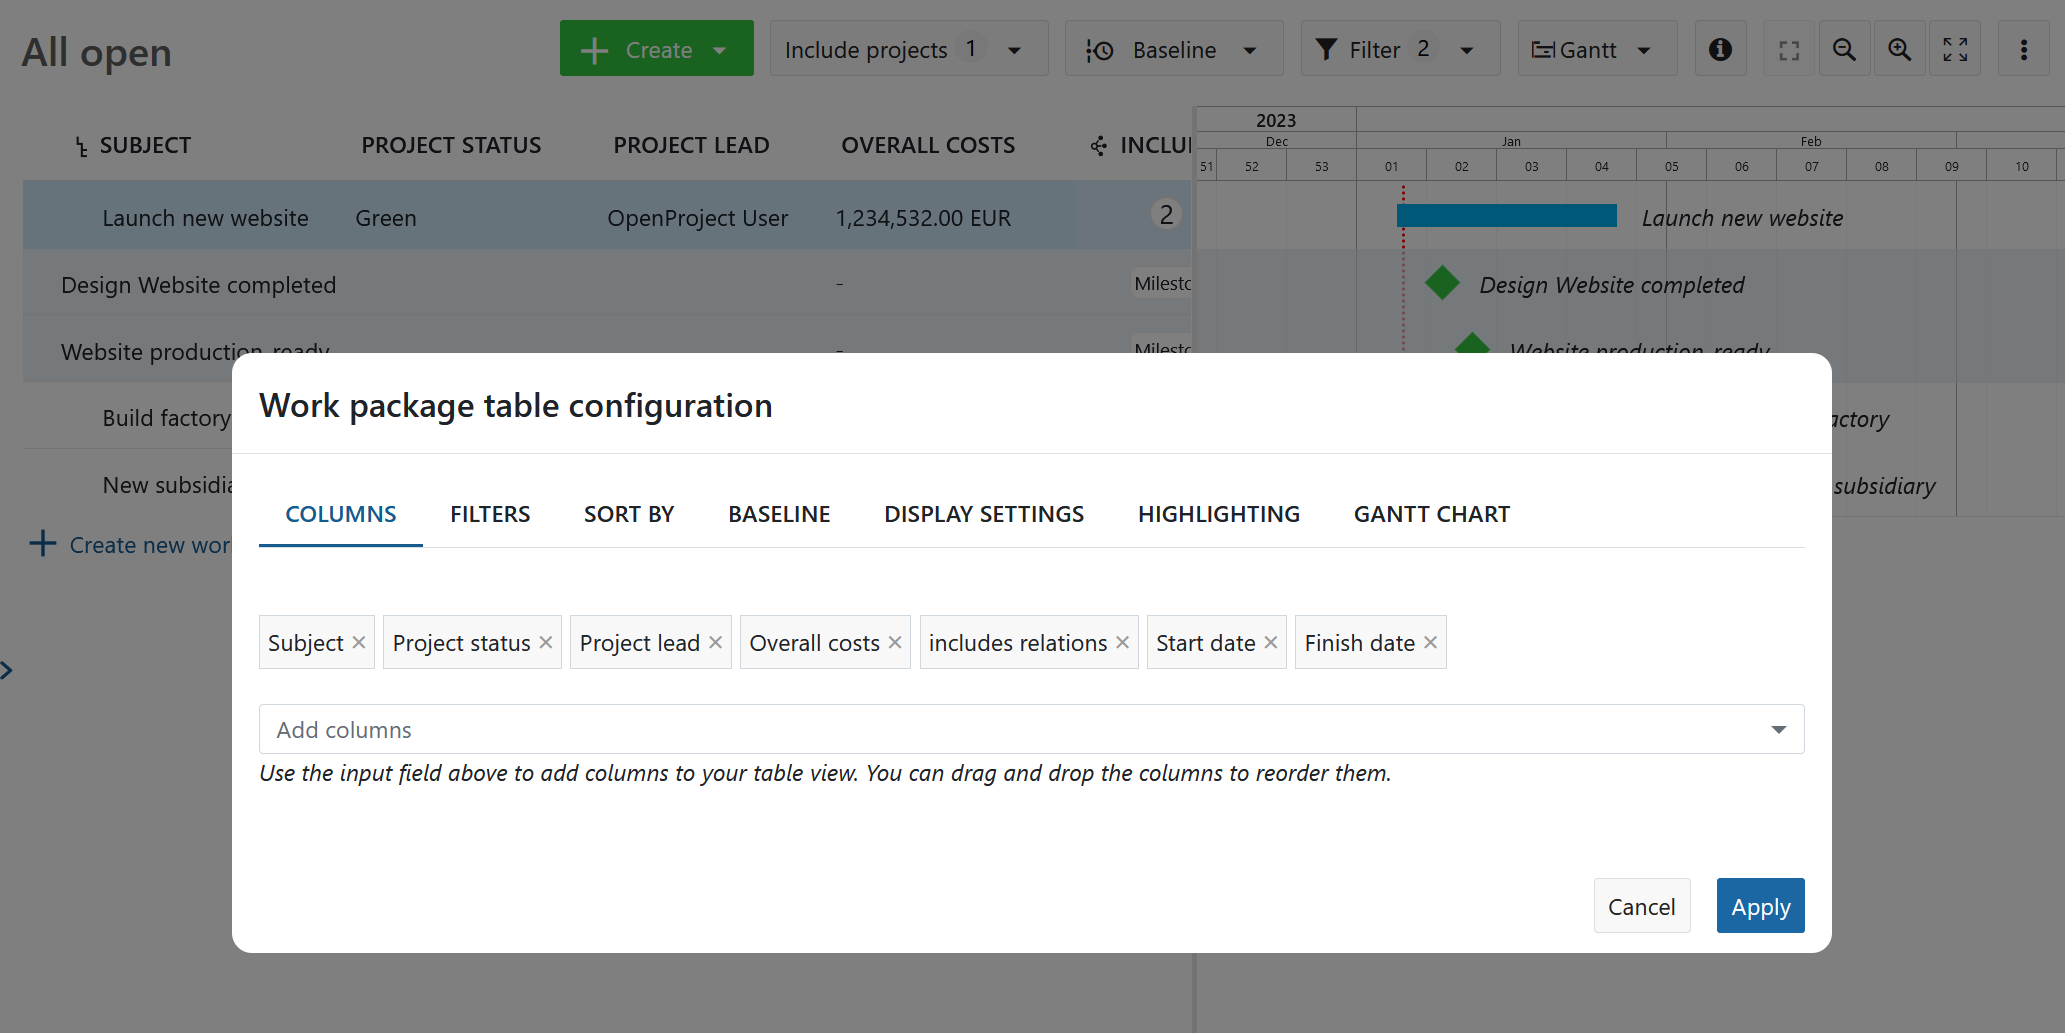
In the displayed list, click on the icon with three vertical dots at the very right side of the columns and select Add columns. This opens a popup menu to adjust the displayed columns. Select additional columns from the list of available options and select the newly created custom field (e.g. Project status). Optionally, reorder the columns (via drag and drop) and remove any unused columns. With the OpenProject Enterprise cloud or Enterprise on-premises edition, you can display relations directly in the list, such as Includes, to show for example the milestones included in certain projects.
Finally, click on Apply.
Continue by creating the different projects, phases and milestones. To do this, click on the green + Create button on the right side and select e.g. Project. Enter the project name and click on Create. Repeat this step for the other projects.
To schedule the projects, activate the Gantt chart by clicking on the Gantt chart icon in the toolbar on the top right side. Simply drag and drop to set the start and due date.
Finally, save the view by clicking on the Settings icon (with the three dots) and choose Save from the dropdown menu. Enter a name (e.g. Project plan), check Save page in menu and click on Save. The view is now added to the side menu below the Work packages entry and can be accessed easily.
You can now use this project plan in OpenProject as an alternative to managing projects in Excel or other spreadsheets.

To find out more on this topic, take a look at a more detailed comparison of OpenProject to Excel.
You need a demo or want to switch?
For an easy switch from Excel to OpenProject, please consult our Guide on Excel synchronization.
If you want to take a glance at OpenProject or test all features thoroughly, just create a free OpenProject trial.
To learn more about the OpenProject Enterprise edition and get your OpenProject environment to the next level, schedule an Enterprise edition demo.


