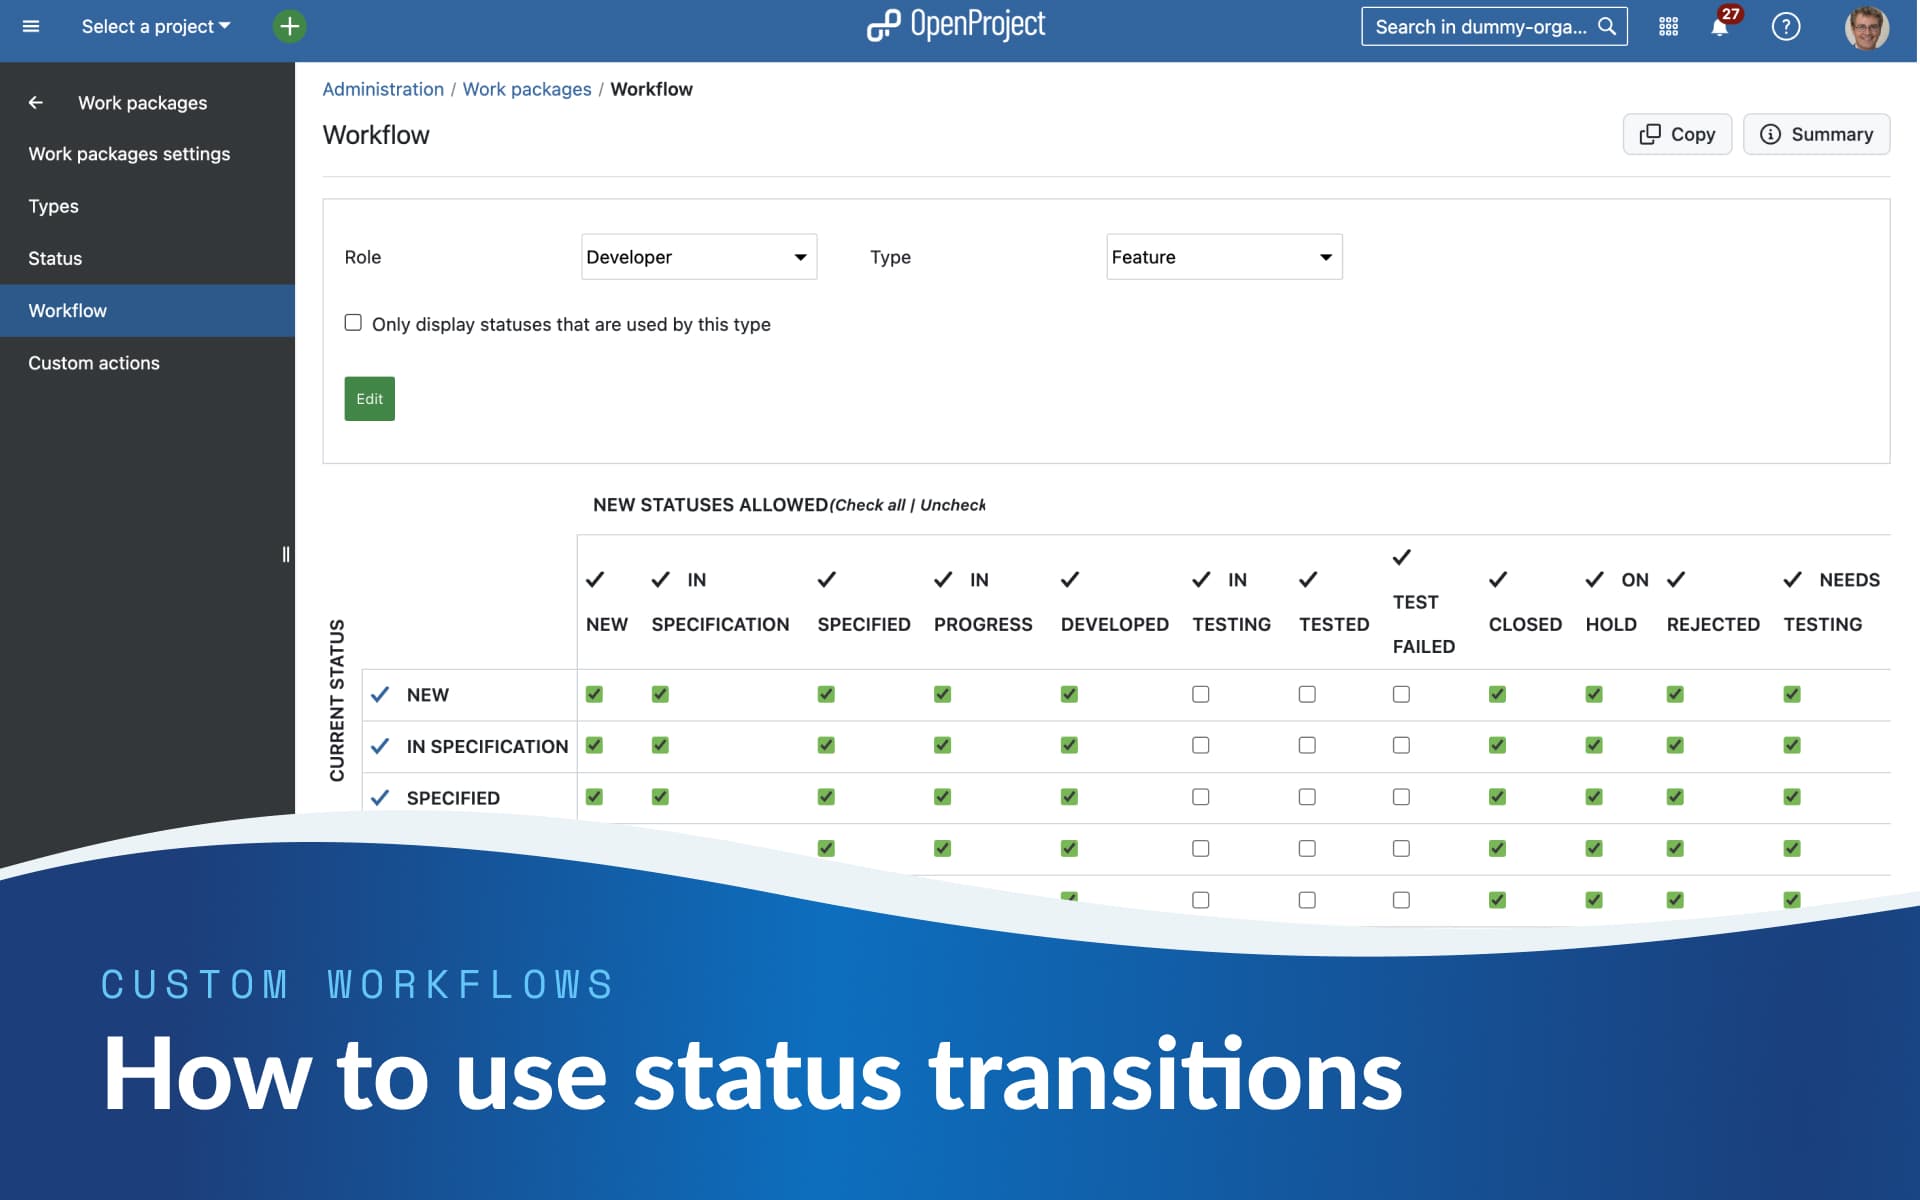
How to use status transitions for custom workflows
OpenProject is a powerful tool, but with great power comes the complexity of customization. If you’re new to OpenProject and having trouble setting up statuses for workflows, you’re not alone. Once you understand how status transitions work in OpenProject, you’ll love having them. Read this article to learn
- what statuses, roles and workflows are - and how they work together,
- why your project management will be much more powerful and efficient with custom workflows,
- how to add a new status and set up a workflow for it.
Let’s dive in!
Know your terms: Status, role and workflow
Let’s start with some terminology. You will be much faster to create your very own workflows with OpenProject, if you speak its language. So, what are statuses, roles and workflows? And how do they come together?
What is a status in OpenProject?
The status is a key element in every project management. In OpenProject, the status is also an essential attribute of a work package. Based on the status, everyone knows immediately how far the respective work package has progressed.
By default, statuses such as New, In progress or Closed are activated in OpenProject. However, depending on the type of work package, other statuses may be useful. For example, a work package of the type Feature needs the status In test, a work package of the type Blog post rather needs the status In review.
See our system admin guide to learn more about status management for OpenProject.
What are roles in OpenProject?
Roles in OpenProject are extremely important in order to provide each person with exactly the permissions they need - no more, no less. In addition to default roles, administrators can create their own roles and assign them fine-grained permissions.
In addition to permissions for features or project views, admins can also assign specific permissions for status changes in OpenProject roles. Exactly these settings then define a workflow in OpenProject – which we will take a closer look at in the next section.
What is a workflow in OpenProject?
Let’s get back to our example from above: Firstly, we have the status In test, which should be selectable by default for features. Then we have the In review status, which should not be selectable for features, but for work packages of the blog post type.
Now let’s take it a step further and look at the roles and permissions: Let’s say, Luke is a developer and regularly works on features. However, he is not authorized to test features - there is a separate QA team for this. Now it’s suddenly no longer enough to just assign a set of statuses to the work package type Feature, we also need different permissions to activate a status, depending on the role.
This is where the workflow finally comes into play. A workflow in OpenProject is defined as the permitted transitions between statuses for a role and a type. In OpenProject, your local admins can customize which role should be able to set which status for which task.
Note
Status changes for workflows are configured on a global level via the administration panel: Administration / work packages / workflow.
The power of customization: Simplify the work for project members
As an administrator, you have the power of defining specific workflows for each role so that project members can perform exactly the status changes they need. The more you customize as an admin at the top, the easier the work becomes for other roles further down in the project.
And remember: You only have to configure these settings once for them to work for years. So grab a coffee and block out a morning to take a closer look at status transitions in OpenProject. Your colleagues and your future work will benefit greatly!
Here’s an example of a typical work setting where status transitions with workflows will be much appreciated:
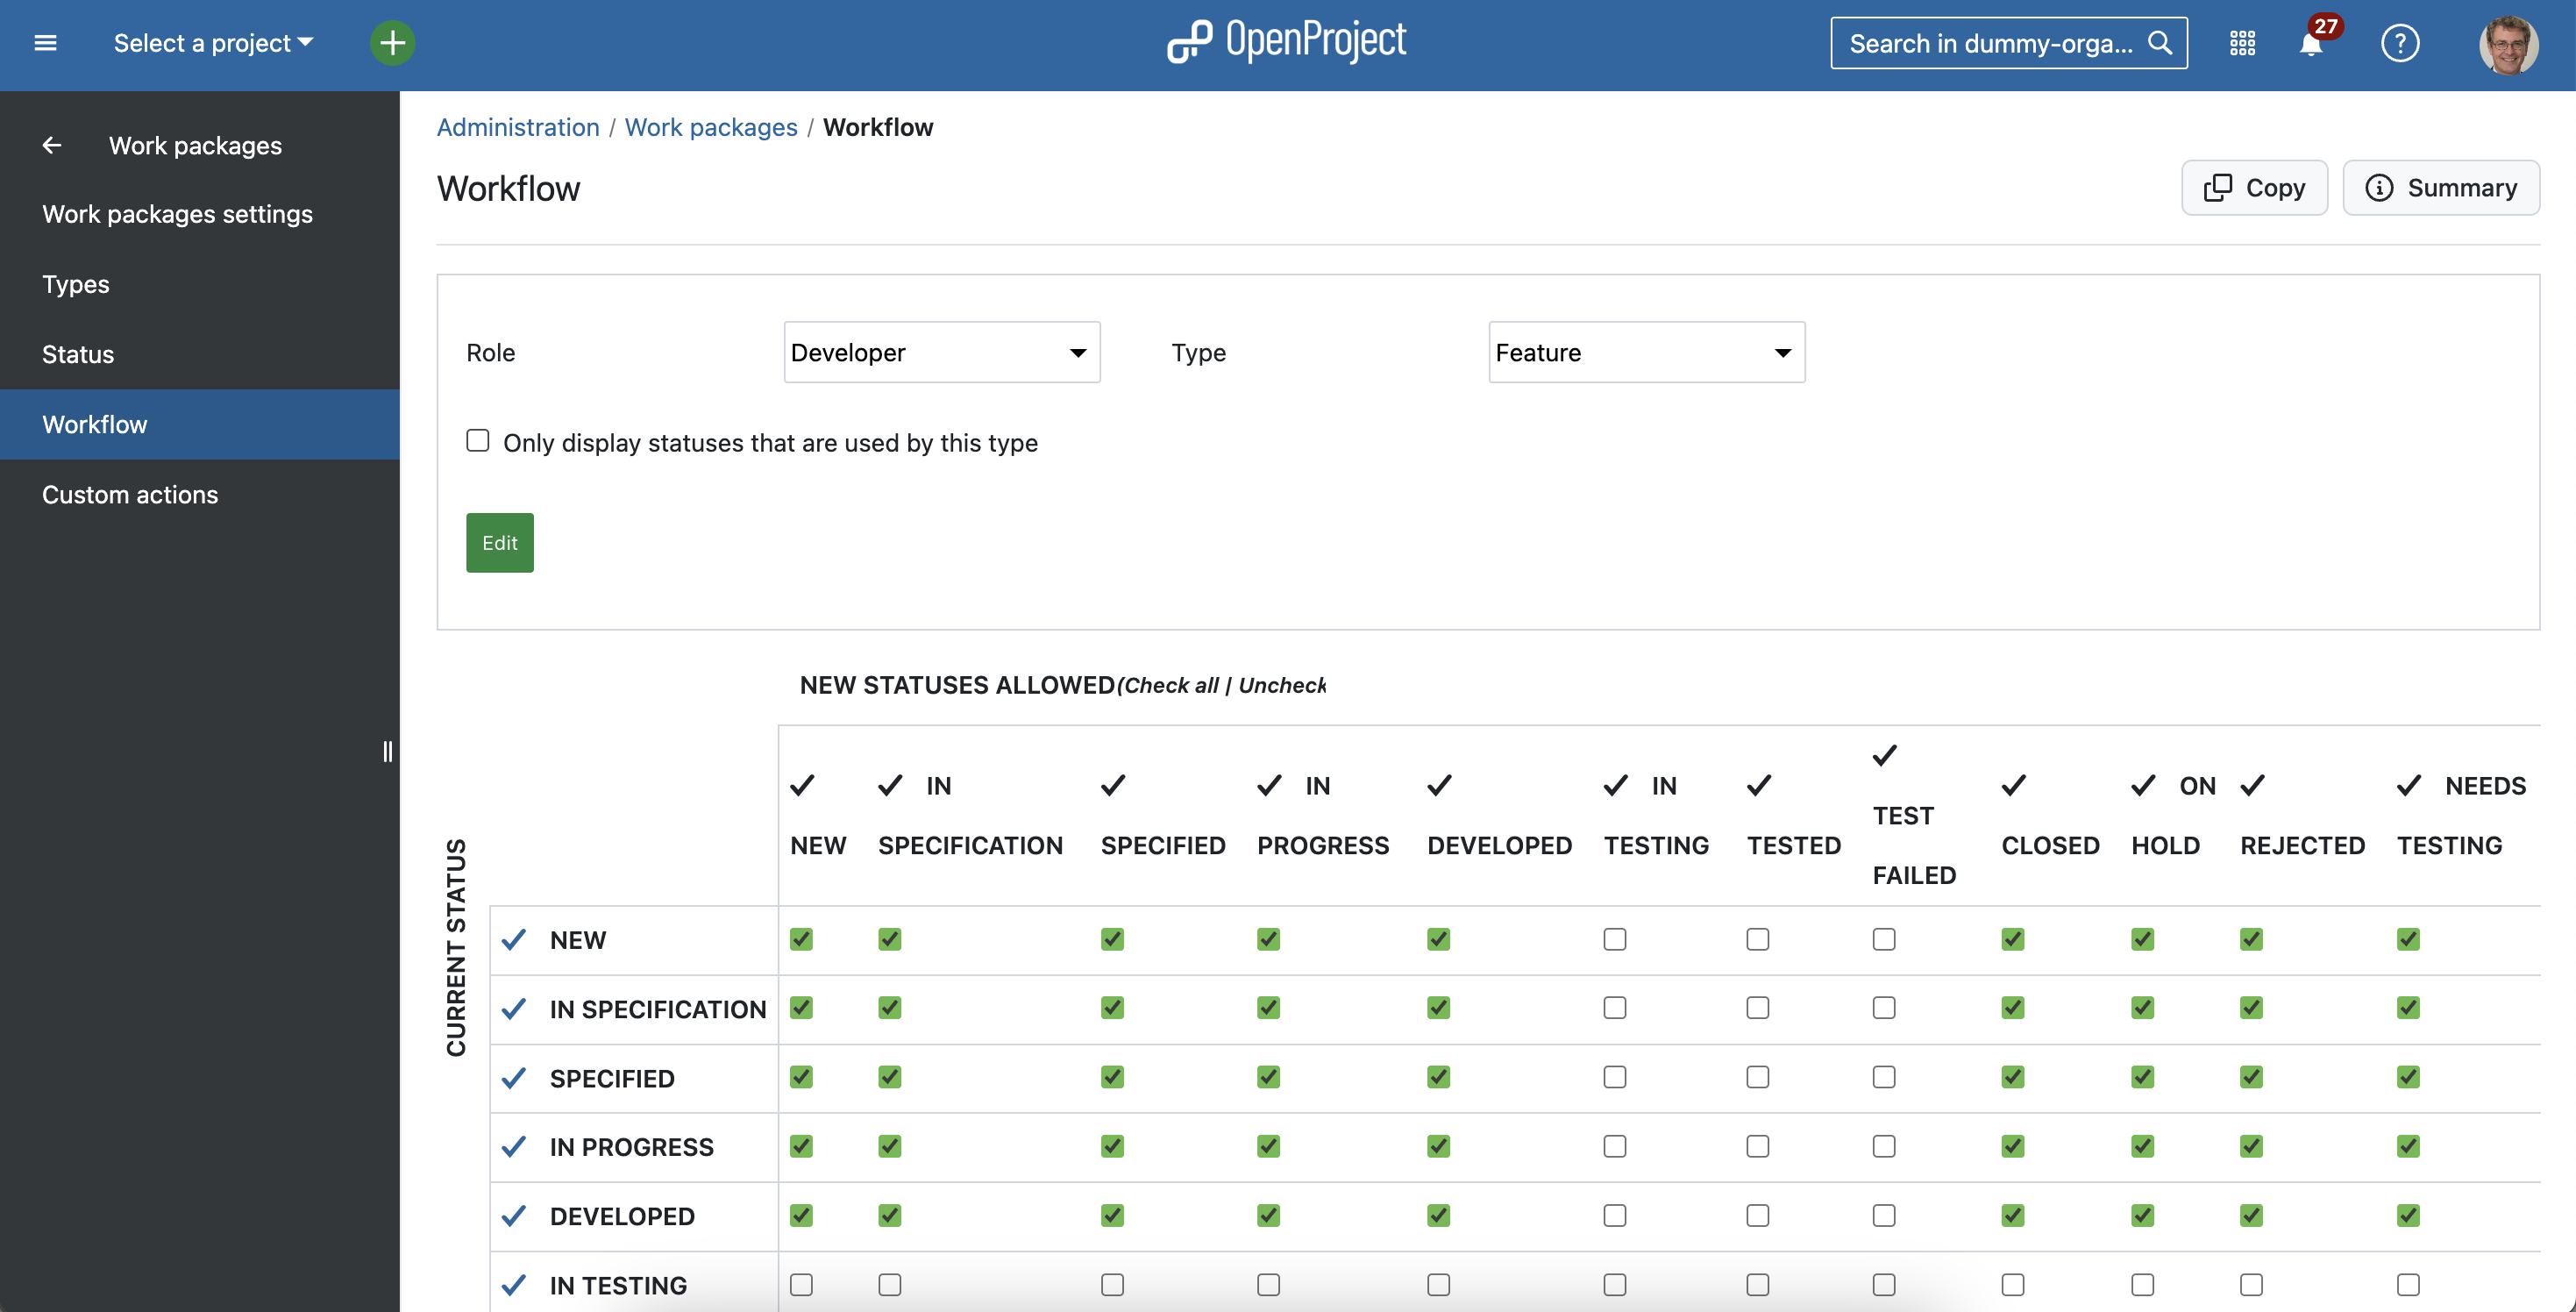
Let’s take Luke, the developer, from the example above. Now his admin Ivan wants Luke to be able to set work packages of the type feature from New to In development and then to Needs testing. However, while Luke’s QA colleague Maya should be able to change work package statuses of the type feature from Needs testing to In testing, this should not be possible for Luke. A role-based permission setting like this allows both the developer Luke and Maya from QA to do their jobs while preventing them from accidentally setting a status for which they have no permission.
This is how the example workflow for the role Developer and the type Feature would look like in OpenProject:
Step-by-step guide: How to add a new status and set up a workflow
Finally, let’s go through the entire process step by step: What settings does admin Ivan need to configure to define the workflows for the work package type Feature – so that each role can perform exactly the status transitions they need to do their job?
1. Step: Create the roles, the status and the work package type you need
If you are specifically looking to create a workflow, you might already have set up the roles, the status and the work package types you need. For our example, admin Ivan would first have to create a work package type called Feature under: Administration / Work packages / Types / New type.
Then he would have to make sure the statuses we described above exist (e.g. Needs testing) – and create new ones, if needed.
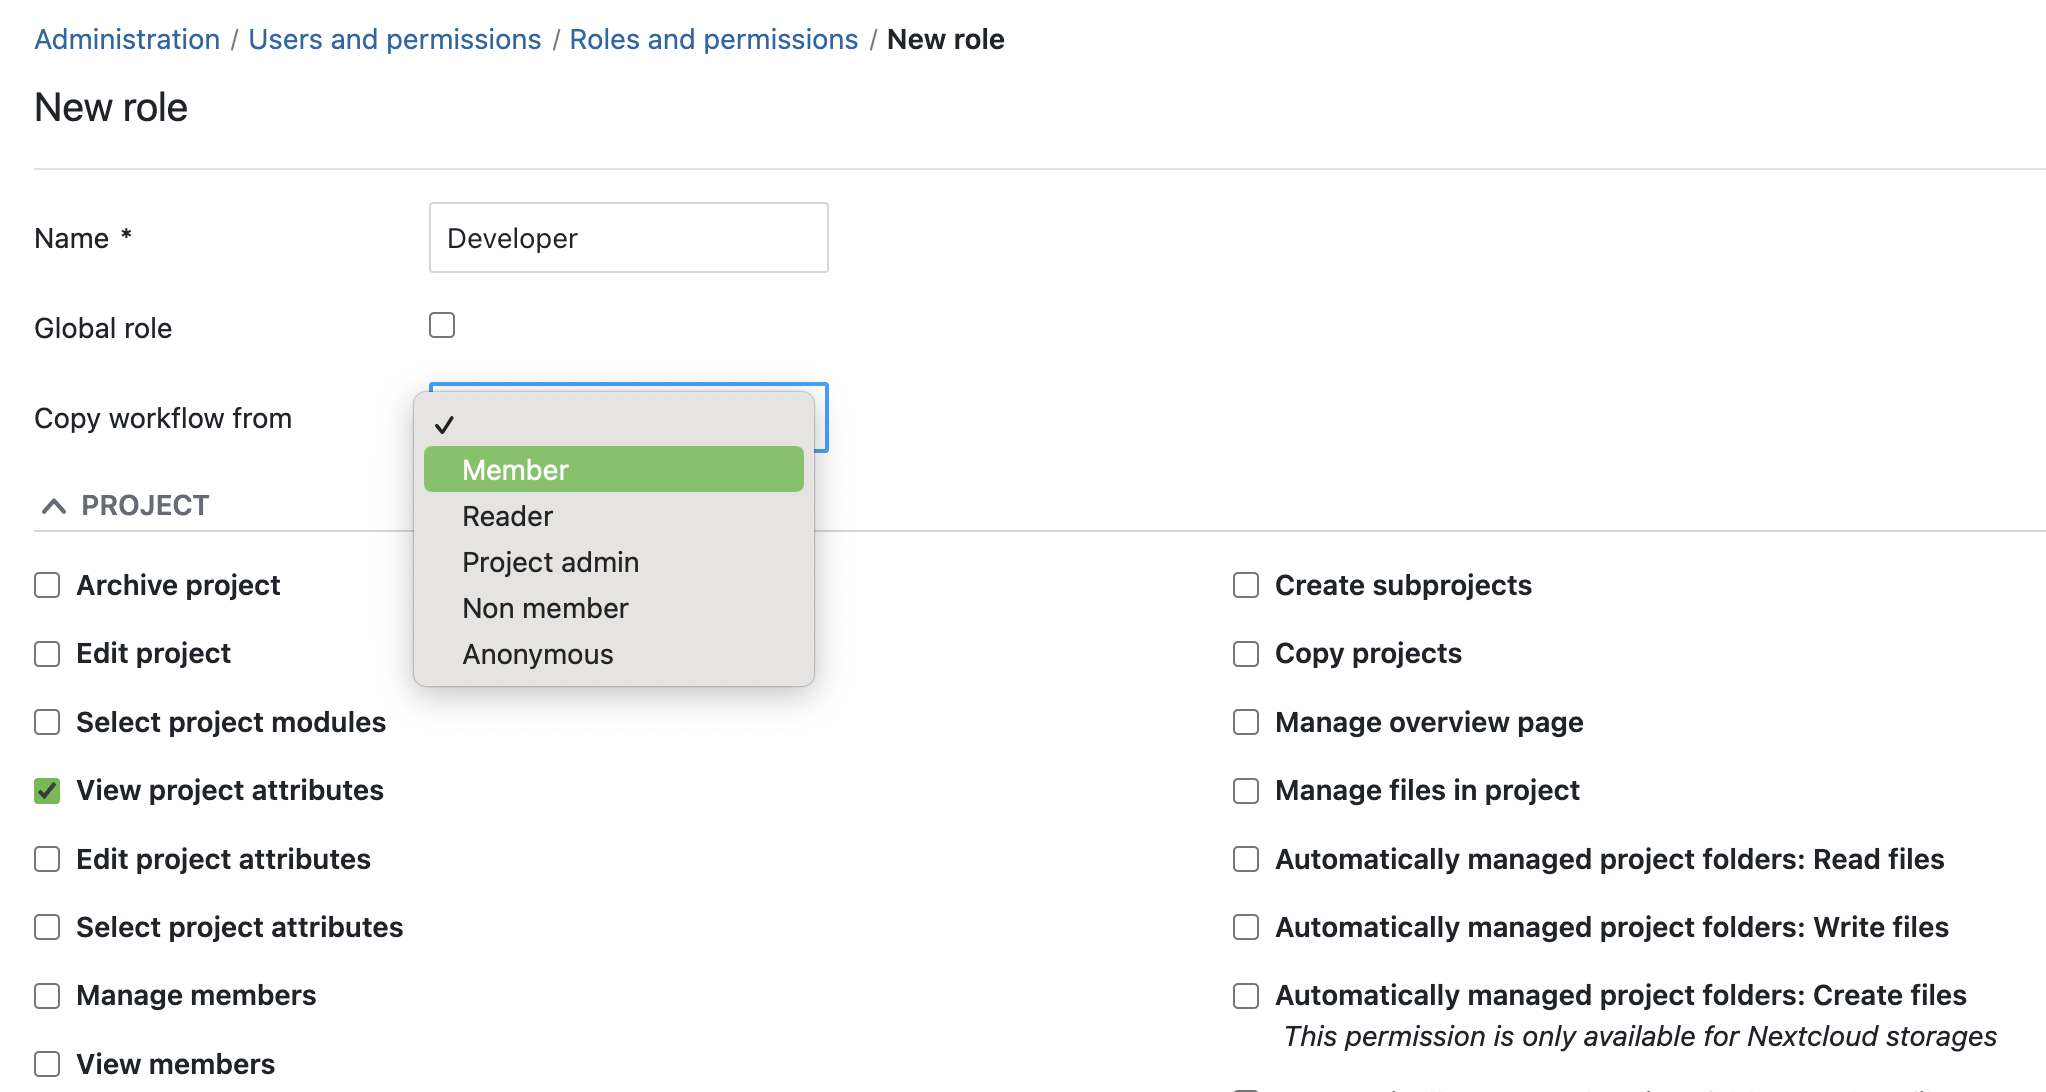
He would also have to set up two roles - Developer and QA. This setting can be found under Administration / Users and permissions / Roles and permissions / New role.
Tip
To save some time when creating a new role, we advise you to copy an existing workflow, e.g. from the typically very generic role Member. Also, please make sure that the new role has the right to change a work package status (or edit work packages, which includes changing the status).
2. Step: Create the workflow
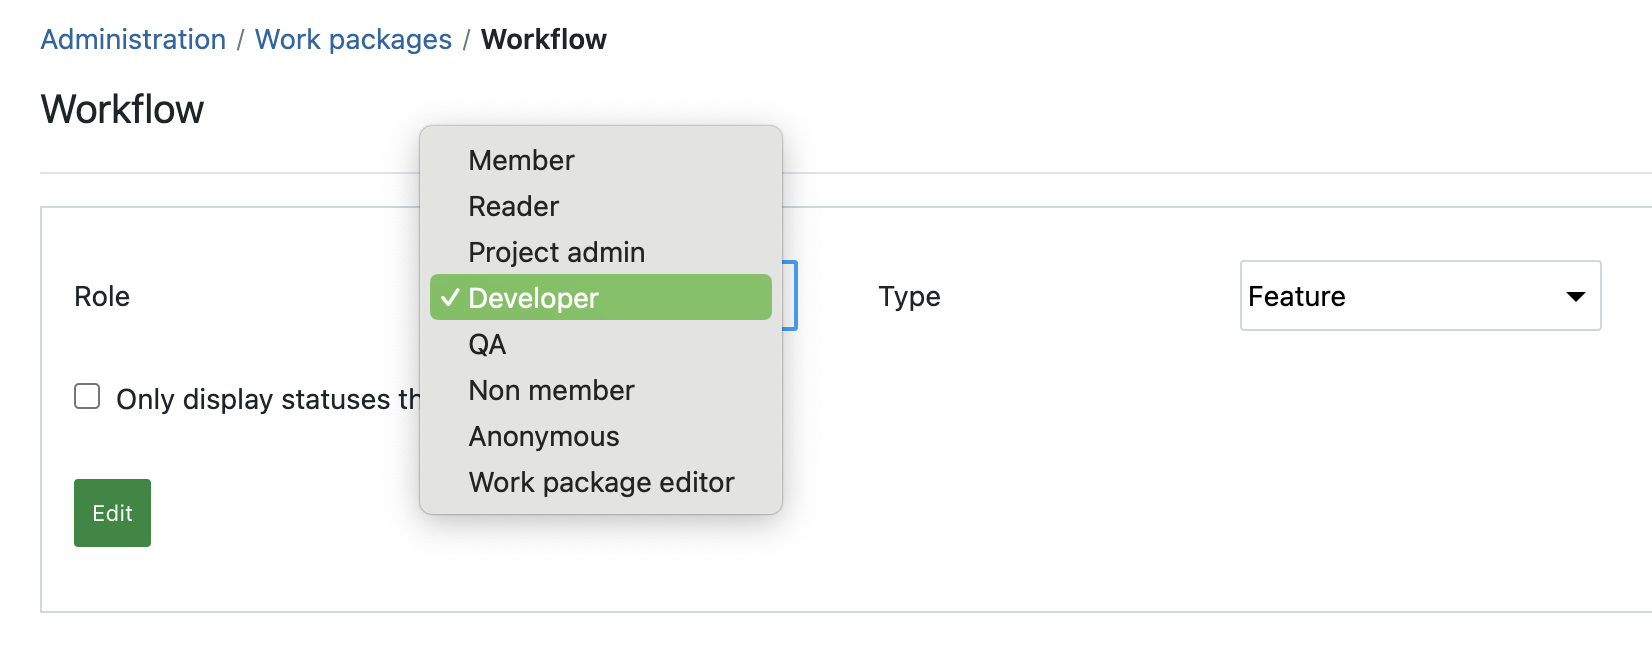
Now that we have created the roles and the work package type that we want to customize, we can start creating a new workflow under Administration / Work packages / Workflow. For our example, Ivan would have to choose the role Developer and the Type Feature:
Important
Version 14.4 or lower: When creating a new workflow, please uncheck the checkbox Only display statuses that are used by this type. This only needs to be checked if you are editing an existing workflow and want to keep the table clear of statuses that are not yet connected with this type. With OpenProject 14.5 and higher, the box will be unchecked by default.
When you click Edit, you can now specify which status transitions the selected role should be allowed to perform for the selected work package type. In our example, Ivan wants to make sure that a person of the role Developer can not set or change a status from or to anything related to testing. If Ivan now unchecks every box that is related to testing, the screen would look like this:
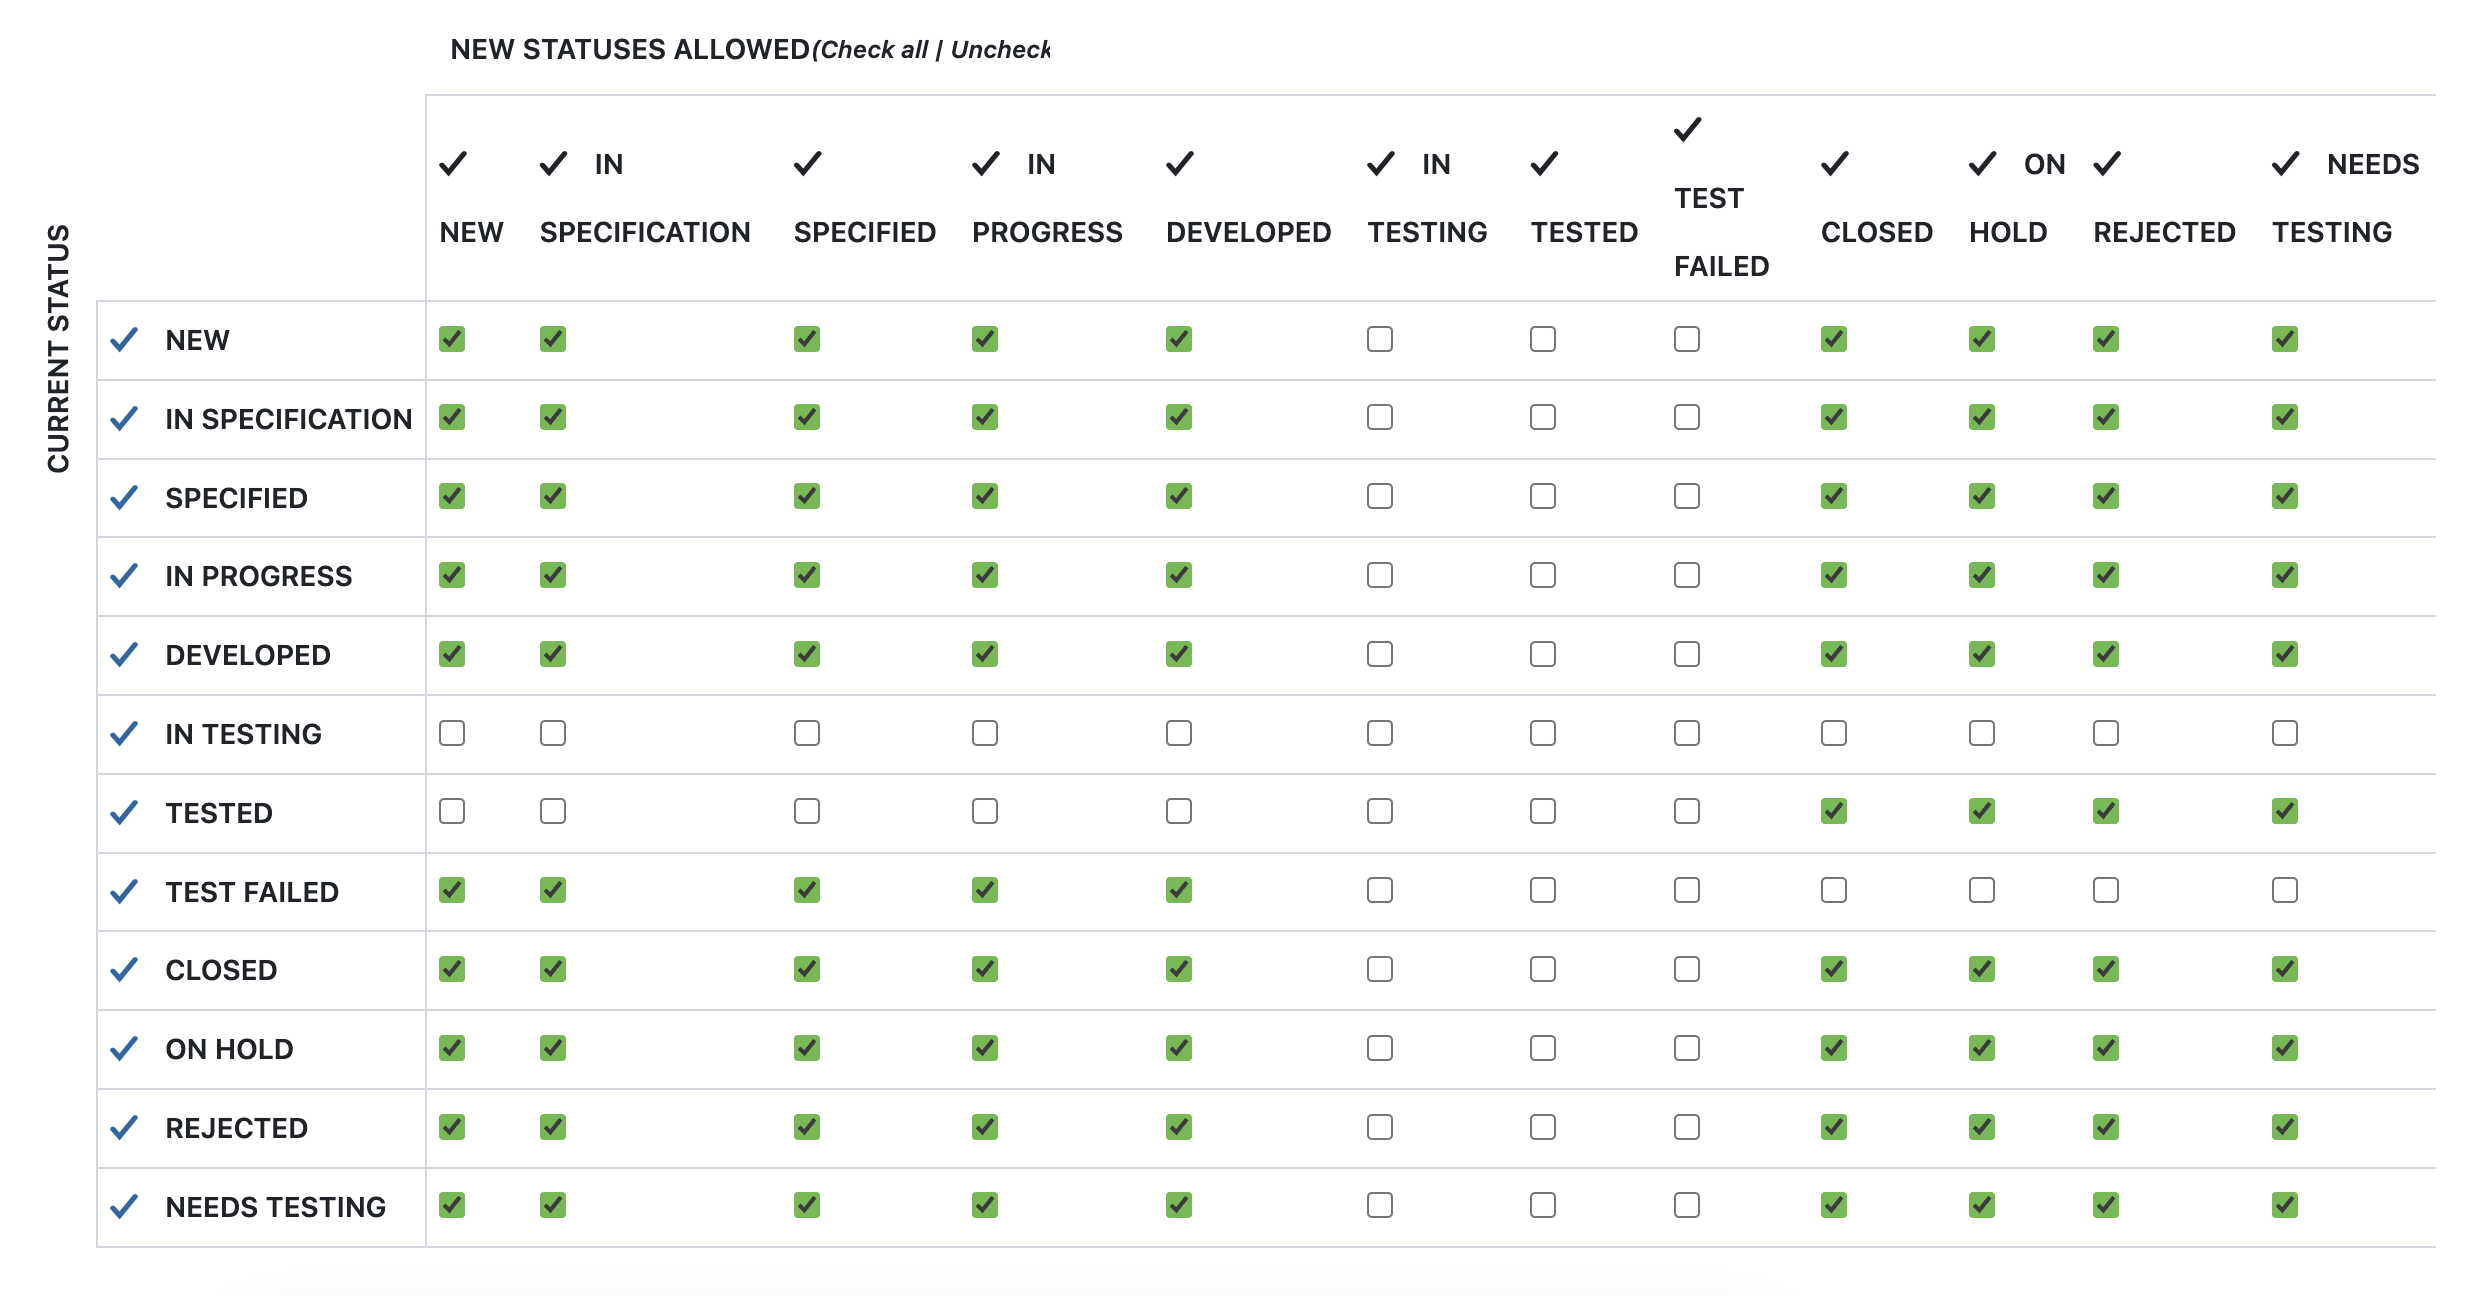
The table shows status transitions enabled or disabled for developers (role) on work packages of the type Feature. As testing features should only be done by QA, these statuses are disabled in the screenshot.
Tip
OpenProject allows admins to set different status transitions depending on the aspect if the user is author or assignee of the work package. This might be extremely helpful to create exceptions for workflows. Because we all know: There are exceptions to every rule, and it is very convenient if your tool offers you options for defining these.
Now, don’t forget to click Save and your workflow is ready!
Wrapping up: More information on how to set up and customize your OpenProject
You have now learned what status, role and workflow mean in OpenProject and how to set up status transitions to support your project and task management. Here’s a quick overview of the tips in this article:
- Before creating a workflow, make sure you have the needed role, status and work package type.
- When creating a new role, copy an existing workflow to save time.
- When creating a new workflow, usually the checkbox for Only display statuses… has to be unchecked.
More information on how to set up your OpenProject instance can be found in the system admin guide – on this page you will find a guide to create custom workflows.
Read more in this blog article about customized workflows. OpenProject is an open source project management tool with a wide range of features and a powerful set of customization options. It offers you the tool to create a custom project management just as you need it. And once it’s set up, working with status transitions and other custom features and actions will be fun because it will work easily and be crowned with success.


