Projektmanagement mit OpenProject
Setting up and managing projects in a structured way is crucial for successful organizations. OpenProject enables users to create and manage projects as well as to collaborate together with other team members.
Let’s take a look at how to use OpenProject for project management. To make the steps more tangible we’ll use the example of a fictional company - ABC Inc. - which wants to track its projects using OpenProject.
ABC Inc. is a manufacturing company which produces parts in various locations and countries. The company wants to use OpenProject to track and manage all its locations.
1. Projektkonzept und Projektinitiierung
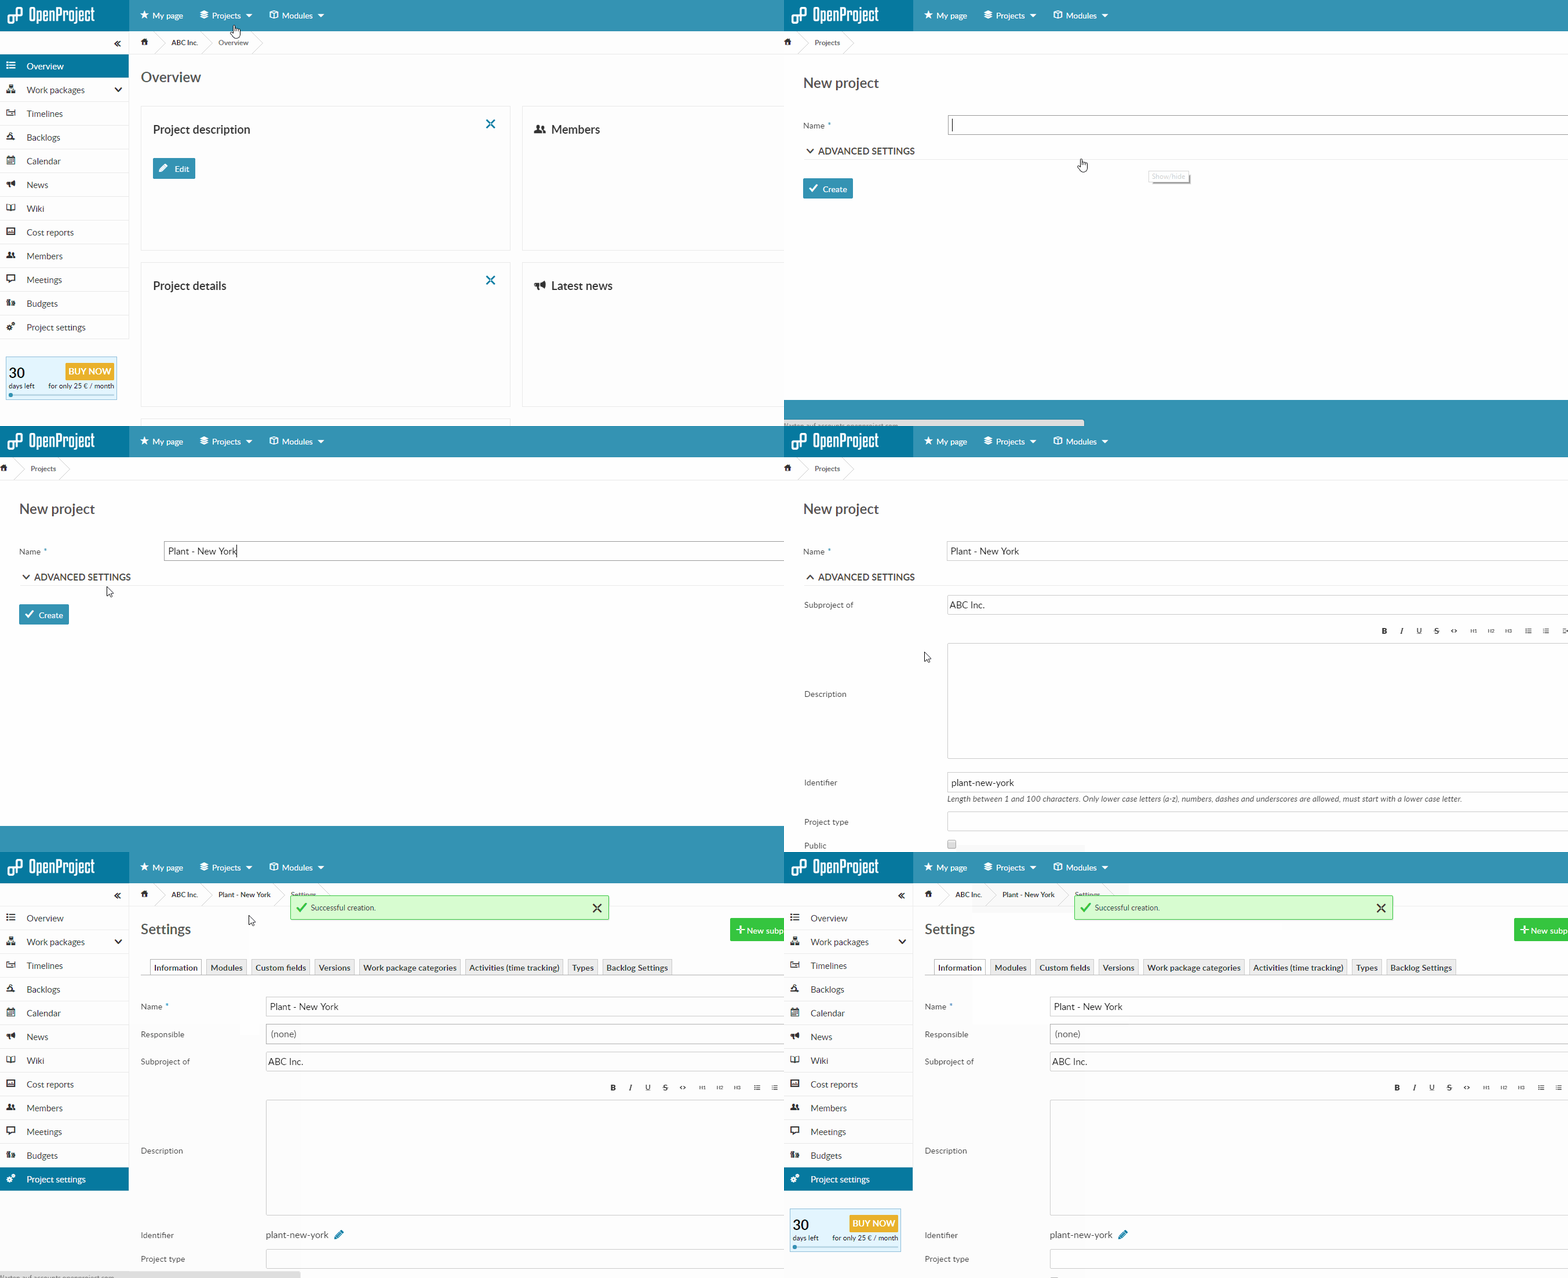
The initial step when setting up OpenProject is the creation of a project hierarchy. ABC Inc. decides to create a main project to track its general, high-level information.
For each of the different location, the company creates a separate project which is a sub-project of the main project.
This is possible by selecting the entry “Projects” from the header menu and choosing “+ New project”.
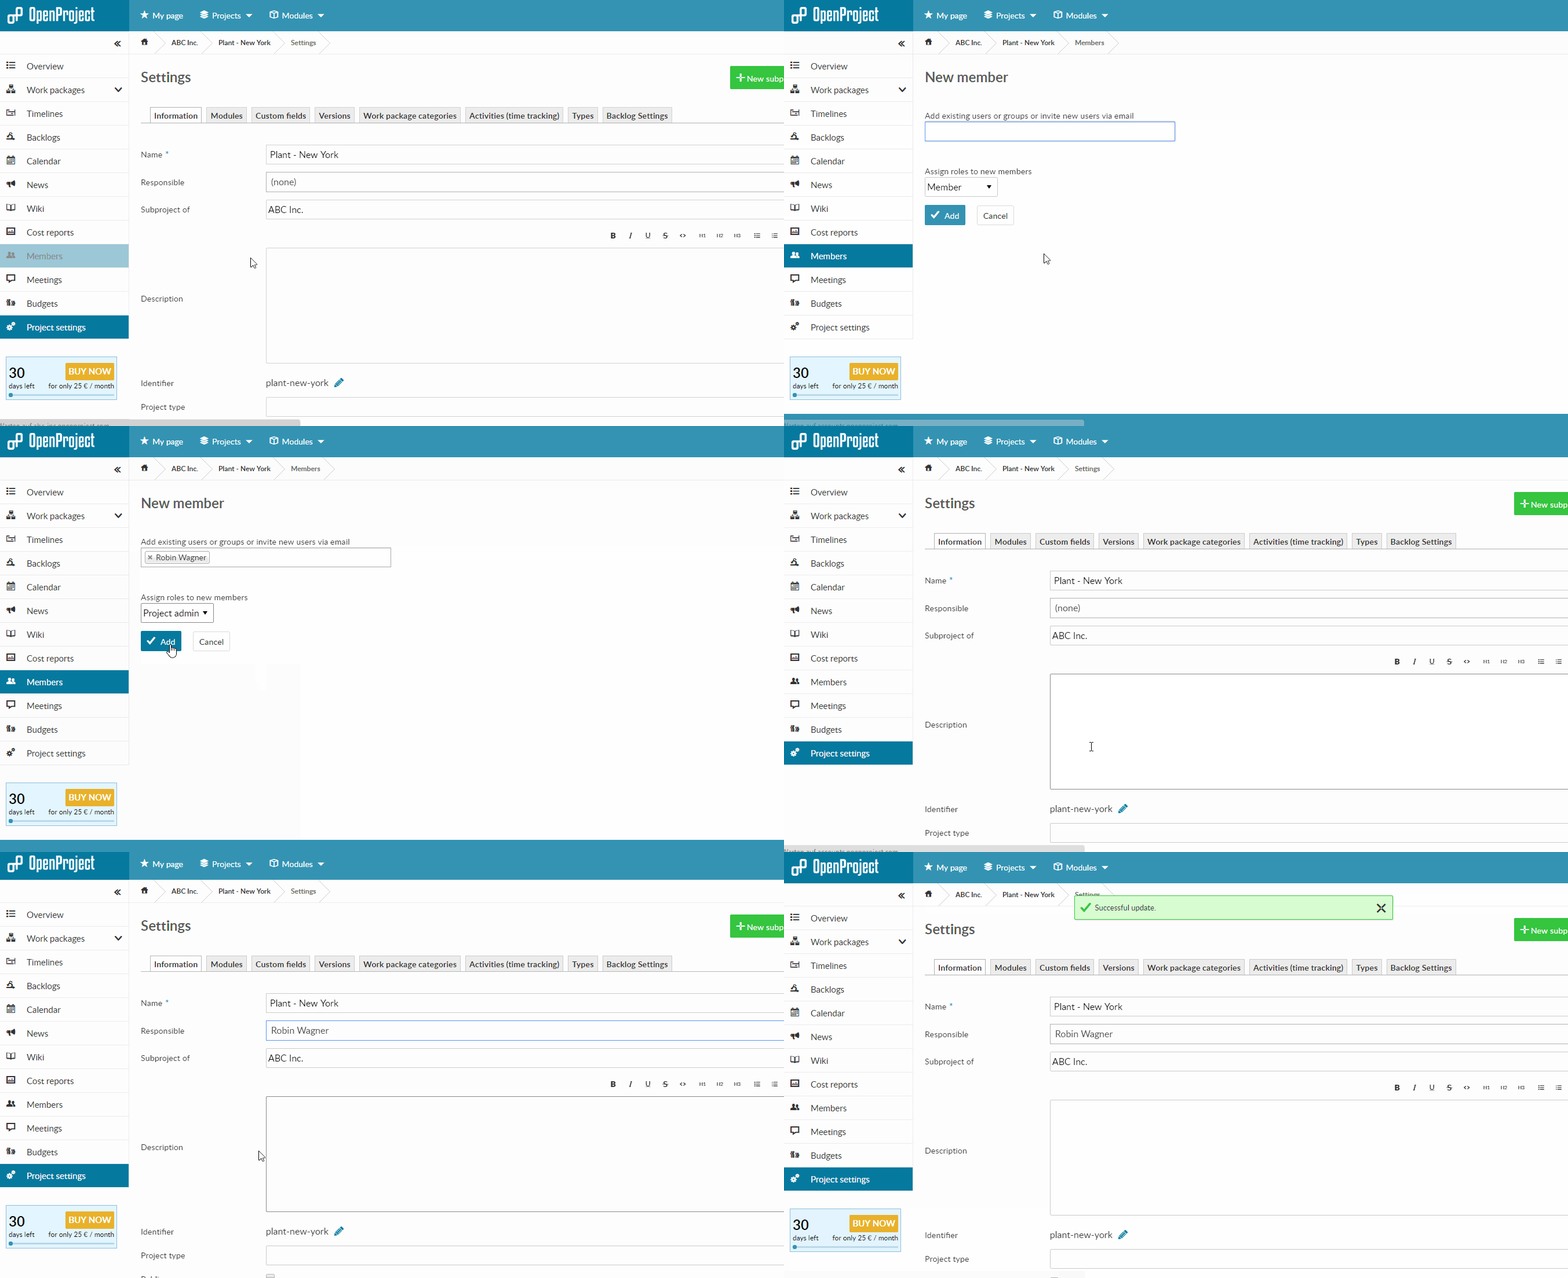
Upon creating those project, the company adds users to the different projects while giving users different permissions (roles) in the projects.
Managers - who should have more permissions within a project - get the role “Project admin” while project members get the role “Members”.
For each project the project responsible is assigned in the project settings.
The functionality and scope of each project can be customized. Since the main project is mainly used only for reporting purposes, only the modules “Timelines” and “Work package tracking” are activated in the project settings.
Since some of the projects are recurring, ABC Inc. also creates a project which serves as a template for similar projects.
Those templates can then copied in the project settings.
2. Projektdefinition und Projektplanung
The goal of the project should be immediately clear, therefore ABC Inc. adds a description to each of its projects, detailing its scope.
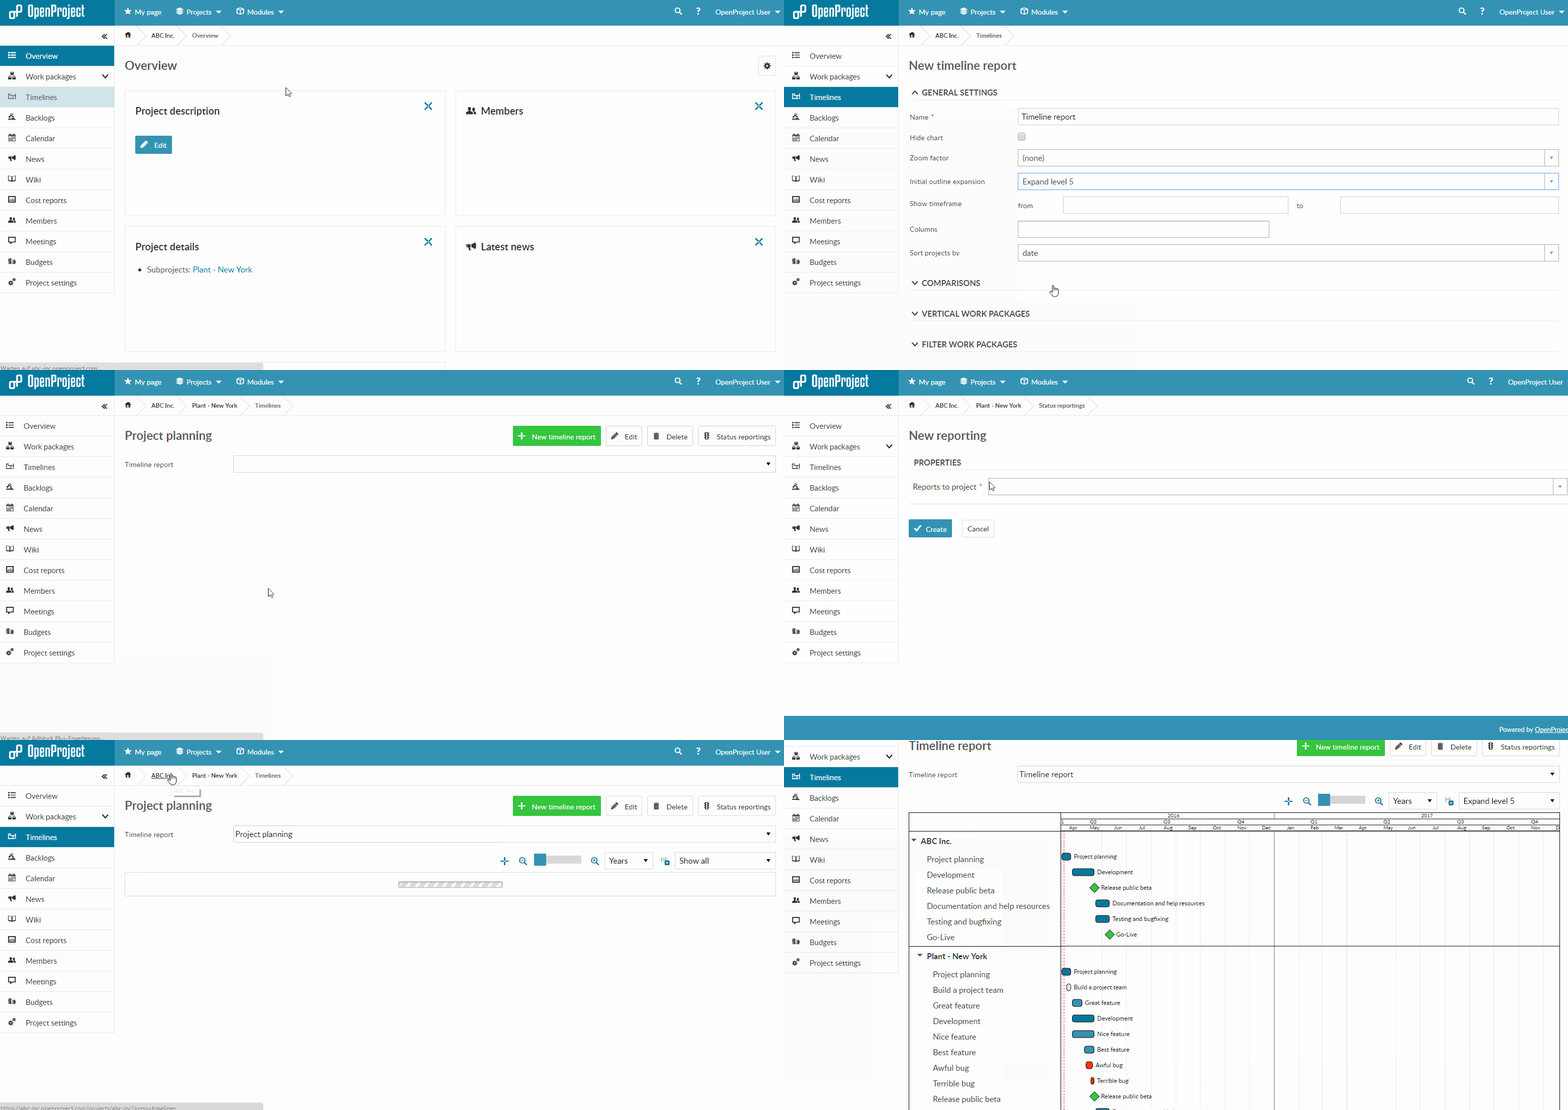
In order to visualize the phases and milestones in the project, the company creates a timeline in the main projects and in the various sub projects.
Using status reportings, the company creates a multi-project timeline report and displays the timeline for the main project and sub-projects in the main project.
In order to inform new project members directly about the current state of planning, the status report is then included in the project overview page.
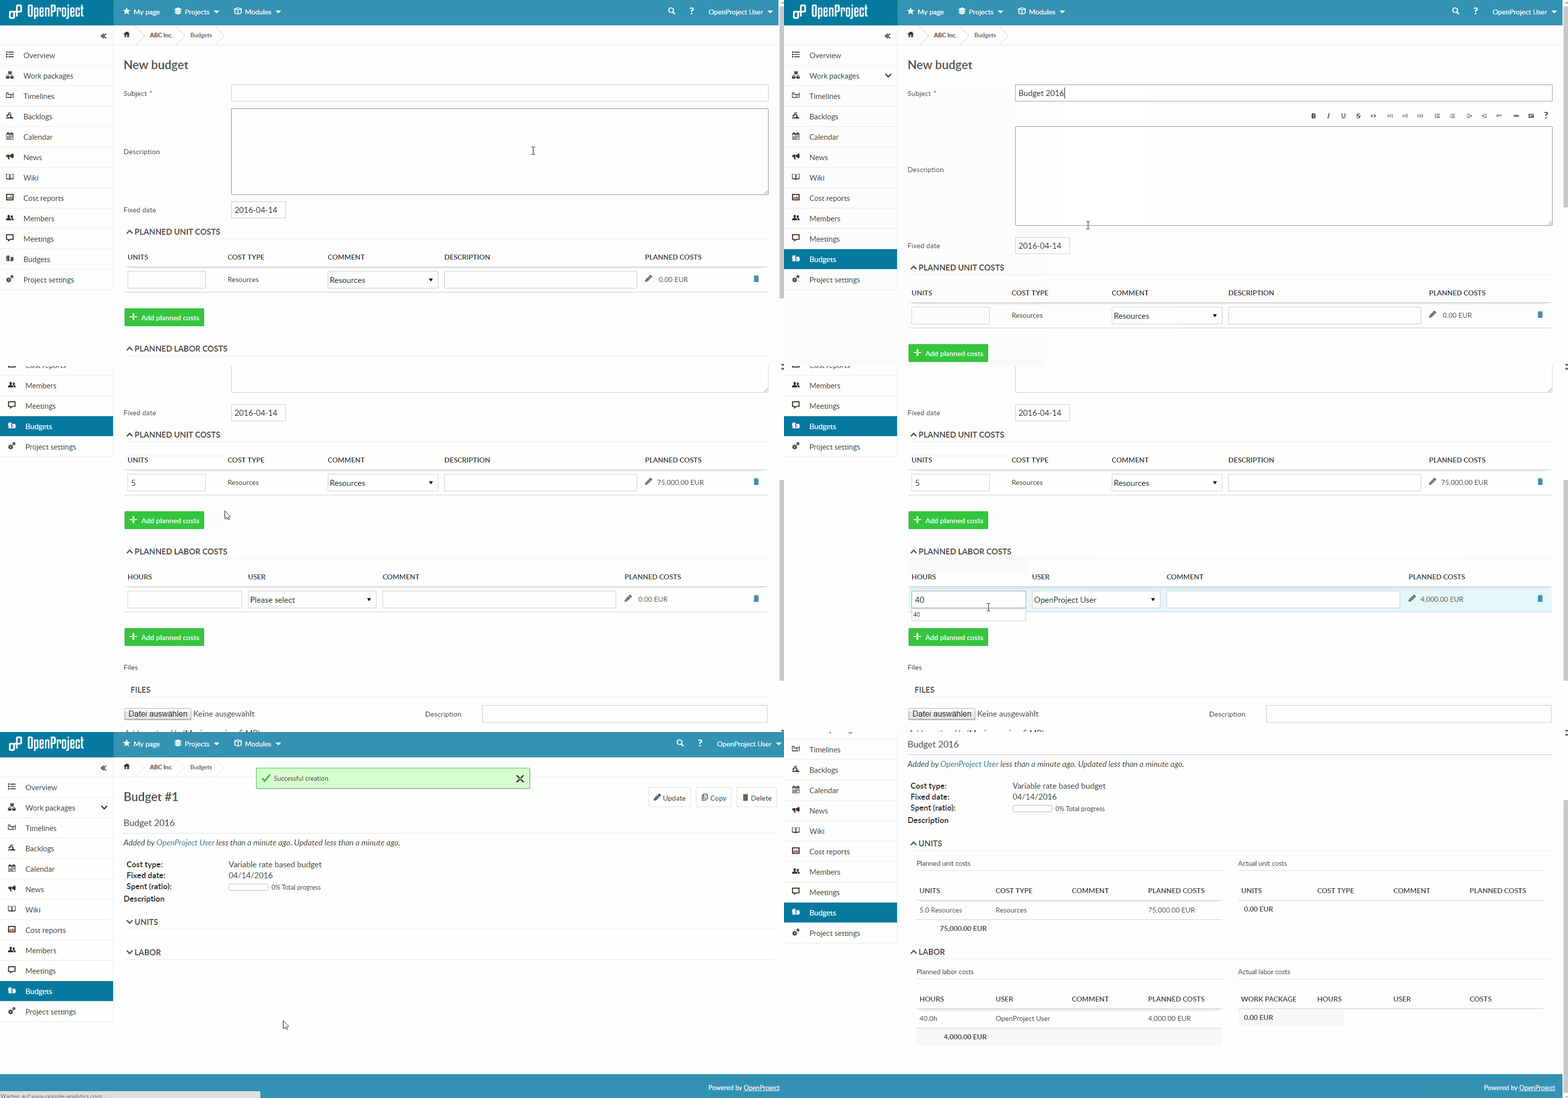
Controlling cost and effort is an important factor in measuring a project’s success. Therefore, a project budget is created in order to track spending.
The budget can be created by selecting Budget in the side navigation and then click + Budget.
Unit cost and personnel coste can be assigned to the budget.
3. Project launch & execution
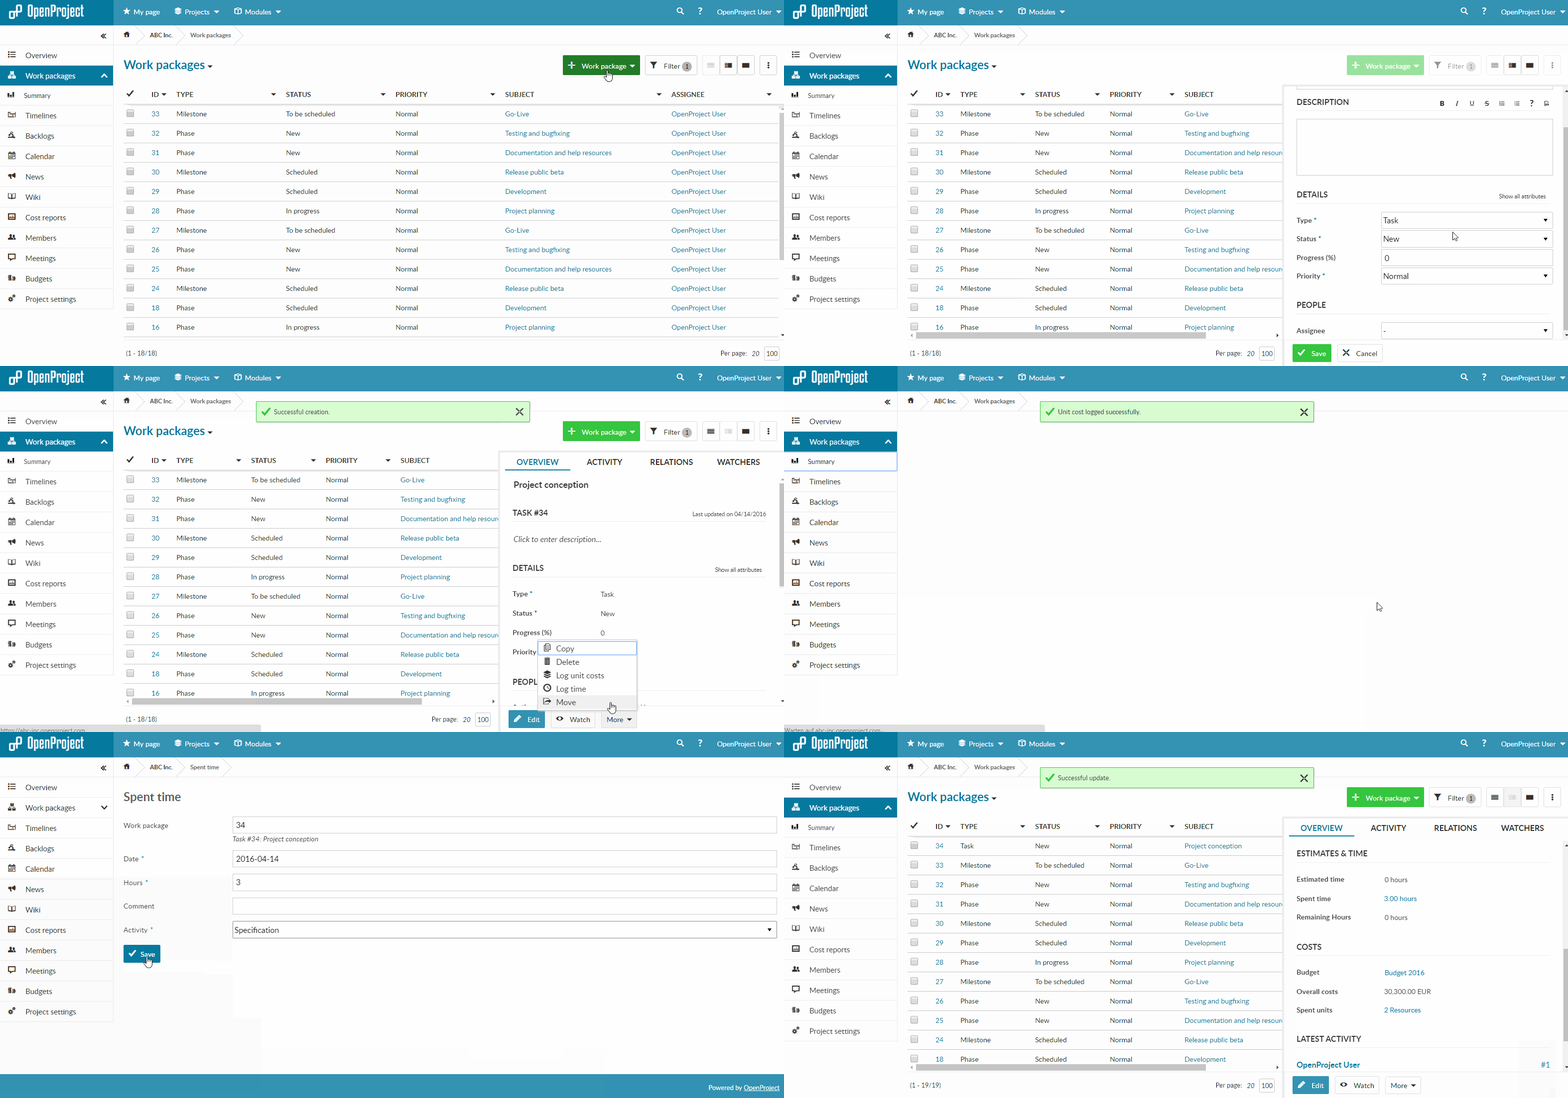
With the setup and configuration complete project members can now start to create and update work packages in the project.
In order to map the effort within the project to the budget, the work packages which are associated with the budget are assigned to it.
When time or unit costs are logged on one of these work packages, the budget is updated accordingly.
During the project’s duration users can create meetings for coordination and document progress in wiki pages.
4. Project performance & control
The performance of a project can be tracked by using the budget and comparing recorded costs with projected expenses.
Changes and delays which occur during a projects life time can additionally be recorded using the planning comparison in the timeline.
5. Projektabschluss
Upon completion of a project, the project can be archived and is no longer accessible. Archived projects can later be unarchived.
Alternatively, projects can be deleted completely.
Need a demo?
Wenn Sie einen Blick auf OpenProject werfen oder alle Funktionen ausgiebig testen möchten, erstellen Sie einfach eine kostenlose OpenProject-Testversion.


