Activité du projet et du lot de travaux
OpenProject vous permet de suivre facilement ce qui se passe dans les lots de travaux spécifiques et dans vos projets.
Activité du lot de travaux
L’onglet Activité d’un lot de travaux conserve un historique de toutes les mises à jour et modifications, ainsi que de toutes les conversations concernant ce lot de travaux. Cet onglet est accessible à la fois dans l’affichage complet des lots de travaux et en mode écran partagé.
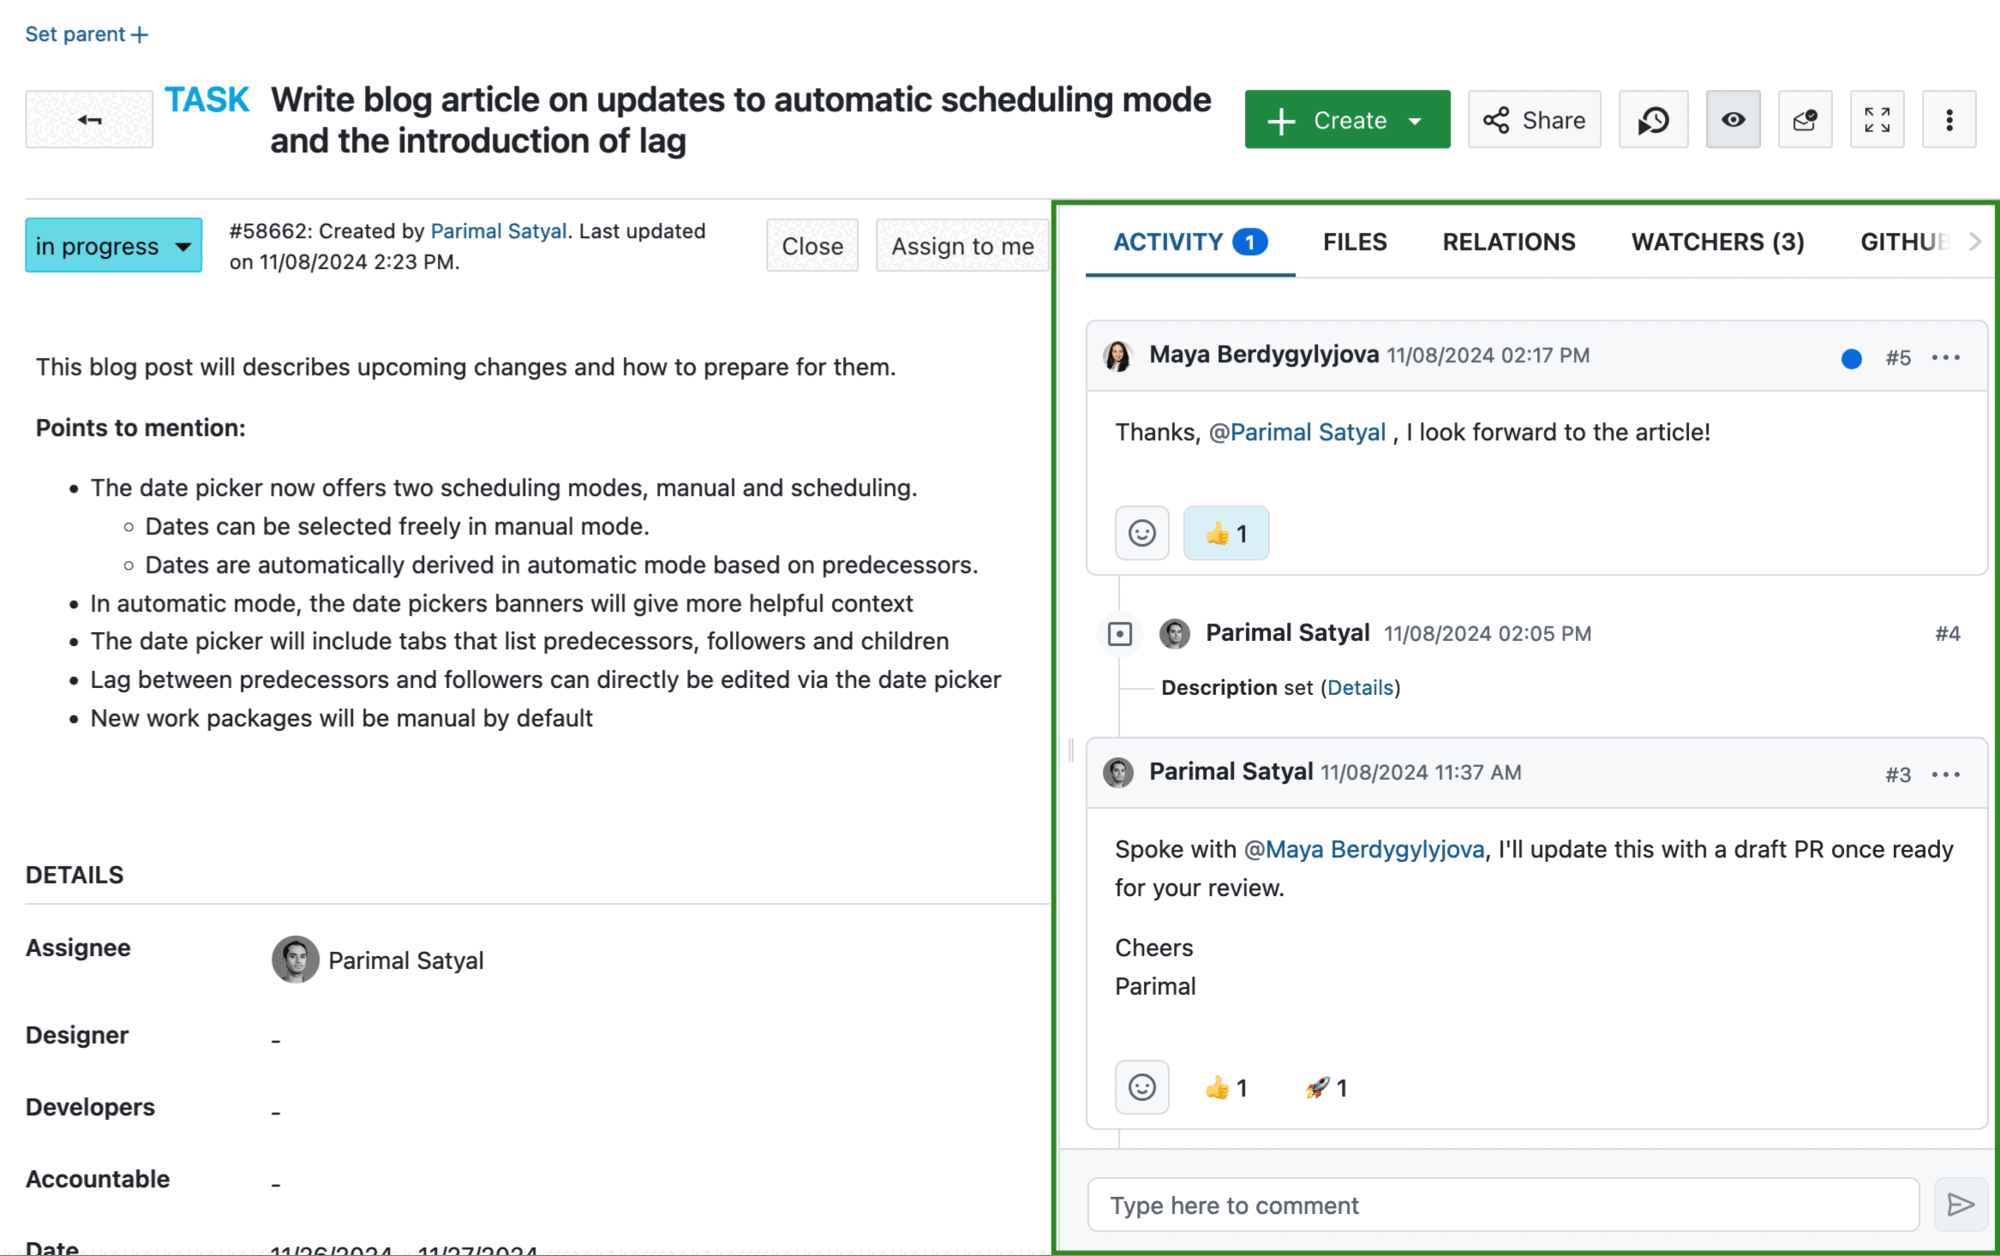
Lorsque vous accédez à cet onglet pour la première fois, vous verrez les commentaires et la liste des modifications dans une chronologie. Cette chronologie peut être classée par ordre chronologique (les commentaires les plus récents en bas) ou anti-chronologique (les commentaires les plus récents en haut) :
Vous pouvez classer les activités pour que les plus récentes apparaissent en haut ou en bas](Activity-sortOrder.png)
Vous pouvez faire défiler l’écran vers le haut ou vers le bas pour avancer ou reculer dans le temps.
Par défaut, l’onglet Activité affiche les commentaires et les modifications, mais vous pouvez le filtrer pour n’afficher que l’un ou l’autre :
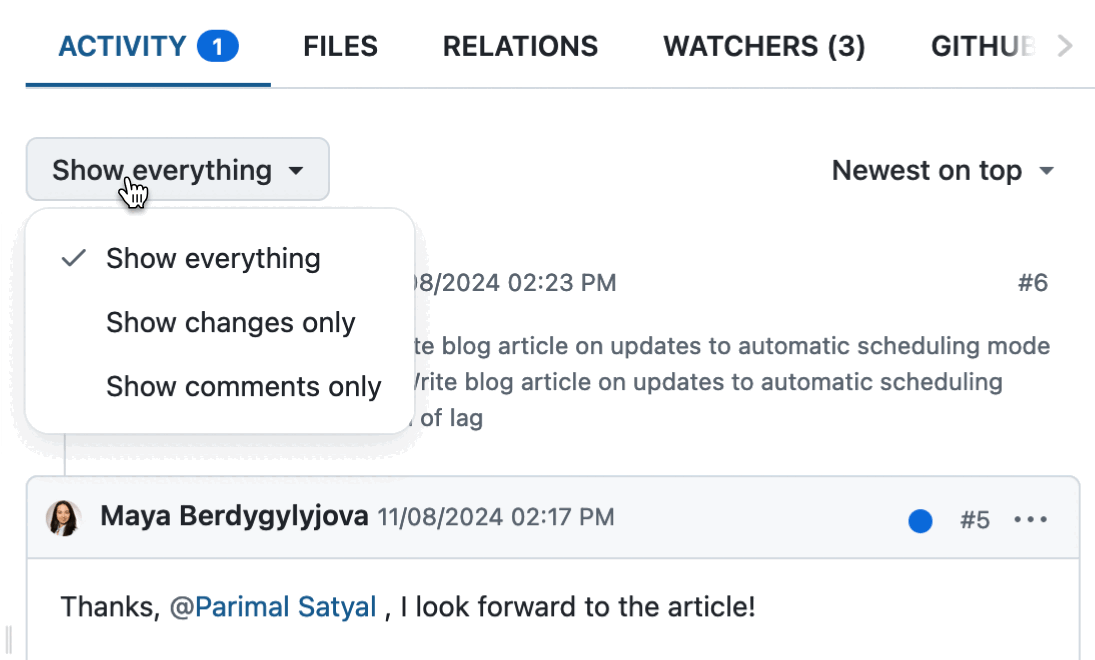
Modifier des ensembles
Lorsque vous ou un autre utilisateur apportez des modifications au lot de travaux, les mises à jour sont répertoriées sous le nom de l’auteur de ces modifications. Toutes les modifications effectuées au cours de la période d’agrégation (définie par l’administrateur) sont regroupées dans un ensemble de modifications.

Si un commentaire a également été ajouté, les modifications sont listées sous le commentaire associé.
Commentaires
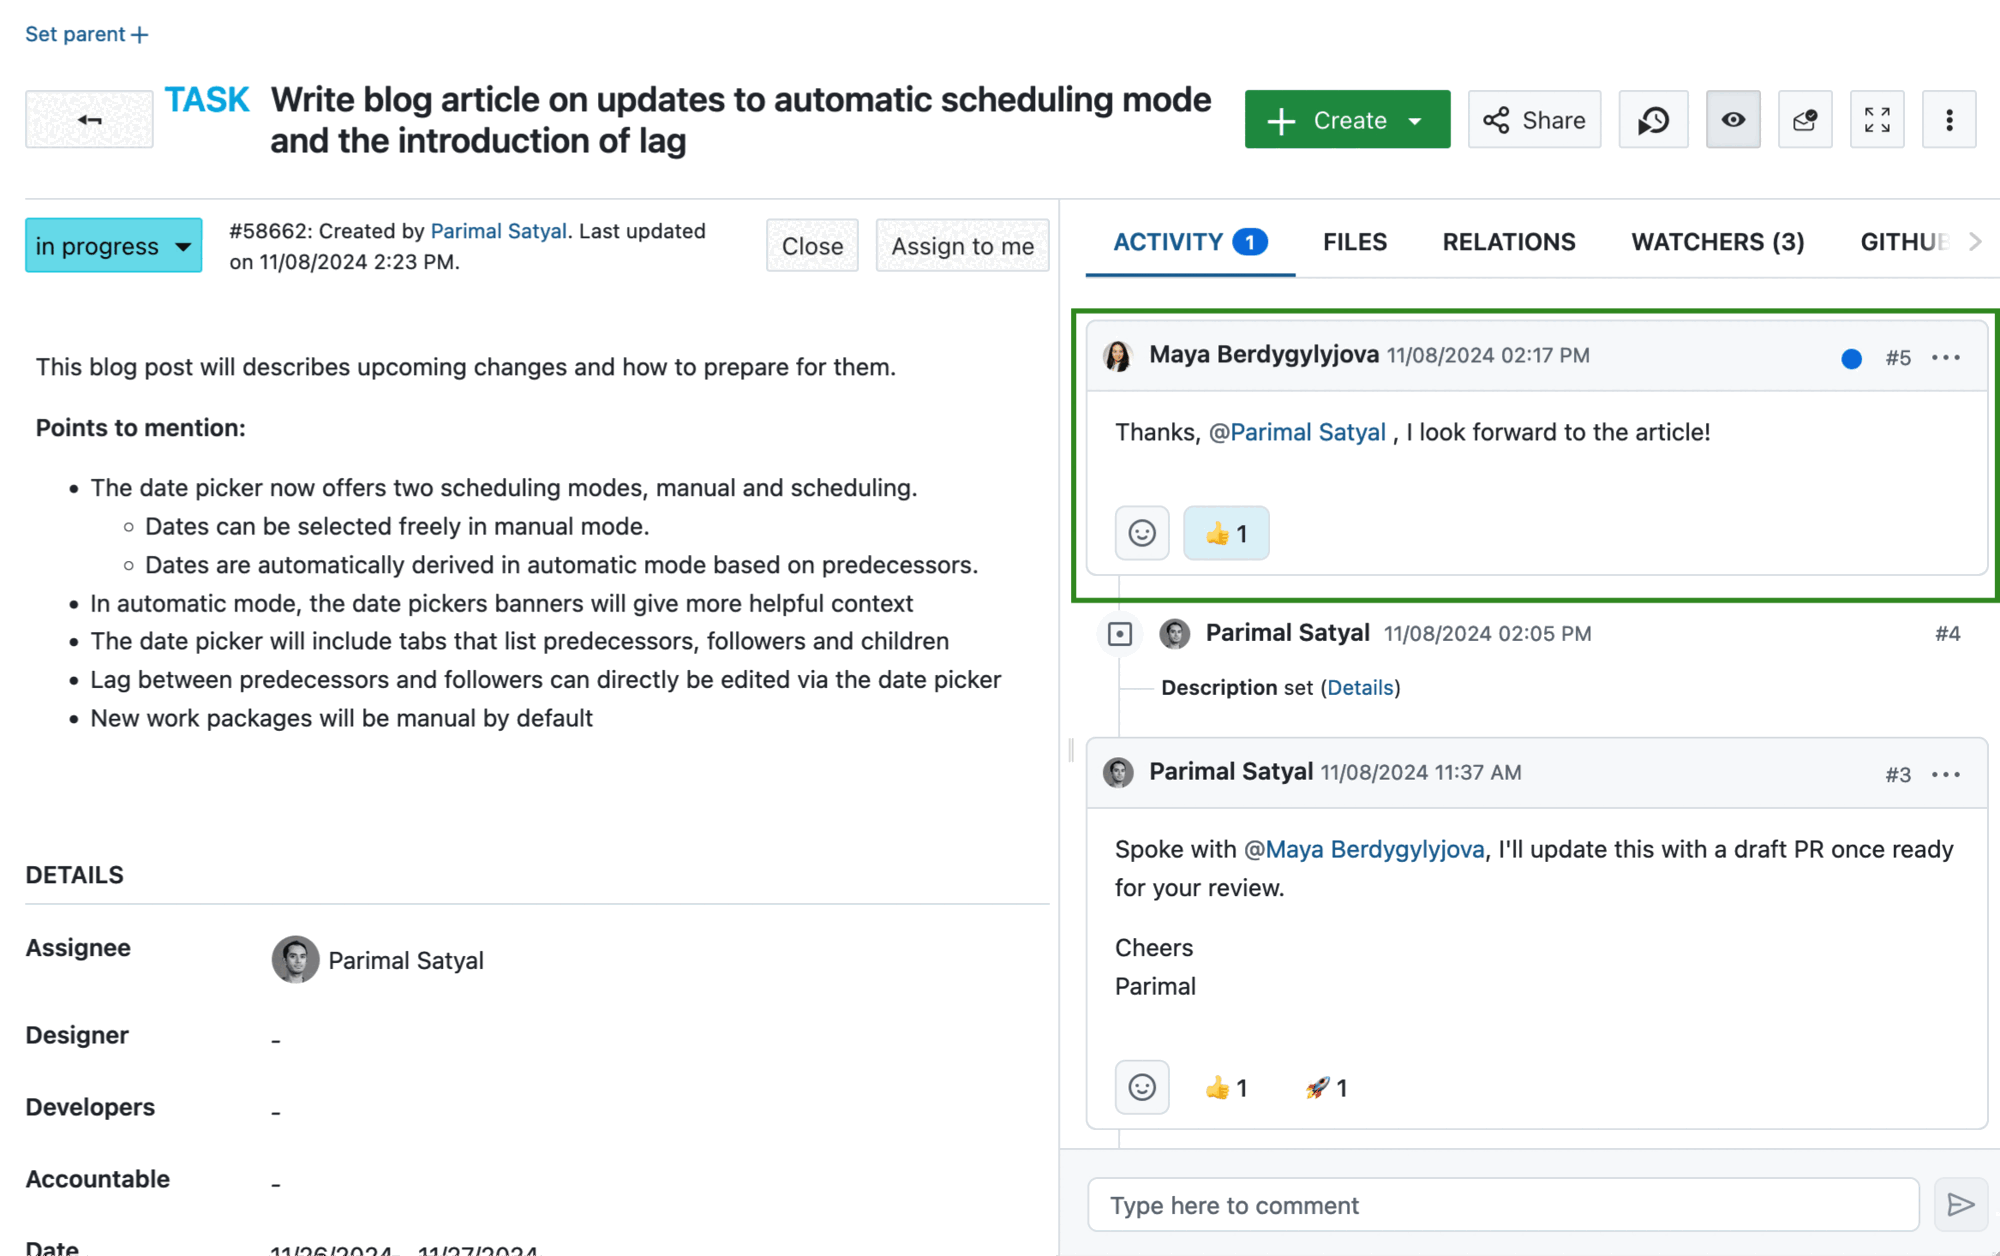
Les commentaires vous permettent d’avoir une conversation avec les autres membres du projet au sujet du présent lot de travaux, ou de commenter les modifications que vous avez apportées.
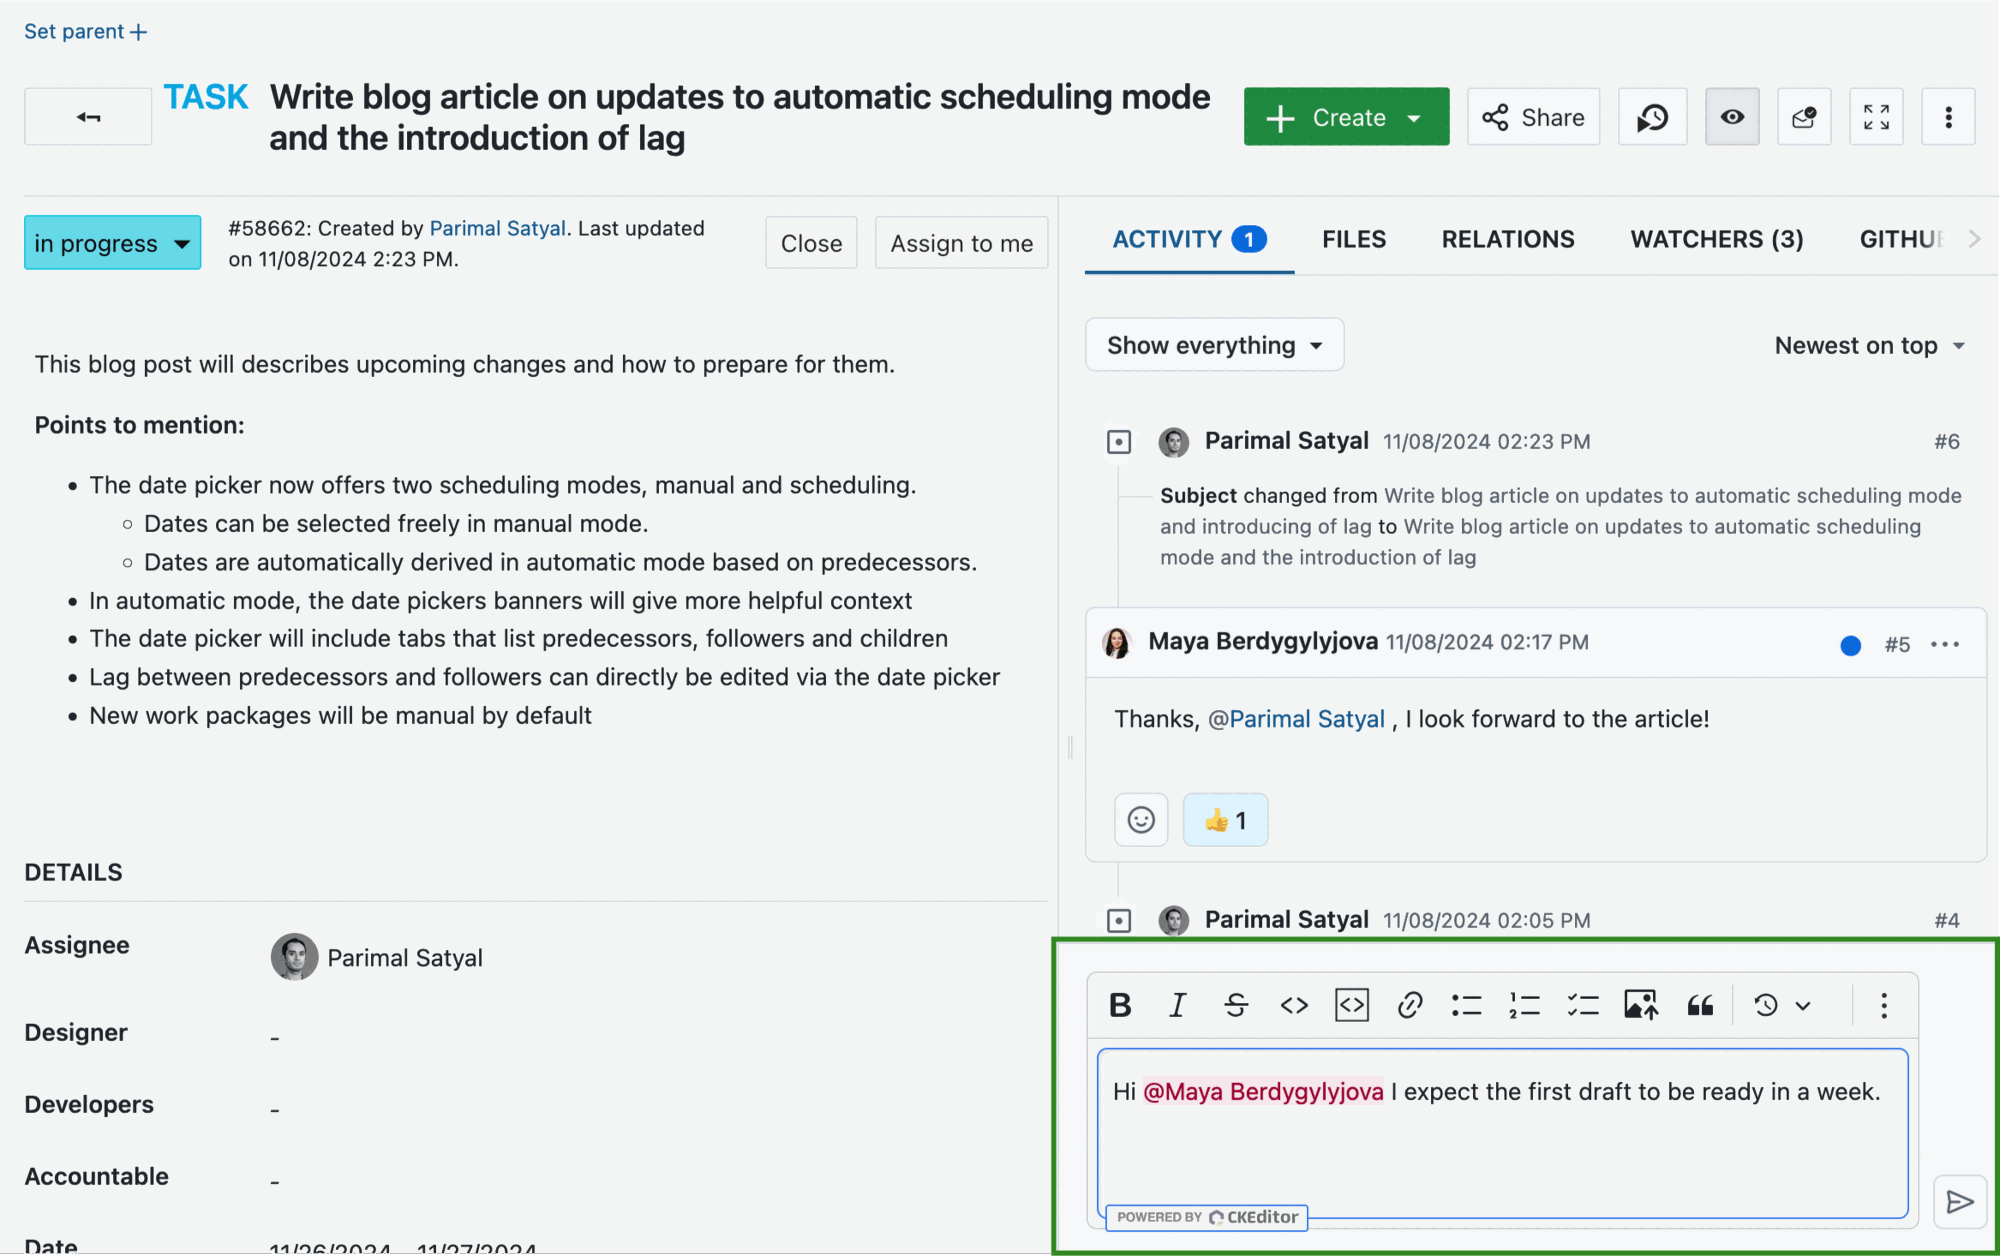
Pour ajouter un nouveau commentaire à un lot de travaux, cliquez sur la boîte de commentaire en bas de l’onglet Activité. Cela le développera et vous donnera accès à des options de formatage. Cliquez sur l’icône de publication ou appuyez sur les touches Commande + Entrée de votre clavier pour publier votre commentaire.
L’icône plus (⋯) située à côté d’un commentaire vous permet d’accéder à un certain nombre de fonctions supplémentaires.
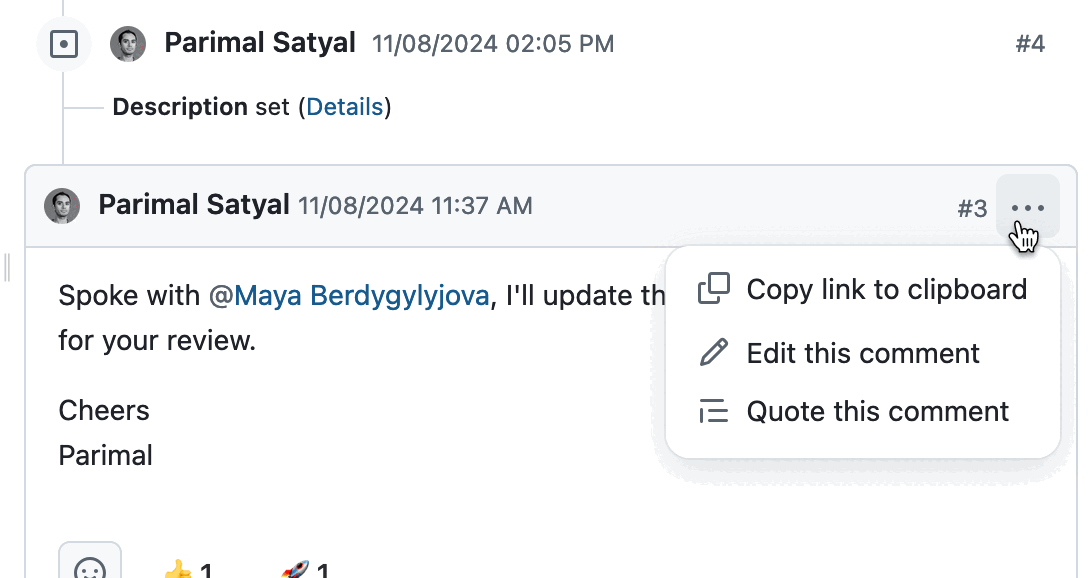
Vous pouvez :
- Copiez un lien vers le commentaire dans votre presse-papiers si vous souhaitez coller un lien vers ce commentaire ailleurs.
Conseil
Le fait de suivre un lien profond fait automatiquement défiler la page de manière à ce que le commentaire lié apparaisse en haut de la page et soit brièvement mis en évidence par une bordure bleue. Après l’interaction suivante, la surbrillance disparaît et l’URL reprend sa forme normale.
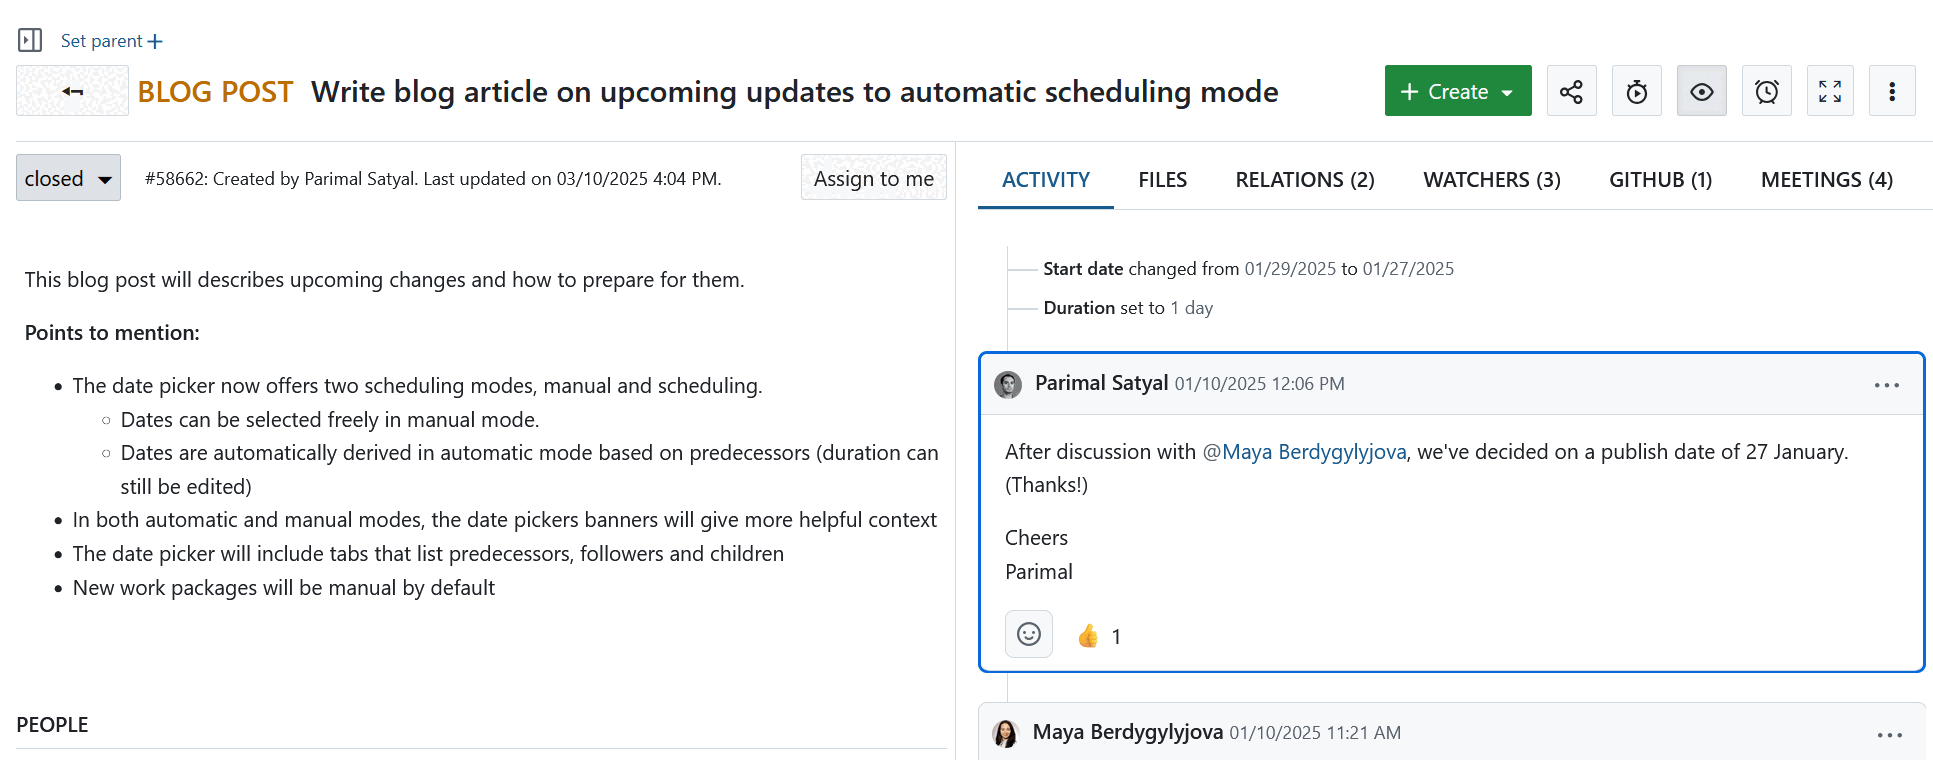
-
Vous pouvez modifier le commentaire si vous en êtes l’auteur.
-
Vous pouvez citer le commentaire de quelqu’un d’autre dans un nouveau commentaire. Cette fonction est utile si vous souhaitez répondre à une partie précise d’un commentaire.
Commentaires internes (add-on Enterprise)
[NOTE] Les commentaires internes sont un add-on Enterprise et ne peuvent être utilisés qu’avec l’édition Enterprise cloud ou Enterprise sur site. Une mise à niveau à partir de l’édition Community gratuite est facilement possible.
Les projets peuvent inclure des clients ou des fournisseurs externes, qui peuvent être invités à participer à un projet ou à un lot de travaux individuel avec des rôles restreints. Pour que les discussions sensibles (p. ex., les tarifs, les négociations ou les détails financiers et contextuels) restent confinées à l’équipe principale, il est possible d’utiliser des commentaires internes. Ces commentaires ne sont visibles que par les utilisateurs autorisés et ne sont pas accessibles aux participants externes. Cela permet aux équipes de gérer les informations sensibles directement au sein des lots de travaux et d’éviter d’utiliser des outils externes, tout en conservant une source unique de vérité.
Conseil
Pour utiliser la fonctionnalité des commentaires internes, un administrateur de projet doit d’abord l’activer en naviguant vers Paramètres du projet → Lots de travaux → Onglet Commentaires internes. Par défaut, les commentaires internes ne sont visibles que par l’administrateur du projet. Cependant, pour un accès plus large, un administrateur d’instance peut accorder des autorisations pour visualiser, écrire et éditer des commentaires internes à n’importe quel rôle existant ou nouveau. Ces autorisations doivent être explicitement attribuées pour que la fonctionnalité soit utilisable. Si les autorisations sont supprimées, les commentaires internes ne seront plus visibles pour ces rôles.
Les commentaires internes se distinguent des autres commentaires par une couleur différente et une icône de verrouillage.
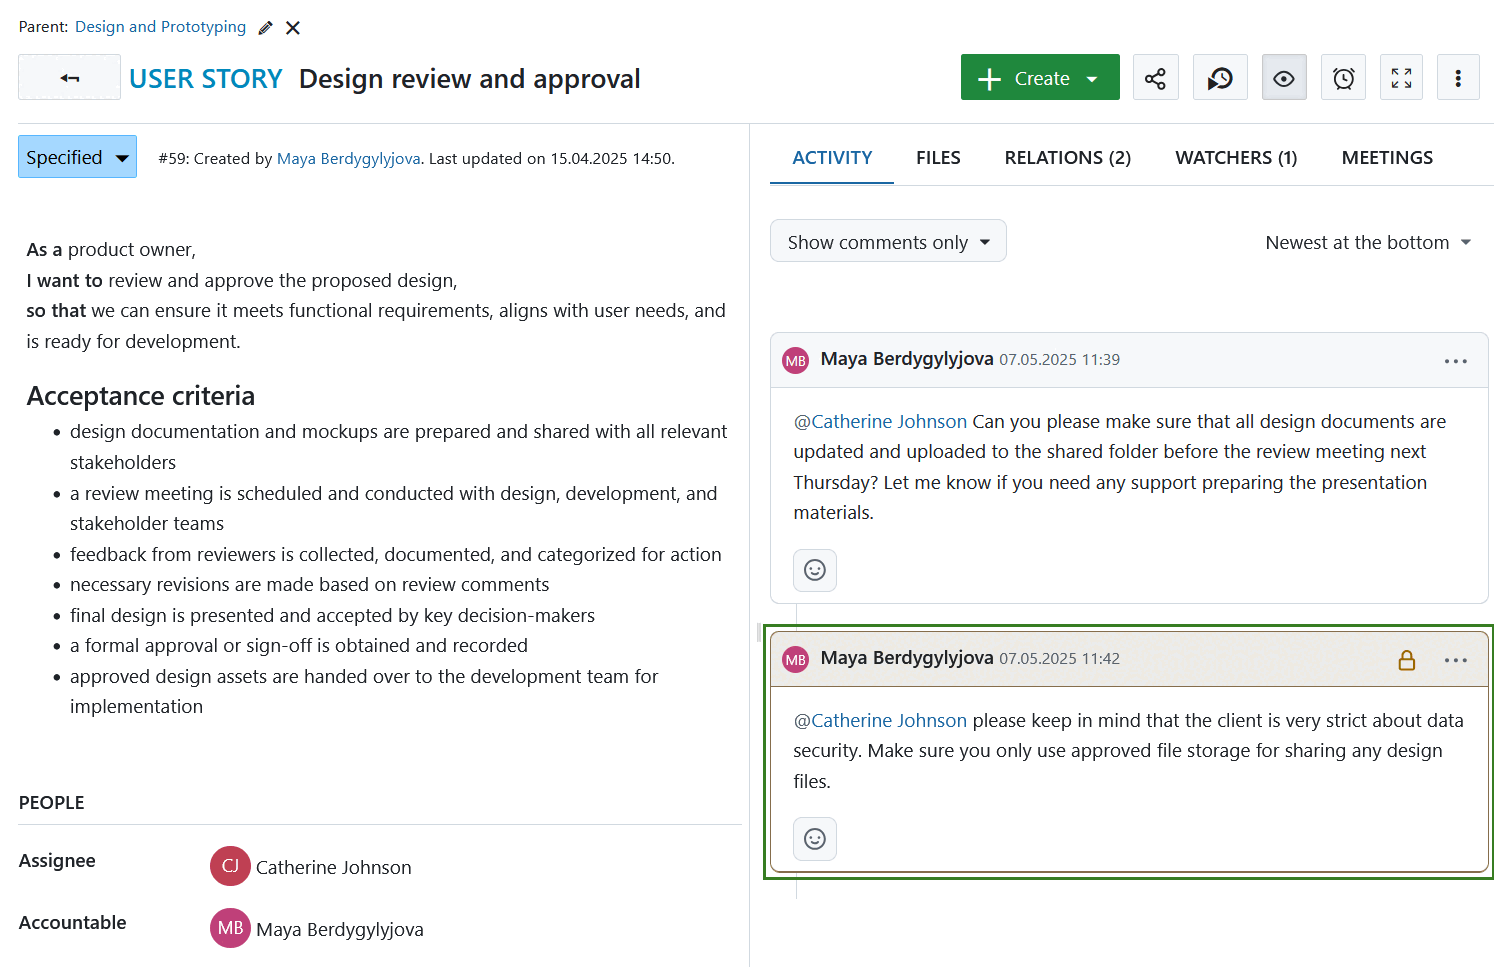
Pour rédiger un commentaire interne, procédez de la même manière que pour un commentaire ordinaire, mais veillez à cocher la case Commentaire interne avant de l’envoyer.
Important
Une fois publié, un commentaire ordinaire ne peut plus être marqué comme interne et un commentaire interne ne peut plus être rendu public.
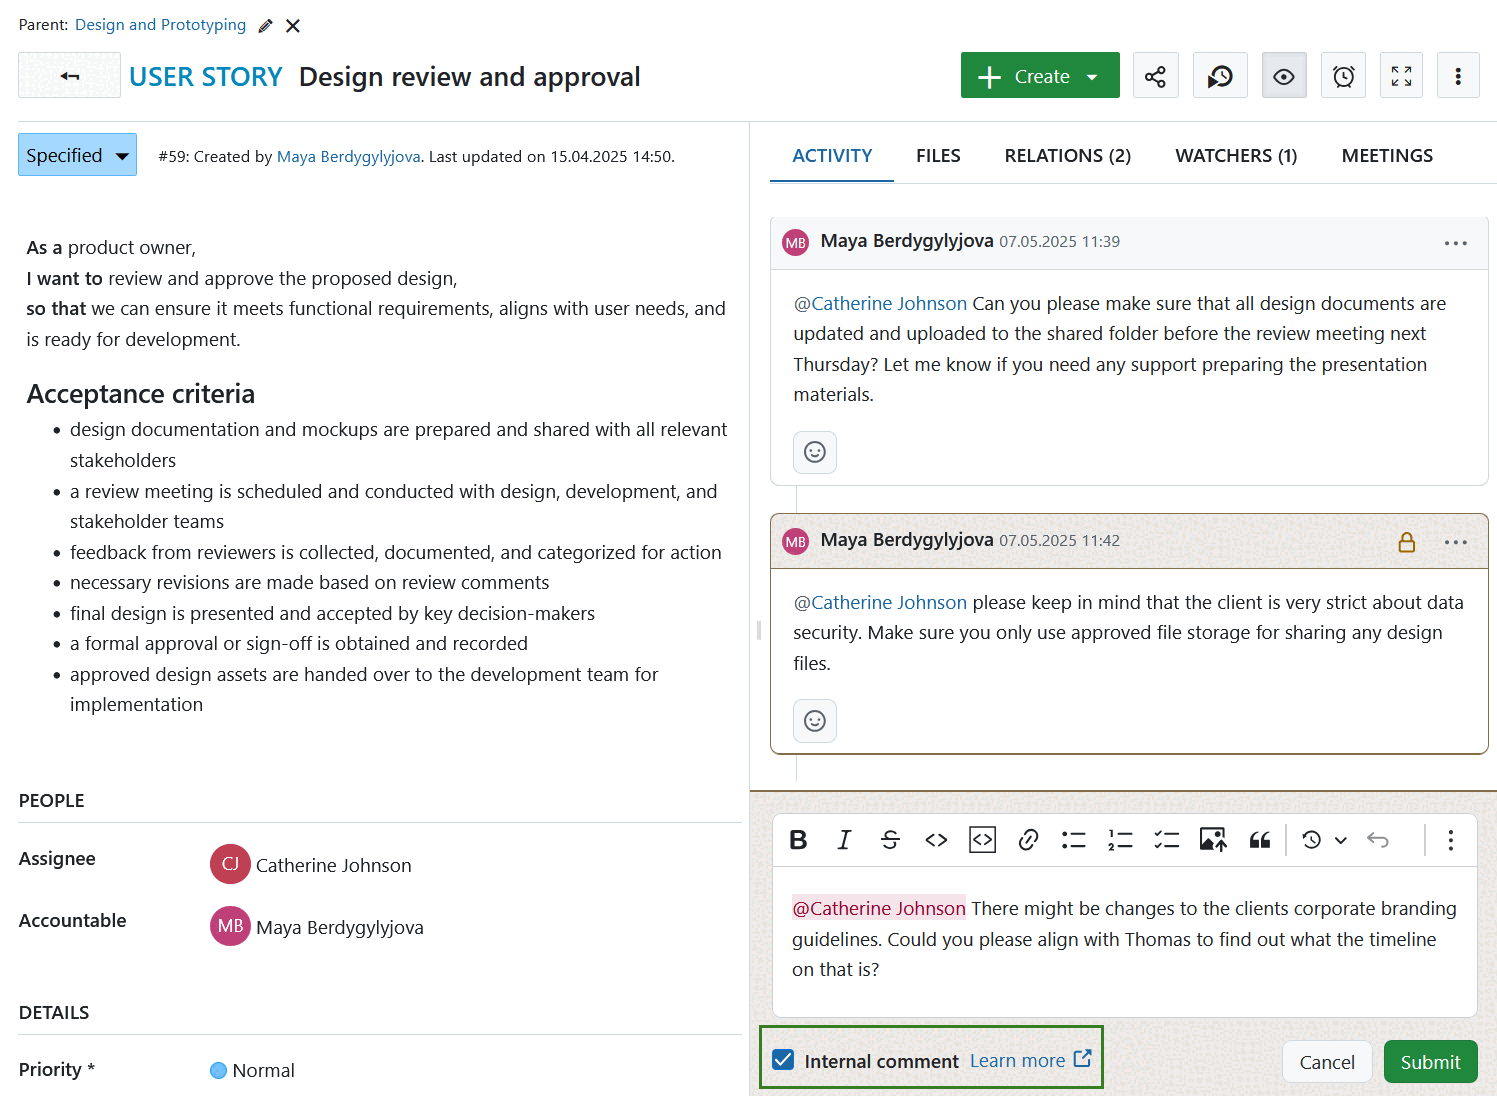
Comme pour les commentaires publics, vous pouvez :
- Copier un lien vers un commentaire interne dans votre presse-papiers,
- Modifier un commentaire interne si vous en êtes l’auteur ou si vous disposez des droits suffisants pour modifier les commentaires ajoutés par d’autres utilisateurs,
- Citer le commentaire interne de quelqu’un d’autre dans un nouveau commentaire. Ce nouveau commentaire sera par défaut un commentaire interne.
Pour utiliser ces options, cliquez sur le menu (…) à côté de l’icône du cadenas sur le côté droit du commentaire.
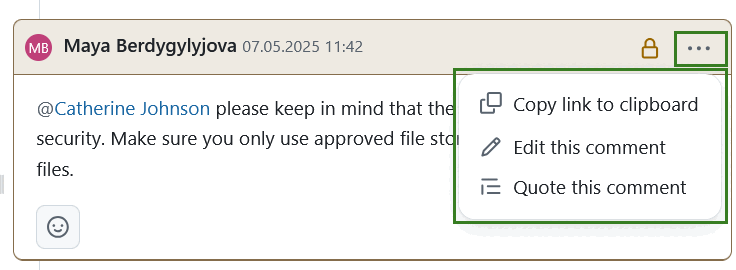
Conseil
Il est actuellement impossible d’afficher une liste de tous les autres utilisateurs d’un projet qui peuvent lire et ajouter des commentaires internes. Nous comprenons qu’il s’agit d’une fonctionnalité importante et nous prévoyons de l’ajouter dans une prochaine version.
Emojis de réaction
À partir de la version 15.0, vous pouvez répondre aux commentaires par des réactions emoji pour communiquer rapidement des messages de base sans avoir à ajouter de commentaire.
Pour ce faire, cliquez sur l’icône emoji à côté de chaque commentaire et choisissez l’un des huit emojis possibles.
Cliquez sur l’icône emoji pour voir la liste des emojis disponibles](Activity-addEmoji.png)
Vous pouvez ajouter plusieurs emojis ou simplement cliquer sur un emoji déjà utilisé par quelqu’un d’autre pour le compléter.
Conseil
Veuillez noter que les réactions emoji ne déclenchent pas de notification. Si vous souhaitez que votre collègue soit informé de votre réaction, laissez un commentaire normal.
Mentions
Si vous souhaitez adresser votre commentaire à des membres particuliers du projet ou attirer leur attention, vous pouvez les @mentionner. Pour ce faire, tapez @ et sélectionnez l’utilisateur que vous souhaitez mentionner.
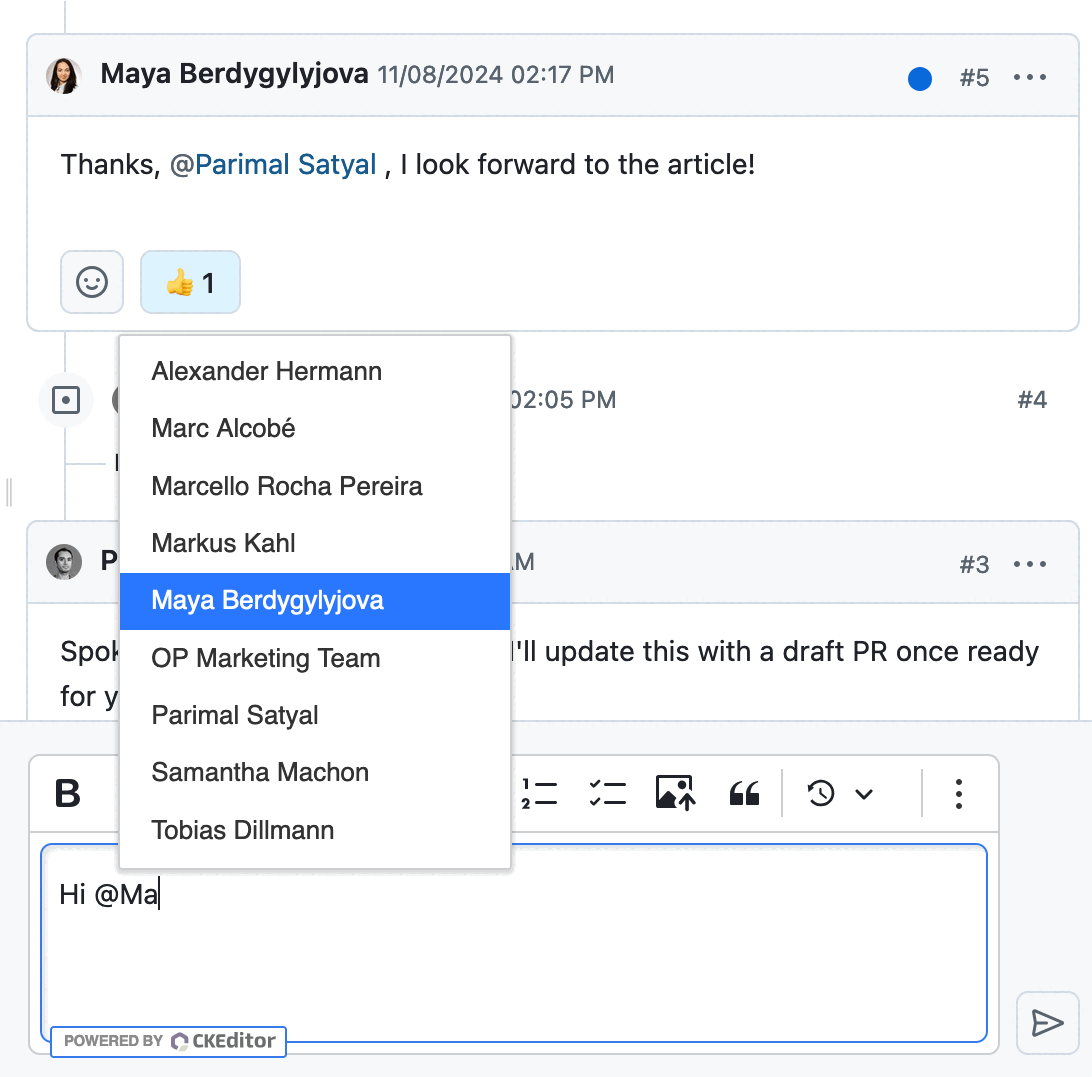
L’utilisateur recevra alors une notification qui lui permettra de voir facilement le commentaire dans lequel il a été mentionné.
Mises à jour automatiques
Depuis OpenProject 15.0, les modifications apportées par d’autres utilisateurs au module de travail actuellement ouvert sont visibles presque immédiatement, en temps réel. Par exemple, si quelqu’un change le responsable, modifie la description et laisse un commentaire, tous ces éléments seront automatiquement répercutés dans le lot de travaux ouvert sans aucune action de votre part.
Conseil
Si vous êtes en train d’éditer un lot de travaux et que quelqu’un d’autre l’édite en même temps, vous recevrez un avertissement vous indiquant que vous ne pourrez pas enregistrer vos modifications tant que vous n’aurez pas actualisé la page. Cela vous permet de copier votre travail ailleurs afin qu’il ne soit pas perdu et que vos modifications n’écrasent pas celles de quelqu’un d’autre.
Activité du projet
OpenProject vous permet de voir un aperçu de tous les changements récents dans un projet. Celles-ci incluent les modifications vers:
- lots de travaux (nouveaux lots de travaux, nouveaux commentaires, changement de statut, assigné, dates, champs personnalisés…)
- attributs du projet (nom, description, champs personnalisés..)
- autres modules (actualités, budget, modification du wiki, messages du forum, temps enregistré…)
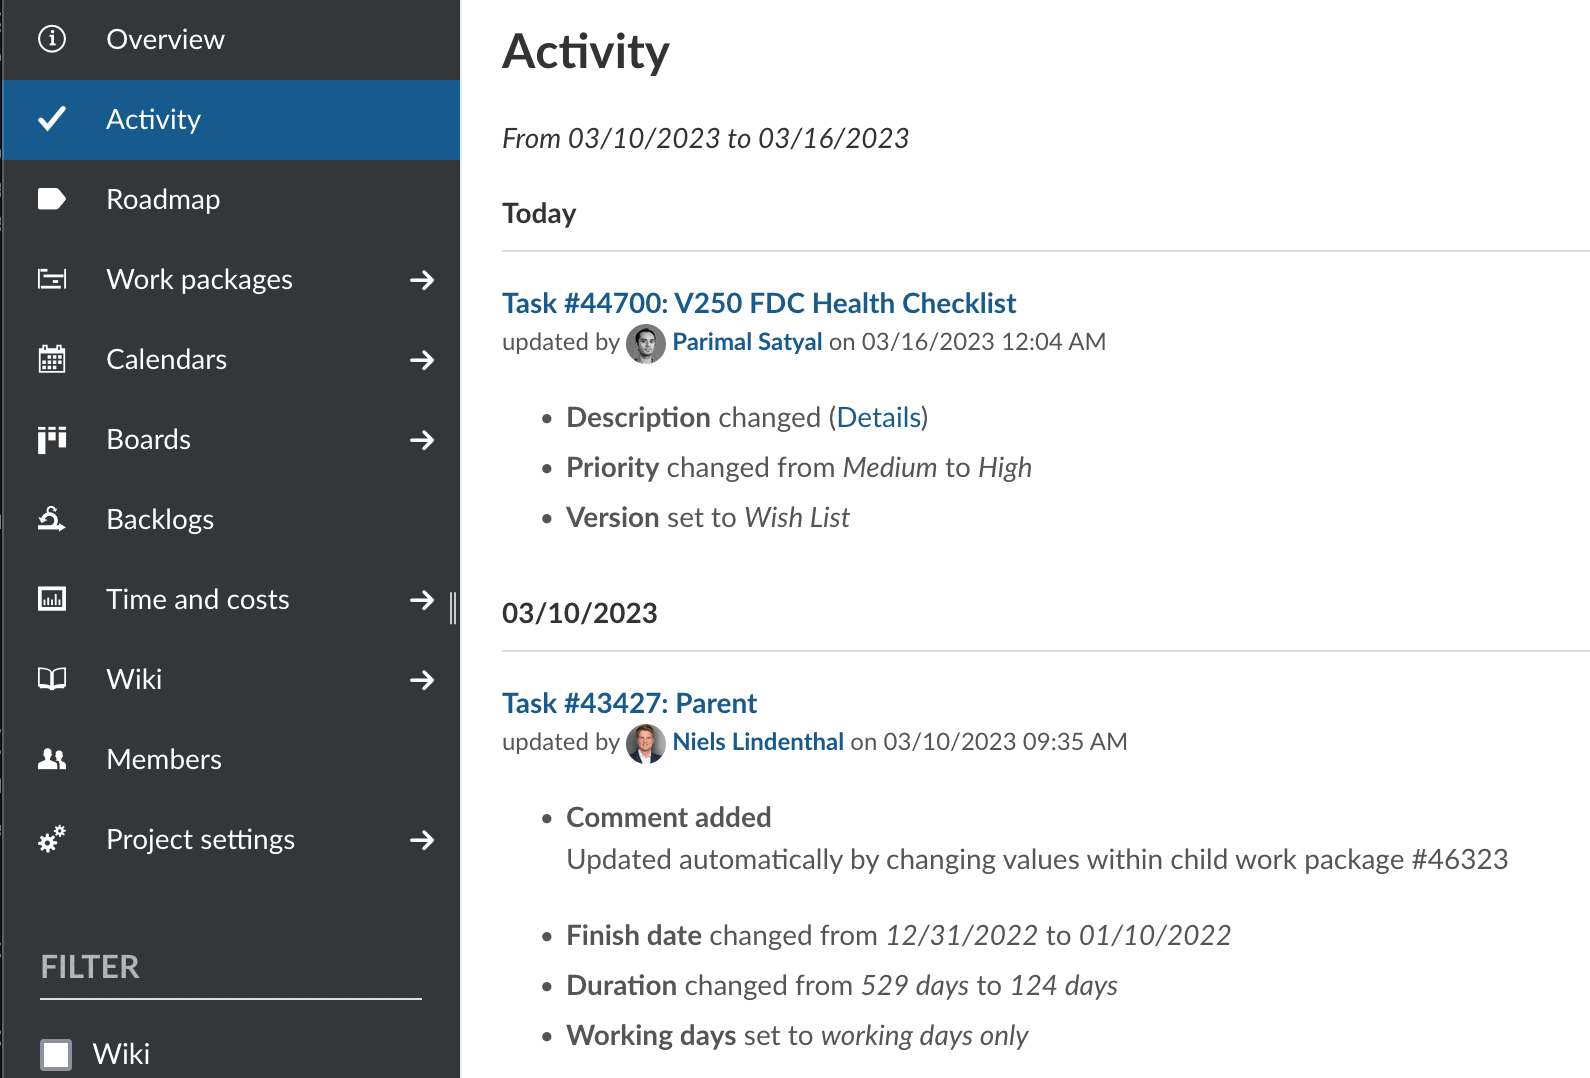
Pour voir l’activité du projet, le module Activité doit d’abord être activé.
Activer l’activité du projet
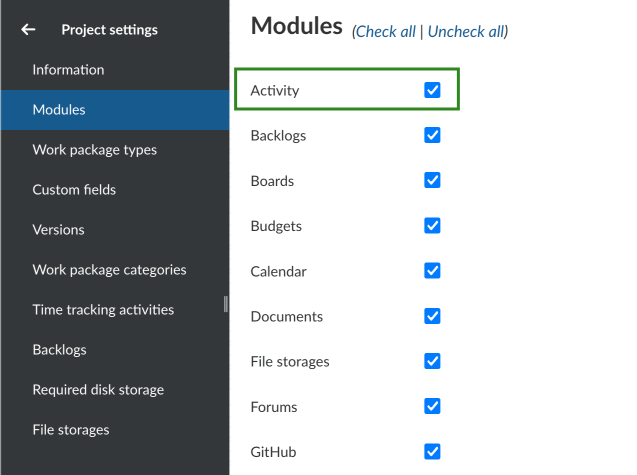
Dans un projet, accédez à la page Paramètres du projet > Modules. Assurez-vous que le module Activité est activé et cliquez sur le bouton Enregistrer en bas de la page.
Visualisation de l’activité du projet
Cliquer sur l’option Activité qui est maintenant visible dans la barre latérale d’un projet. Cela vous montrera l’activité récente dans le projet, avec les changements les plus récents en haut.
Pour chaque mise à jour concernant un lot de travaux, vous verrez :
- l’identifiant et le titre du lot de travaux
- le nom du projet ou du sous-projet auquel appartient le lot de travaux (en parenthèses)
- l’utilisateur responsable de la modification
- la date et l’heure des modifications (agrégées)
- une liste d’attributs qui ont été modifiés

À partir de la version 12.5, le module Activité répertorie également les modifications aux attributs du projet, y compris les champs personnalisés du projet. Pour chaque mise à jour, vous verrez :
- le nom du projet ou du sous-projet
- l’utilisateur responsable de la modification
- la date et l’heure des modifications (agrégées)
- une liste d’attributs qui ont été modifiés

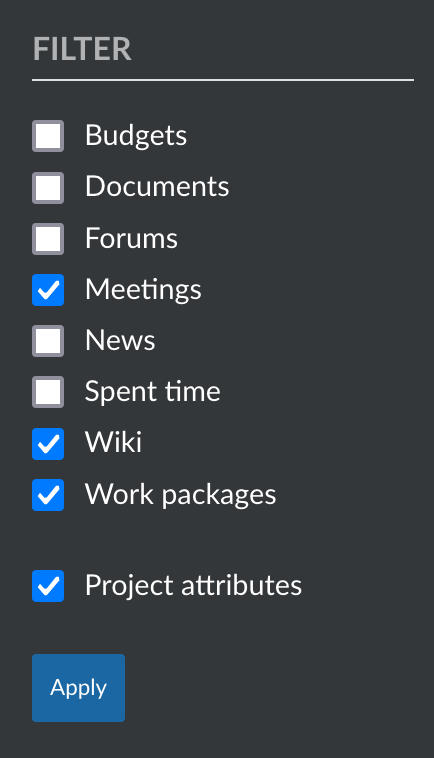
Filtrage de l’activité du projet
Pour filtrer la liste des activités du projet, utilisez les filtres dans la barre latérale. Vous pouvez filtrer pour n’afficher qu’une seule ou une combinaison de modifications qui concernent :
- Budgets
- Actualités
- Temps passé
- Modifications du wiki
- Lots de travaux
- Attributs du projet
Il est également possible de choisir d’inclure ou d’exclure les mises à jour concernant les sous-projets.
Combien de temps en arrière puis-je obtenir des informations sur les activités du projet ?
La rétrospective pour les activités du projet n’est pas limitée. Vous pouvez donc remonter dans le temps pour obtenir toutes les activités du projet jusqu’au début du projet. Vous pouvez configurer dans les paramètres administrateur le nombre de jours affichés sur chaque page d’activité. Pour des raisons de performance, les jours affichés doivent être définis à un niveau bas (par exemple 7 jours).
Remarque : La liste des activités du projet est paginée. Vous pouvez cliquer sur les liens « Précédent » ou « Suivant » au bas de la page (le cas échéant) pour naviguer entre les pages.


